×
- Live Chat
- 1-888-905-9199
My Garage
My Account
My Cart
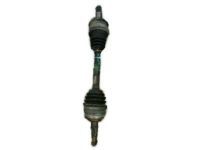
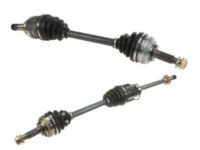
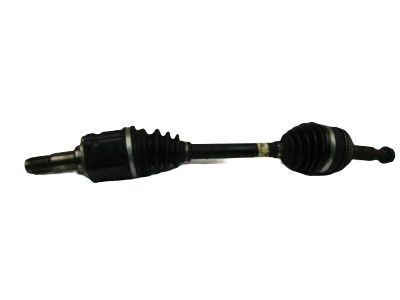
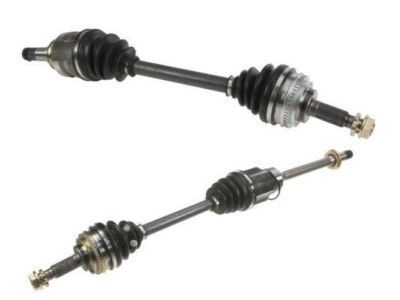
Genuine Toyota Solara Axle Shaft
Car Axle ShaftEnter your vehicle info to find more parts and verify fitment
- Select Vehicle by VIN
- Select Vehicle by Model
Select by VIN
orEnter your VIN for the most accurate results.Enter your VIN for the most accurate results.
Select by Model
-- Select Make --
-- Select Model --
-- Select Year --
55 Axle Shafts found
Toyota Solara Shaft Assembly, Front Drive, Left
Part Number: 43420-08010- Other Name: Shaft Assy, Front Drive, Lh; Axle Assembly
- Position: Driver Side
$394.97 MSRP: $581.40You Save: $186.43 (33%)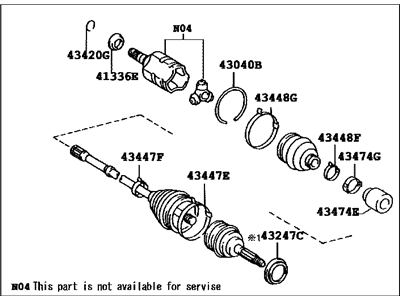
Toyota Solara Shaft Assembly, Front Cv Axle, Left
Part Number: 43420-06490- Other Name: Shaft Assy, Front Drive, Lh; Axle Assembly
- Manufacturer Note: W(ABS)
- Position: Driver Side
- Replaces: 43420-06221
$462.88 MSRP: $681.36You Save: $218.48 (33%)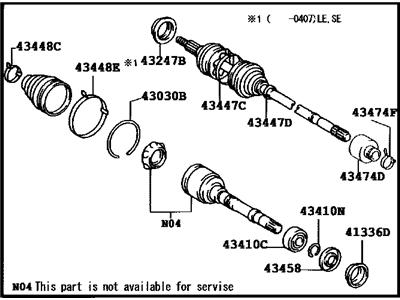
Toyota Solara Shaft Assembly, Front Drive, Right
Part Number: 43410-06221- Other Name: Shaft Assy, Front Drive, Rh; Axle Assembly
- Manufacturer Note: W(ABS)
- Position: Passenger Side
$508.15 MSRP: $747.99You Save: $239.84 (33%)Toyota Solara Shaft Assembly, Front Drive, Left
Part Number: 43420-06450- Other Name: Shaft Assy, Front Drive, Lh; Axle Assembly
- Position: Driver Side
$394.97 MSRP: $581.40You Save: $186.43 (33%)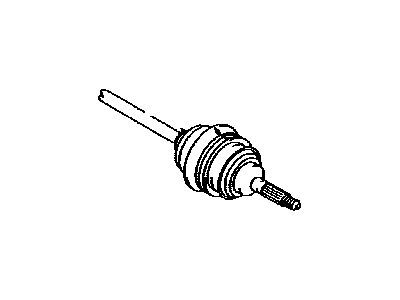
Toyota Solara Shaft Assembly, Front Drive, Left
Part Number: 43420-06161- Other Name: Shaft Assy, Front Drive, Lh
- Position: Driver Side
$294.79 MSRP: $422.71You Save: $127.92 (31%)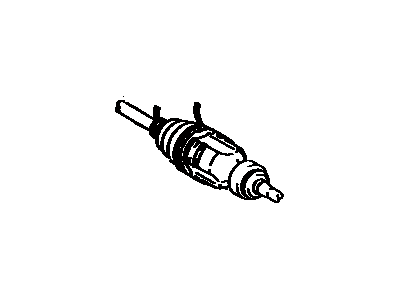
Toyota Solara Shaft Assembly, Front Drive, Right
Part Number: 43410-06281- Other Name: Shaft Assy, Front Drive, Rh
- Manufacturer Note: W(ABS)
- Position: Passenger Side
- Replaced by: 43410-06282
$389.51 MSRP: $573.35You Save: $183.84 (33%)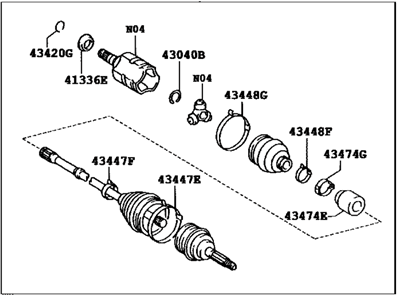
Toyota Solara Shaft Assembly, Front Drive, Left
Part Number: 43420-06460- Other Name: Shaft Assy, Front Drive, Lh; Axle Assembly
- Position: Driver Side
$395.25 MSRP: $581.80You Save: $186.55 (33%)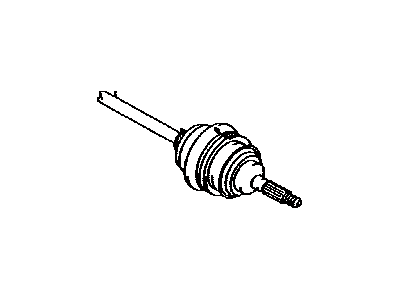
Toyota Solara Shaft Assembly, Front Drive, Left
Part Number: 43420-06261- Other Name: Shaft Assy, Front Drive, Lh
- Manufacturer Note: W(ABS)
- Position: Driver Side
- Replaced by: 43420-06262
$427.81 MSRP: $629.73You Save: $201.92 (33%)Toyota Solara Shaft Assembly, Front Drive, Left
Part Number: 43420-06262- Other Name: Shaft Assy, Front Drive, Lh; Axle Assembly
- Manufacturer Note: W(ABS)
- Position: Driver Side
- Replaces: 43420-06261
$427.81 MSRP: $629.73You Save: $201.92 (33%)Toyota Solara Shaft Assembly, Front Drive, Right
Part Number: 43410-06261- Other Name: Shaft Assy, Front Drive, Rh
- Manufacturer Note: W(ABS)
- Position: Passenger Side
- Replaced by: 43410-06262
$429.39 MSRP: $632.05You Save: $202.66 (33%)Toyota Solara Shaft Assembly, Front Drive, Right
Part Number: 43410-06330- Other Name: Shaft Assy, Front Drive, Rh; Axle Assembly
- Position: Passenger Side
$463.77 MSRP: $682.68You Save: $218.91 (33%)Toyota Solara Shaft Assembly, Front Drive, Right
Part Number: 43410-06271- Other Name: Shaft Assy, Front Drive, Rh; Axle Assembly
- Position: Passenger Side
$507.01 MSRP: $746.32You Save: $239.31 (33%)Toyota Solara Shaft Assembly, Front Drive, Right
Part Number: 43410-06251- Other Name: Shaft Assy, Front Drive, Rh
- Position: Passenger Side
- Replaced by: 43410-06252
$507.86 MSRP: $747.56You Save: $239.70 (33%)Toyota Solara Shaft Assembly, Front Drive, Right
Part Number: 43410-06252- Other Name: Shaft Assy, Front Drive, Rh; Axle Assembly
- Position: Passenger Side
- Replaces: 43410-06251
$507.86 MSRP: $747.56You Save: $239.70 (33%)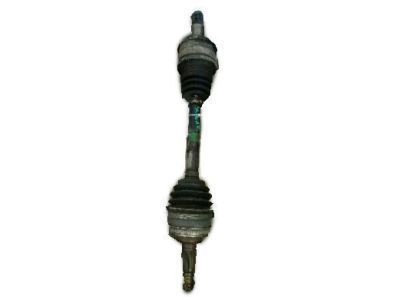
Toyota Solara Shaft Assembly, Front Drive, Left
Part Number: 43420-06170- Other Name: Shaft Assy, Front Drive, Lh
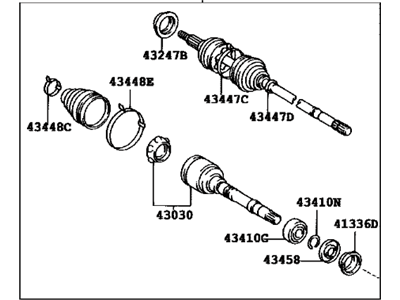
- Manufacturer Note: TYPE B:REFER TO ILLUSTRATION
- Position: Driver Side
Toyota Solara Shaft Assembly, Front Drive, Left
Part Number: 43420-06151- Other Name: Shaft Assy, Front Drive, Lh
- Manufacturer Note: TYPE A:REFER TO ILLUSTRATION
- Position: Driver Side
Toyota Solara Shaft Assembly, Front Drive, Right
Part Number: 43410-06480- Other Name: Shaft Assy, Front Drive, Rh; Axle Assembly
- Position: Passenger Side
$508.15 MSRP: $747.99You Save: $239.84 (33%)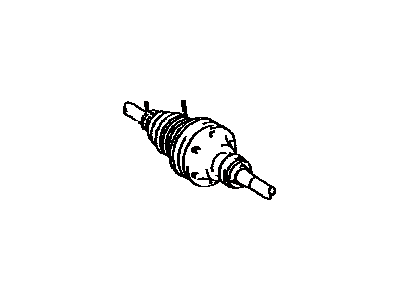
Toyota Solara Shaft Assembly, Front Drive, Right
Part Number: 43410-06170- Other Name: Shaft Assy, Front Drive, Rh
- Manufacturer Note: TYPE B:REFER TO ILLUSTRATION
- Position: Passenger Side
Toyota Solara Shaft Assembly, Front Drive, Right
Part Number: 43410-06151- Other Name: Shaft Assy, Front Drive, Rh
- Manufacturer Note: TYPE A:REFER TO ILLUSTRATION
- Position: Passenger Side
Toyota Solara Shaft Assembly, Front Drive, Right
Part Number: 43410-07031- Other Name: Shaft Assy, Front Drive, Rh; Axle Assembly
- Position: Passenger Side
- Replaces: 43410-06430
| Page 1 of 3 |Next >
1-20 of 55 Results
Toyota Solara Axle Shaft Parts Questions & Answers
- Q: How to remove and install a driveaxle on Toyota Avalon and Toyota Solara?A: To remove the axle shaft, start by disconnecting the cable from the negative terminal of the battery. Set the parking brake and remove the wheel cover or hub cap. Remove the cotter pin and the bearing nut lock from the axle shaft/hub nut. Break loose the axle shaft/hub nut but leave it in place. Loosen the lug nuts on the front wheel, raise the vehicle, and support it securely on jack stands. Remove the wheel and any engine splash shields that may be in the way. Remove the axle shaft/hub nut. Then, remove the nuts and bolt securing the ball joint to the control arm and pry the control arm down to separate the components. To loosen the axle shaft from the hub splines, tap the end of the axle shaft with a soft-faced hammer or a hammer and a brass punch. If necessary, remove the brake disc and push the axle shaft from the hub with a two-jaw puller. Place a drain pan underneath the transaxle as a precaution. Remove the case protector if present. Pull out the steering knuckle to detach the axle shaft from the hub. If removing the right axle shaft, remove the center-bearing lock bolt and the snap ring, then pull the splined inner end of the shaft out of the differential side gear. For the left axle shaft, carefully pry the inner CV joint out of the transaxle. If the vehicle needs to be moved without the axle shaft, secure the hub with a large bolt and washers. For installation, follow the reverse procedure of removal with the following additional points:When installing the left axle shaft or the intermediate shaft on any model, push the axle shaft sharply inward to seat the retaining ring on the inner CV joint into the groove in the differential side gear.For the right axle shaft/intermediate shaft assembly, tighten the center bearing lock bolt to the specified torque.Install the wheel and lug nuts, lower the vehicle, and tighten the lug nuts to the correct torque.Tighten the axle shaft/hub nut to the specified torque, then install the nut lock and a new cotter pin.Check the transaxle lubricant (for manual transaxle) or differential lubricant (for automatic transaxle) and add if necessary to reach the proper level. Finally, check the intermediate shaft bearing for smooth operation and replace it if it feels rough or sticky.
- Q: What is the function of the driveaxles and CV joints in a transaxle system?A: The power from the transaxle is transmitted to the wheels through a pair of axle shafts, with the inner end of each axle shaft directly splined to the differential side gears. The outer ends of the axle shafts are splined to the axle hubs and locked in place by a large nut. The left side axle shaft is shorter, while the right side axle shaft is longer and equipped with an intermediate shaft supported by a bearing support. The inner ends of the axle shafts have sliding constant velocity joints capable of both angular and axial motion, while the outer joints are capable of angular but not axial movement. The boots should be inspected periodically for damage and leaks, and torn CV Boot must be replaced immediately to prevent damage. Symptoms of worn or damaged CV joints include clicking noises in turns, clunking when accelerating after coasting, and vibration at highway speeds. Checking for wear in the CV joints and axle shafts involves rotating each axle in both directions while feeling for play indicating worn splines or sloppy CV joints, as well as checking for cracks, dents, and distortion in the axle shafts.