Your vehicle deserves only genuine OEM Toyota parts and accessories. To ensure reliability, purchase Toyota part # 13523-22020 Gear Or Sprocket, Camshaft Timing. It is sometimes referred to as Scion Cam Gear, Scion Variable Timing Sprocket. Our Toyota parts and accessories are expedited directly from authorized Toyota dealers strategically located all across the U.S. and are backed by the manufacturer's 12 month, 12,000 mile warranty. OEM Toyota parts are the best for restoring your vehicle to factory condition performance. This part fits 2005-2010 Scion tC, 2004-2006 Scion xA, 2004-2015 Scion xB.
Affordable, reliable and built to last, Toyota part # 1352322020 Gear Or Sprocket, Camshaft Timing stands out as the smart option. ToyotaPartsDeal.com is your prime online source with the biggest and best selection of genuine Toyota parts and accessories at giant discounted prices. We have the OEM Toyota parts and accessories you need at the wholesale prices. ToyotaPartsDeal.com has you covered no matter what type of Toyota vehicle you drive. For detailed Scion parts information, click here.
Make sure this part fits your vehicle
Scion 13523-22020 Gear Or Sprocket, Camshaft Timing
2004-2015 Scion 1352322020
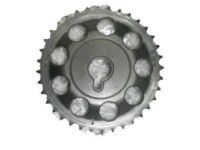


- Part DescriptionGear Or Sprocket, Camshaft Timing
- Replaced By13523-0D010
- ManufacturerToyota
$42.94 MSRP: $60.02 1
You Save: $17.08 (29%)
Ships in 1-2 Business Days
 Bearing, CAMSHAFT11811-37020
 Bearing, CAMSHAFT11821-37020
 CAMSHAFT Sub-Assembly, N13501-37080
 CAMSHAFT Sub-Assembly, N13502-37070
 Chain Sub-Assy13507-28010
 Gasket13552-37010
 Gear Assembly, CAMSHAFT13050-37050
 Plate, Chain Tensioner13549-37020
 Slipper, Chain Tensioner13559-37050
 TENSIONER Assembly, Chain13540-37030
Product Specifications
Brand Genuine Scion Manufacturer Part Number 13523-22020 Part Description Gear Or Sprocket, Camshaft Timing Item Dimensions 4.3 x 3.8 x 1.5 inches Item Weight 0.80 Pounds Condition New Fitment Type Direct Replacement Manufacturer Toyota SKU 13523-22020 Warranty This genuine Toyota part is guaranteed by Toyota's factory warranty. Shipping & Return Shipping Policy Return Policy Warning: California’s Proposition 65Vehicle Fitment
Year Make Model Trim & Engine Important vehicle option details 2005-2010 Scion tC G|4 Cyl 2.4L 2AZFE; 2AZFE; ANT10L-ALMGKA, ANT10L-ALPGKA 2004-2006 Scion xA 4 Cyl 1.5L 1NZFE; 1NZFE; NCP61L-HHMNKA, NCP61L-HHPNKA 2008-2015, 2004-2006 Scion xB 4 Cyl 1.5L, 4 Cyl 2.4L 1NZFE, 2AZFE; 1NZFE; NCP31L-DHMNKA, 2AZFE; AZE151L-FHMNKA, AZE151L-FHMNKK, AZE151L-FHPNKA, AZE151L-FHPNKK, NCP31L-DHPNKA
Customer Questions & Answers
- Q:Does it fit my car? Posted by ToyotaPartsDeal Specialist
- A:You can Select Your Vehicle to check if 13523-22020 fits your vehicle.Posted by ToyotaPartsDeal Specialist
- Q:How to remove and install a timing belt and Sprocket on V6 engine for 1997 through 2001 Toyota Solara and 1997 through 2001 Toyota Avalon? Posted by Customer
- A:To begin the removal process, first, disconnect the negative battery cable and proceed by removing the coolant overflow and windshield washer tanks, and if applicable, the front suspension upper brace on Solara models. Then, remove the drive belts from the alternator and power steering pump, followed by loosening the lug nuts on the right front wheel but leaving them in place. Raise the front of the vehicle, ensuring secure support on jack stands, and remove the right front wheel, inner fender apron, and the spark plugs. Position the number one cylinder at Top Dead Center (TDC) and support the engine from below, removing the engine movement control rod and its bracket, using a wooden block on the jack head for support. Additionally, remove the upper timing belt cover and gasket, ensuring the wiring harness is unclipped and pushed back. Verify installation marks on the timing belt or make new ones if obscured, and ensure proper alignment of the camshaft pulley timing marks. Remove the timing belt tensioner, release tension between the rear and front camshaft sprockets, and detach the timing belt from the camshaft sprockets. If needed, the camshaft sprockets can be removed after removing the valve cover. Next, remove the upper idler pulley, the crankshaft pulley bolt, and the crankshaft pulley itself, being cautious not to disturb the TDC position of the crankshaft. Remove the lower timing belt cover, the timing belt guide, and the timing belt itself, ensuring alignment marks are present or adding new ones. Remove the no. 1 idler pulley and plate washer using an Allen wrench, and if necessary, the crankshaft sprocket, taking care not to damage the crankshaft sensor portion. Inspect the belt tensioner for leaks and proper protrusion, and check the idler pulleys for smooth rotation. For installation, clean the timing belt area thoroughly, align the crankshaft timing sprocket keyway with the crankshaft key and install the sprocket, being cautious with the crankshaft sensor portion. Apply thread-locking compound to the lower idler pulley bolt and position the idler pulley and washer, tightening the bolt. Install the timing belt, starting with the crankshaft sprocket, ensuring alignment with marks on the belt, sprockets, and covers if reusing the original belt. Place the belt over the lower idler and water pump pulleys, slip the belt guide over the crankshaft, and install the lower timing belt cover and gasket. Fit the crankshaft pulley onto the crankshaft, aligning the keyway, and tighten the bolt while preventing the crankshaft from turning. Reinstall the upper idler pulley, ensuring smooth rotation. Place the front camshaft sprocket on the camshaft with the flange side out, aligning the pin hole with the camshaft pin, and install the retaining bolt while preventing camshaft movement. Double-check timing marks for alignment. If applicable, adjust the rear camshaft sprocket to align with the mark on the rear cover and place it on the camshaft with the flange side in, aligning the pin hole with the camshaft pin, and install the retaining bolt, again preventing camshaft movement. Slightly turn the front camshaft sprocket clockwise to add tension to the belt, then slip the belt onto the rear sprocket. Compress the timing belt tensioner pushrod, insert a pin, drill bit, or Allen wrench through the holes, and release the pressure. Install the timing belt tensioner, tighten the bolts, and remove the retaining pin. Rotate the crankshaft clockwise through two complete revolutions to recheck timing marks. Finally, reinstall the engine movement control rod's mounting bracket, upper timing belt cover and gasket, engine movement control rod and braces, and all other previously removed parts in reverse order.Posted by ToyotaPartsDeal Specialist
- Q:How to remove the timing chain and Sprocket on V4 engine for 2002 through 2008 Toyota Solara and 2002 through 2006 Toyota Avalon? Posted by Customer
- A:Before embarking on the removal process, ensure you have the necessary special tools and equipment ready. To begin, disconnect the battery's negative terminal and proceed to remove the drive belt, alternator, valve cover, and ABS actuator if applicable. Afterward, raise the front of the vehicle with the right front wheel removed, and drain the cooling system. Carefully remove the power steering pump without disconnecting the fluid lines and secure it aside. Position the number one piston at TDC on the compression stroke, aligning the timing marks on the crankshaft pulley and camshaft sprockets. Subsequently, remove the crankshaft pulley/vibration damper, being cautious not to shift the engine from TDC. Support the engine using an engine support fixture and remove the passenger-side engine mount. Additionally, remove the drive belt tensioner and the crankshaft position sensor from the timing chain cover, including the bolt securing the crankshaft position sensor wiring harness. Proceed to remove the oil pan, the main wiring harness junction, and the timing chain tensioner from the timing chain cover. Unfasten the timing chain cover fasteners and pry off the cover. Slide the crankshaft position sensor reluctor ring off the crankshaft, then remove the timing chain tensioner pivot arm, chain guide, lower chain guide, and timing chain as a single assembly. The camshaft sprockets can be removed by loosening their bolts and using a wrench to hold the lug on the camshaft. Inspect all components for wear and damage, including the timing chain, sprockets, and chain guides, replacing any that fail inspection. Ensure the chain guides are within specified wear limits. When installing, clean the timing chain cover and apply RTV sealant before securing it in position with the original bolts. Reset and lock the timing chain tensioner to its "zero" position, lubricate the tensioner O-ring, and install it with the hook facing up. Reinstall the crankshaft pulley/vibration damper and set the chain tension by rotating the engine counterclockwise and allowing the tensioner to engage. Confirm TDC alignment and tighten the timing chain cover fasteners before proceeding with the reinstallation process in reverse.Posted by ToyotaPartsDeal Specialist
- Q:How do you remove the no. 1 idler pulley and plate washer for the 2006 Toyota Solara? Posted by Customer
- A:Remove the no. 1 idler pulley and plate washer using an Allen wrench.Posted by ToyotaPartsDeal Specialist
- See expert answers on similar Variable Timing Sprocket
- Q:What are the initial steps before removing the timing chain cover for the 2000 Toyota Echo? Posted by Customer
- A:The initial steps include draining the engine oil and removing the auxiliary drivebelt, cylinder head cover, and spark plugs.Posted by ToyotaPartsDeal Specialist
- See expert answers on similar Variable Timing Sprocket
- Q:What does the manufacturer recommend for the removal procedure on the 2013 Toyota Camry? Posted by Customer
- A:The manufacturer recommends removing the engine and transaxle assembly.Posted by ToyotaPartsDeal Specialist
- See expert answers on similar Variable Timing Sprocket
- Q:What steps are involved in removing the lower timing belt cover, and what should be checked when inspecting the timing belt for the 2001 Toyota Solara? Posted by Customer
- A:The lower timing belt cover is removed along with the timing belt guide. During inspection, the idler pulleys, spring, and timing belt are checked for wear, damage, or cracks.Posted by ToyotaPartsDeal Specialist
- See expert answers on similar Variable Timing Sprocket
- Q:What are the initial steps to begin the timing system removal procedure for the 2007 Toyota Camry? Posted by Customer
- A:The initial steps include removing the engine/transaxle assembly, the drivebelt, including the drive-belt tensioner and idler pulleys, and setting the engine to TDC (Top Dead Center).Posted by ToyotaPartsDeal Specialist
- See expert answers on similar Variable Timing Sprocket
- Q:What components should be removed after supporting the engine for the 2010 Toyota Yaris? Posted by Customer
- A:After supporting the engine, the right-hand engine mounting, water pump pulley, and water pump should be removed.Posted by ToyotaPartsDeal Specialist
- See expert answers on similar Variable Timing Sprocket
If you have any questions about this product, please don't hesitate to ask us. We will be happy to help you!
Genuine Toyota Part 13523-22020, the Right Choice
Why choose Toyota Parts Deal
- Dedicated Service
Your complete satisfaction is our #1 goal
- Lowest Prices
Best deals on genuine OE parts from dealerships
- Fast Delivery
Orders are processed and delivered promptly