My Garage
Cart
Make sure this part fits

Scion 31470-42031 Cylinder Assy, Clutch Release

2005-2010 Scion tC 3147042031

Customer Questions & Expert Answers (3)
Toyota 31470-42031 Cylinder Assy, Clutch Release
  • Part Description
    Cylinder Assy, Clutch Release
  • Part Name Code
    31470
  • Replaces
    31470-42030
  • Manufacturer
    Toyota
Make sure this part fits
$72.71 MSRP: $102.49
You Save: $29.78 (30%)
Ships in 1-3 Business Days
1
ADD TO CART
  • Related Parts
  • Product Specifications
  • Vehicle Fitment
  • Customer Questions & Expert Answers
  • Product Specifications

    BrandGenuine Scion
    Part Name Code31470
    Manufacturer Part Number31470-42031
    Part DescriptionCylinder Assy, Clutch Release
    Other NamesSlave Cylinder
    Item Dimensions6.9 x 5.3 x 1.6 inches
    Item Weight1.60 Pounds
    ConditionNew
    Fitment TypeDirect Replacement
    Replaces31470-42030
    ManufacturerToyota
    SKU31470-42031
    WarrantyThis genuine Toyota part is guaranteed by Toyota's factory warranty.
    Shipping & ReturnShipping Policy Return Policy
    Warning: California's Proposition 65
  • Vehicle Fitment

    Year Make Model Trim & Engine Important vehicle option details
    2005-2010 Scion tCG|4 Cyl 2.4L2AZFE; ANT10L-ALMGKA, ANT10L-ALPGKA
  • Customer Questions & Expert Answers

    Q:
    I would like to know availability and if it is direct fit replacement Posted by ToyotaPartsDeal Specialist
    A:
    You can Select Your Vehicle to check if 31470-42031 fits your vehicle.
    Posted by ToyotaPartsDeal Specialist
    Q:
    How to Remove and Install the Clutch Slave Cylinder on a Toyota Camry? Posted by Customer
    A:
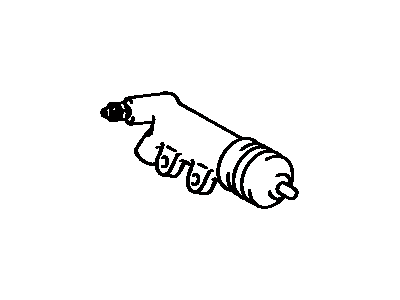
    For the removal of the clutch slave cylinder of 2009 and earlier models, the following steps should be taken, you ought to remove the negative cable from the battery and also pull off the air filter housing. To remove the hydraulic line, loosen the flare-nut with the flare-nut wrench, so as not to round off the nut, with a small can and rags to catch the oil that spills. Subsequently, taking off the mounting bolts, slave cylinder with the top part of the framework divided from the accumulator bracket. For installation, one has to connect the hydraulic line to the slave cylinder and position the pushrod in the release fork pocket finally the nuts to be tightened to a certain torque. Turn the hydraulic line fitting until tight and torque, add brake fluid of DOT 3 standard, flush out the air, refit the air filter housing back in place, reconnect the battery. The process starts with removal of engine/transaxle assembly and then separation of the transaxle from the engine if it is a 2010 and later model. Loosen the hydraulic line to the slave cylinder and unscrew the mounting bolts and then take off the slave cylinder from the transaxle input shaft bearing retainer. Clean the area of the clutch housing, apply high-temperature grease to the input shaft retainer, and install the slave bearing cylinder onto it placing caution that no extra grease smearing the input splines. Tighten enough the hydraulic line to the slave cylinder but do not over tighten; fasten slave cylinder with new mounting screws and tighten to the recommended torque. Fasten the hydraulic line fitting with an additional 10 ft-lbs of torque, re-engage the transaxle with the engine, and refill the clutch master cylinder with brake fluid; thereafter, bleed the hydraulic system. For the accumulator in 2009 and earlier models, you have to pull the negative terminal of the battery, remove air filter housing and air flap inlet duct and, thereafter you remove the accumulator along with its mounting bolts. Remove the hydraulic line fittings from the accumulator and slave cylinder, and also remove the mounting bolts, it will be useful to use the flare-nut wrench for this job to avoid rounding of bolts. During installation, torque the hydraulic lines to the accumulator and tighten the mounting bolts partially, before they are fully tightened to the prescribed torque; then firmly torque the hydraulic line connections. Removal of the stabilizer bar is followed by the installation process which is the reverse of the removal process after which bleeding of the hydraulic system is done. For 2010 and later models the following are required, take off the negative cable of the battery, loosen the lugs of the left-front wheel, lift the car, and take off the wheel alongside the inner fender splash shield. Take out the car air filter housing and air duct to hydraulically disconnect the unit, unscrew the hydraulic line fittings and remove the clutch orifice assembly fasteners and U-clip to disconnect the clutch hose. Last, unscrew the mounting bolts for the accumulator and the needed assembly after disconnecting all the hydraulic hoses and then screw the mounting bolts for the accumulator, connect the hoses and properly tighten the fittings with undue procedure regressing up to the hydraulic system bleeding step.
    Posted by ToyotaPartsDeal Specialist
    Q:
    How to remove and install the Clutch Slave Cylinder on a 2002 through 2008 Toyota Solara? Posted by Customer
    A:
    To remove the clutch slave cylinder, first disconnect the negative cable from the battery. Raise the vehicle and support it securely on jackstands. Unscrew the threaded fitting to disconnect the hydraulic line from the slave cylinder, using a flare-nut wrench if available to prevent rounding off the fitting, and have a small can and rags ready for any spilled fluid. Remove the mounting bolts to separate the slave cylinder from the accumulator bracket. For installation, connect the hydraulic line to the slave cylinder and install it on the bracket, ensuring the pushrod is seated in the release fork pocket, then tighten the nuts to the specified torque. Securely tighten the hydraulic line threaded fitting, fill the clutch master cylinder with brake fluid that meets DOT 3 specifications, and bleed the system. Lower the vehicle and reconnect the negative battery cable. To remove the accumulator, disconnect the negative cable from the battery, raise the vehicle and support it on jackstands, then remove the cruise control actuator mounting bolts if equipped and position the assembly aside. Remove the battery and battery tray, then take out the starter. Unscrew the hydraulic line fittings from the accumulator and slave cylinder, and remove the mounting bolts from the accumulator bracket. For installation, connect the hydraulic lines to the accumulator without fully tightening them, install the accumulator mounting bolts and tighten them to the specified torque, and then securely tighten the hydraulic line fittings. The remainder of the installation follows the reverse order of removal.
    Posted by ToyotaPartsDeal Specialist
    If you have any questions about this product, please don't hesitate to ask us. We will be happy to help you!

Genuine Toyota Part 31470-42031, the Right Choice

To ensure reliability, purchase Toyota part # 31470-42031 Cylinder Assy, Clutch Release. It is sometimes referred to as Scion Clutch Slave Cylinder. For unrivaled quality, OEM parts are the ultimate choice. These parts are manufactured by Toyota's official factory using top-quality materials and undergo strict testing procedures, ensuring outstanding dependability and long-lasting durability. This part fits 2005-2010 Scion tC.

ToyotaPartsDeal.com is a leading supplier of genuine Toyota parts and accessories such as Toyota 3147042031 Cylinder Assy, Clutch Release. In need of OEM Toyota parts? Look no further than our extensive inventory of genuine Toyota parts, competitively priced to be highly exceptional in the market. They are all manufacturer-warrantied. Add to that, our easy return policy and swift delivery service, and your shopping experience promises to be the great pleasant ever. For detailed Scion parts information, click here.

Why choose Toyota Parts Deal

  • Dedicated Service

    Your complete satisfaction is our #1 goal

  • Lowest Prices

    Best deals on genuine OE parts from dealerships

  • Fast Delivery

    Orders are processed and delivered promptly