My Garage
My Account
Cart
This part fits
2008 Toyota Land Cruiser
Check another vehicle- The location this part fits: Rear Passenger Side, Rear Driver Side
- Production Date: 09/2007-01/2012
- Fitting Vehicle Options: URJ200
Toyota 48530-69445 Shock Absorber Assembly Rear Right
2008-2021 Toyota Land Cruiser 4853069445
Customer Questions & Expert Answers (2)
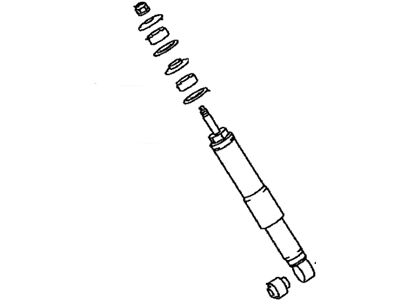
- Part DescriptionAbsorber Assembly, Shock, Rear Rh
- MARK 48530-60140,MEXICO SPEC
- PositionRear Passenger Side
- ManufacturerToyota
This part fits
2008 Toyota Land Cruiser
Check another vehicle- The location this part fits: Rear Passenger Side, Rear Driver Side
- Production Date: 09/2007-01/2012
- Fitting Vehicle Options: URJ200
$50.33 MSRP: $70.34
You Save: $20.01 (29%)
Ships in 1-3 Business Days
1
- Related Parts
- Specifications
- Q&A
Product Specifications
Brand Genuine Toyota Manufacturer Part Number 48530-69445 Part Description Absorber Assembly, Shock, Rear Rh Manufacturer Note MARK 48530-60140,MEXICO SPEC Item Dimensions 27.2 x 7.1 x 6.0 inches Item Weight 11.80 Pounds Position Rear Passenger Side Condition New Fitment Type Direct Replacement Manufacturer Toyota SKU 48530-69445 Warranty This genuine Toyota part is covered by warranty. Shipping & Return Shipping Policy Return Policy Warning: California's Proposition 65Customer Questions & Expert Answers
- Q:Is the above part number correct or is there another correct number for my car? Posted by ToyotaPartsDeal Specialist
- A:You can Select Your Vehicle to check if 48530-69445 fits your vehicle.Posted by ToyotaPartsDeal Specialist
- Installation and Repair Tips by AI Expert
- Removal: 1. Park on level ground, set parking brake, chock opposite wheels, and wear safety gear. 2. Disconnect the negative battery terminal and isolate it before touching any electrical connectors. 3. Lift the vehicle with a jack at a manufacturer-recommended lift point and support it securely on jack stands; do not rely on the jack alone. 4. Remove the wheel to access the shock area. 5. If the vehicle has adjustable or air suspension, follow the manufacturer procedure to relieve system pressure and disconnect any electrical/air lines after the battery is isolated. 6. Support the axle or suspension arm with a jack so the shock does not suddenly drop when fasteners are removed. 7. Locate and disconnect any electrical connectors or sensors attached to the shock (if equipped), labeling them if needed. 8. Loosen and remove the fasteners that retain the shock at both ends; designs vary, so access direction and number of bolts may differ. 9. Remove the shock from its mounts; if it's bound, move the suspension slightly to gain clearance rather than forcing the part. 10. Inspect mounting bushings, washers, and surrounding components for wear or damage and set aside hardware for inspection or replacement. Installation: 1. Confirm replacement shock is the correct type and orientation for the vehicle and compare it to the removed unit. 2. Clean mounting surfaces and replace worn bushings or fasteners as needed before installing the new shock. 3. If applicable, preload or orient the shock per the part instructions; some designs require installing with a specific alignment. 4. Position the new shock into the mounts and loosely install the fasteners by hand to hold it in place. 5. Support the suspension so the shock mounts align naturally, then tighten fasteners to the manufacturer's specification (do not guess specs). 6. Reconnect any electrical connectors or air lines, ensuring secure, clean connections and proper routing away from pinch points. 7. Reinstall the wheel, lower the vehicle from jack stands, and torque wheel fasteners to the manufacturer's specification. 8. Reconnect the negative battery terminal. 9. If the vehicle has adjustable or air suspension, re-enable and cycle the system per manufacturer guidance and check for leaks. 10. Perform a controlled road test to verify ride quality and listen for noises; recheck fasteners and connectors after initial test drive. Repair tip: Replace shocks on the same axle in pairs and consider new mounting hardware; always follow the vehicle maker's specific procedures and torque values when available.
- Q:
Why choose Toyota Parts Deal
- Dedicated Service
Your complete satisfaction is our #1 goal
- Lowest Prices
Best deals on genuine OE parts from dealerships
- Fast Delivery
Orders are processed and delivered promptly