This part fits the vehicle you selected:
My Vehicle: 1992 Toyota Land Cruiser 6 Cyl 4.0L; FJ80L-GNPNEA
Change VehicleThe vehicle options this part fits:
- Production Date: 01/1990-08/1992
- Fitting Vehicle Options: 3FE.. FJ80
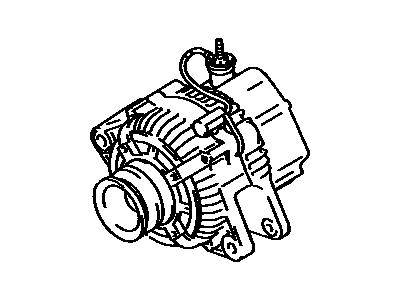
Toyota 27060-61091 Alternator Assembly
1991-1993 Toyota Land Cruiser 2706061091

- Part DescriptionAlternator Assy
- 12V 80A
- Part Name Code27020
- ManufacturerToyota
- Manufacturer's NotesThis part is discontinued.
This part fits the vehicle you selected:
1992 Toyota Land Cruiser 6 Cyl 4.0L; FJ80L-GNPNEA
The vehicle options this part fits:
- Production Date: 01/1990-08/1992
- Fitting Vehicle Options: 3FE.. FJ80
Product Specifications
| Brand | Genuine Toyota |
| Part Name Code | 27020 |
| Manufacturer Part Number | 27060-61091 |
| Part Description | Alternator Assy |
| Item Dimensions | 13.5 x 10.7 x 9.2 inches |
| Item Weight | 16.00 Pounds |
| Condition | New |
| Fitment Type | Direct Replacement |
| Manufacturer | Toyota |
| SKU | 27060-61091 |
| Warranty | This genuine Toyota part is guaranteed by Toyota's factory warranty. |
| Shipping & Return | Shipping Policy Return Policy |
Warning: California’s Proposition 65
Customer Questions & Answers
- Q:I just want to confirm I'm purchasing a correct part before placing an order Posted by ToyotaPartsDeal Specialist
- A:You can Select Your Vehicle to check if 27060-61091 fits your vehicle.Posted by ToyotaPartsDeal Specialist
- Q:How to disassemble and reassemble an alternator equipped with a true internal regulator? Posted by Customer
- A:These models are equipped with a true internal regulator that is attached to the rectifier assembly within the alternator body. To disassemble, remove the alternator and place it on a clean workbench. Remove the rear cover nuts, nut and terminal insulator, and the rear cover. Then remove the five voltage regulator and brush holder mounting screws. Remove the brush holder and regulator from the rear end frame. If only replacing the regulator, proceed to install the new unit, reassemble the alternator, and install it on the engine. If replacing the brushes, measure the exposed length of each brush and compare it to the minimum length. If necessary, replace the brushes and brush holder assembly. Make sure each brush moves smoothly in the brush holder. Remove the rectifier assembly by removing the mounting screws, rubber insulators, and seal plate. Scribe or paint marks on the front and rear end frame housings for reassembly. Remove the nut retaining the pulley to the rotor shaft and remove the pulley. Remove the four nuts retaining the front and rear end frames together, then separate the rear end frame assembly from the front end frame. Remove the thrust washer and remove the rotor from the front end frame. For component checks, check for an open between the two slip rings and for grounds between each slip ring and the rotor. Check for opens between each end terminal of the stator windings and for a grounded stator winding between each stator terminal and the frame. Check the positive and negative rectifiers by checking continuity and polarity. If any diodes fail the test, the diode assembly is defective. To reassemble, install the components in the reverse order of removal, ensuring the brush holder is depressed to clear the shaft. Tighten all nuts and screws securely. Finally, install the alternator.Posted by ToyotaPartsDeal Specialist
- Q:How to remove and replace an alternator in a Toyota Land Cruiser? Posted by Customer
- A:Detach the cable from the negative terminal of the battery. Caution: If the stereo in your vehicle is equipped with an anti-theft system, make sure you have the correct activation code before disconnecting the battery. Detach the electrical connectors from the alternator. Loosen the alternator adjustment, pivot and lock bolts and detach the drivebelt. Remove the adjustment and lock bolts from the alternator adjustment bracket. Separate the alternator and bracket from the engine. If you are replacing the alternator, take the old alternator with you when purchasing a replacement unit. Make sure that the new/rebuilt unit is identical to the old alternator. Look at the terminals - they should be the same in number, size and locations as the terminals on the old alternator. Finally, look at the identification markings - they will be stamped in the housing or printed on a tag or plaque affixed to the housing. Make sure that these numbers are the same on both alternators. Many new/rebuilt alternators do not have a pulley installed, so you may have to switch the pulley from the old unit to the new/rebuilt one. When buying an alternator, find out the shop's policy regarding installation of pulleys - some shops will perform this service free of charge. Installation is the reverse of removal. After the alternator is installed, adjust the drivebelt tension. Check the charging voltage to verify proper operation of the alternator.Posted by ToyotaPartsDeal Specialist
If you have any questions about this product, please don't hesitate to ask us. We will be happy to help you!
Why choose Toyota Parts Deal
- Dedicated Service
Your complete satisfaction is our #1 goal
- Lowest Prices
Best deals on genuine OE parts from dealerships
- Fast Delivery
Orders are processed and delivered promptly

