My Garage
My Account
Cart
This part fits
2007 Toyota Prius United States Of America; NHW20L-AHEEBA
Check another vehicle- Production Date: 11/2005-03/2009
- Fitting Vehicle Options: 1NZFXE.. NHW20
Toyota 28800-21181 Battery
2004-2018 Toyota 2880021181
Customer Questions & Expert Answers (4)
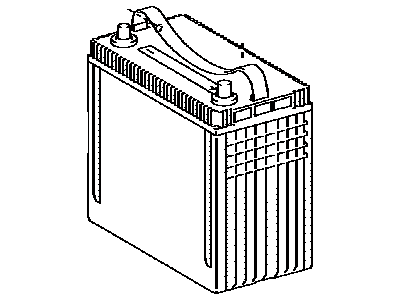
- Part DescriptionBattery
- S34B20R
- Part Name Code28800
- Replaces
- ManufacturerToyota
This part fits
2007 Toyota Prius United States Of America; NHW20L-AHEEBA
Check another vehicle- Production Date: 11/2005-03/2009
- Fitting Vehicle Options: 1NZFXE.. NHW20
$197.20 MSRP: $235.30
You Save: $38.10 (17%)
Currently UnavailableDue to manufacturer supply shortage, this item isn't currently available for ordering.
- Related Parts
- Specifications
- Q&A
Product Specifications
Brand Genuine Toyota Part Name Code 28800 Manufacturer Part Number 28800-21181 Part Description Battery Manufacturer Note S34B20R Item Dimensions 18.4 x 18.9 x 18.7 inches Item Weight 10.50 Pounds Condition New Fitment Type Direct Replacement Replaces 28800-21180 Manufacturer Toyota SKU 28800-21181 Warranty This genuine Toyota part is covered by warranty. Shipping & Return Shipping Policy Return Policy Warning: California's Proposition 65Customer Questions & Expert Answers
- Q:I just want to confirm I'm purchasing a correct part before placing an order Posted by ToyotaPartsDeal Specialist
- A:You can Select Your Vehicle to check if 28800-21181 fits your vehicle.Posted by ToyotaPartsDeal Specialist
Installation and Repair Tips- Q:How Can Car Batteries Be Checked and Replaced on a Toyota Prius? Posted by Customer
- A:For 2004 through 2009 models, first, remove the surface charge from the battery by turning on the high beams for ten seconds, then turning them off and letting the vehicle stand for two minutes. Next, check the battery state of charge by visually inspecting the indicator eye; if clear, charge the battery. Perform an open voltage circuit test with a digital voltmeter, ensuring the voltage is 12.6 volts or more before proceeding to a load test using a battery load-testing tool, maintaining the load for 15 seconds and ensuring the voltage does not drop below 9.6 volts. For replacement, open the rear hatch, lift the cargo area cover, and remove the luggage storage box. The battery is under a cover on the right side; remove this cover, disconnect the power supply connector and module, and then disconnect the wiring harness from the plastic duct before removing the duct. For 2009 and earlier models, disconnect the negative battery terminal first, then the positive, and remove the battery hold-down clamp before lifting the battery out. Inspect the tray and fasteners for corrosion, cleaning any affected areas with a baking soda/water solution and repainting as necessary. Ensure the replacement battery matches the original specifications and is fully charged before installation, which should be done in reverse order, connecting the positive cable first. After connecting the cables, apply a light coating of battery terminal corrosion inhibitor. Finally, initialize the power window system by turning the ignition on, raising the driver's window halfway, closing it completely while holding the switch for at least a second, and checking the UP and DOWN operations. If they do not work, disconnect and reconnect the battery to start the process again.Posted by ToyotaPartsDeal Specialist
- Q:Why is Routine Preventive Maintenance Important for Car Batteries in Your Toyota Prius? Posted by Customer
- A:A routine preventive maintenance program is essential for the battery in your vehicle to ensure quick and reliable starts. Before performing any battery maintenance, make sure you have the proper equipment for safety. Take precautions when servicing the battery, such as turning off the engine and disconnecting the cable from the negative terminal. The battery produces flammable and explosive hydrogen gas, so avoid creating sparks or lighting matches near it and charge it in a ventilated area. The electrolyte contains poisonous and corrosive sulfuric acid, so avoid contact with eyes, skin, or clothes, and wear protective safety glasses. Check the external condition of the battery for any corrosion, loose connections, cracks, or loose hold-down clamps. If corrosion is present, remove the battery for cleaning. Clean the cable clamps, terminals, and battery case with a solution of warm water and baking soda, taking care not to let the solution enter the battery. Ensure the battery tray is in good condition and the hold-down fasteners are tight. For charging, a slow-rate charger is recommended, such as a one or two-amp battery charger. Avoid using a quick-charge system. The average time to charge a battery depends on the charger. Corrosion can be removed with a water and baking soda solution, and any damaged metal parts should be covered with a zinc-based primer and painted.Posted by ToyotaPartsDeal Specialist
- Additional Installation and Repair Tips by AI Expert
- Removal steps 1. Park on a level surface, set the parking brake, turn the ignition off, remove the key/fob, and wait a few minutes for vehicle systems to power down. 2. Wear safety glasses and acid-resistant gloves; batteries contain corrosive electrolyte and can produce sparks or hydrogen gas. 3. Locate the 12-volt battery using the owner's manual; access location and covers vary by design. 4. If the vehicle is a hybrid or has a high-voltage system, do not attempt high-voltage battery service; high-voltage components are dangerous and should be handled by qualified technicians. 5. Remove any plastic covers or panels that block terminal access, noting that fastener types and positions vary. 6. Disconnect the negative (ground) cable first, then the positive cable; keep disconnected cables away from the battery terminals and any grounded metal. 7. Remove the battery hold-down or retaining strap/brace; designs vary, so take care to support the battery before fully freeing it. 8. Lift the battery straight out using proper lifting technique or a strap-batteries are heavy and awkward; avoid tipping to prevent spills. 9. Clean the tray and terminal clamps of corrosion and acid residue using appropriate cleaners and a brush, then safely store or recycle the removed battery. Installation steps 1. Verify the replacement battery matches the vehicle's required type, size, polarity, and terminal orientation per the owner's manual. 2. Place the new battery in the tray so it sits flat and the terminals are oriented for the cable routing used earlier. 3. Reinstall and secure the hold-down or retaining hardware so the battery cannot move; tighten hardware snugly per manufacturer guidance (do not overtighten). 4. Reconnect the positive terminal first, then the negative terminal; ensure clamps are seated fully and tightened to a firm fit (follow vehicle instructions for final torque if available). 5. Apply a light coating of anti-corrosion compound or dielectric grease to terminals and clamps to reduce future corrosion. 6. Reinstall any covers or panels removed for access and confirm all wiring is routed clear of moving parts and heat sources. 7. Start the vehicle and observe instrument cluster/warning lights; verify charging system operation and that accessories work normally. 8. Properly recycle the old battery at an approved facility or return it to the supplier. Repair tip 1. Photograph the battery, clamp orientation, and cable routing before removal and label any connectors if multiple grounds or fuses are present to simplify reinstallation.
- Q:
Why choose Toyota Parts Deal
- Dedicated Service
Your complete satisfaction is our #1 goal
- Lowest Prices
Best deals on genuine OE parts from dealerships
- Fast Delivery
Orders are processed and delivered promptly