My Garage
My Account
Cart
Additional information needed to check if this part fits
1977 Toyota Land Cruiser United States Of America
Check another vehicle- Production Date: 03/1969-07/1980
- Fitting Vehicle Options: BJ40, FJ40, 55
Toyota 90942-02014 Bolt
1969-1981 Toyota 9094202014
Customer Questions & Expert Answers (1)
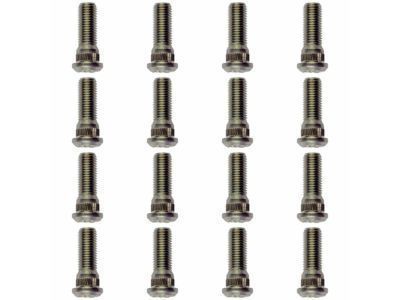
- Part DescriptionBolt, Hub
- ManufacturerToyota
- Require Quantity12
- Package Quantity1
Additional information needed to check if this part fits
1977 Toyota Land Cruiser United States Of America
Check another vehicle- Production Date: 03/1969-07/1980
- Fitting Vehicle Options: BJ40, FJ40, 55
$6.53 MSRP: $9.13
You Save: $2.60 (29%)
Ships in 1-3 Business Days
1
- Related Parts
- Specifications
- Q&A
Product Specifications
Brand Genuine Toyota Manufacturer Part Number 90942-02014 Part Description Bolt; Bolt, Hub Item Weight 0.50 Pounds Condition New Fitment Type Direct Replacement Require Quantity 12 Manufacturer Toyota SKU 90942-02014 Warranty This genuine Toyota part is covered by warranty. Shipping & Return Shipping Policy Return Policy Warning: California's Proposition 65Customer Questions & Expert Answers
- Installation & Repair Tips by AI Expert
- Removal steps 1. Park on a level surface, set the parking brake, chock opposite wheels and wear eye/hand protection. 2. Slightly loosen the wheel nuts while the vehicle is on the ground. 3. Raise the vehicle with a jack and support securely on jack stands placed at appropriate lift points. 4. Remove the wheel. 5. If the vehicle has ABS or wheel-speed sensors, disconnect the negative battery terminal and isolate the harness before disturbing sensor connectors; if not applicable, skip this step. 6. Remove brake components or hub covers as needed to gain access to the hub face-hang calipers out of the way with a hanger rather than letting them dangle by the hose. 7. Remove any retaining clips, dust caps, axle/hub nuts or bearing retainers that block access to the stud (designs vary; follow the disassembly required for your hub). 8. Back the damaged stud out from the hub by driving or pressing it out from the back side using the proper punch, drift, slide hammer or hydraulic press; apply penetrating oil and protect mating surfaces if removal is stubborn. 9. Clean the stud bore and inspect the hub and wheel mounting surface for damage or corrosion. Installation steps 1. Clean the stud hole again and, if the manufacturer permits, apply a light coat of anti-seize to the stud shank-if unsure, leave dry and consult a manual. 2. Insert the new stud from the back of the hub into the bore so the splines engage; if it cannot be pressed in by hand, use a press or draw it through with stacked washers and a lug nut tightened to pull the stud home. 3. Tighten the pulling lug nut(s) until the stud shoulder is fully seated flush with the hub face; avoid over-pulling or deforming the stud. 4. Reinstall any retaining clips, dust caps, axle/hub nuts, bearing retainers and brake components in the reverse order of removal, torquing hardware to factory specifications. 5. Reconnect any sensor connectors and reconnect the negative battery terminal if it was disconnected. 6. Mount the wheel, start lug nuts by hand, lower the vehicle to the ground, and torque the lug nuts to the manufacturer's specification in a cross/star pattern. 7. After a short test drive, recheck lug nut torque and inspect for any abnormal noise or looseness. Repair tip: Replace any bent, corroded, or stretched studs and use new lug nuts if threads are damaged; when pulling studs in with a nut, use a thick washer between the nut and hub to protect the hub face.