My Garage
My Account
Cart
This part fits
1975 Toyota Land Cruiser
Check another vehicle- Production Date: 01/1975-02/1976
- Fitting Vehicle Options: FJ40, 55
Toyota 89449-69015 Speedometer Drive Cable Assembly No.2
1975-1977 Toyota Land Cruiser 8944969015
Customer Questions & Expert Answers (1)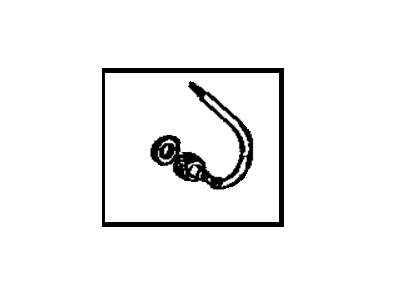
- Part DescriptionCable Assy, Speedometer Drive, No.2
- Part Name Code83710A
- ManufacturerToyota
- Manufacturer's NotesThis part is discontinued.
This part fits
1975 Toyota Land Cruiser
Check another vehicle- Production Date: 01/1975-02/1976
- Fitting Vehicle Options: FJ40, 55
- Related Parts
- Specifications
- Q&A
Product Specifications
Brand Genuine Toyota Part Name Code 83710A Manufacturer Part Number 89449-69015 Part Description Cable Assy, Speedometer Drive, No.2 Item Dimensions 15.6 x 11.3 x 3.1 inches Item Weight 2.40 Pounds Condition New Fitment Type Direct Replacement Manufacturer Toyota SKU 89449-69015 Warranty This genuine Toyota part is covered by warranty. Shipping & Return Shipping Policy Return Policy Warning: California's Proposition 65Customer Questions & Expert Answers
- Installation & Repair Tips by AI Expert
- Removal: 1. Park on level ground, set the parking brake, chock wheels, and secure the vehicle with jackstands if lifting is required. 2. Gather hand tools, penetrating oil, rags, flashlight, replacement cable, and a camera or phone to document routing. 3. Disconnect the negative battery terminal to prevent accidental electrical issues while you work. 4. Access the dash/backside of the instrument cluster or access panel as needed to reach the speedometer cable connection; exact trim removal varies by design. 5. Photograph or mark the cable routing and note any retainers or clips so you can reinstall the same path. 6. Protect painted surfaces with a rag or tape where the cable or tools may contact the body. 7. At the speedometer end, disengage the retaining nut/clip or coupling and withdraw the cable from the instrument - designs vary, so avoid forcing parts. 8. If the cable passes through a firewall grommet, work it free carefully and retain the grommet if reusable; replace if damaged. 9. At the transmission/drive housing end, raise the vehicle further if needed, support it safely, apply penetrating oil to seized fittings, then disconnect the cable from the drive gear or coupling per the design used. 10. Remove the cable housing and inner cable assembly from the vehicle, taking care to catch any broken core pieces or debris. 11. Inspect connection ends, grommets, and routing channels for wear or damage and clean mounting points. Installation: 1. Compare the new cable to the removed one to confirm correct length and end fittings before installing. 2. Lightly lubricate the inner cable with a manufacturer-recommended speedometer cable grease or light, dry-type cable lubricant if applicable; avoid over-lubrication that attracts dirt. 3. Route the new cable following the original path, using the photographed reference and secure it with original retainers or equivalent clips; keep bends gradual and away from heat or moving parts. 4. Feed the cable through the firewall grommet and seat the grommet properly to prevent chafing and leaks. 5. Engage the transmission/drive end into the gear or coupling and secure with the appropriate clip or connector by hand; do not force threads. 6. Attach the speedometer end to the instrument coupling and secure the nut/clip by hand until seated. 7. Reinstall any dash trim or access panels removed earlier. 8. Reconnect the negative battery terminal. 9. Verify function by driving at low speed in a safe area or turning the wheel/wheels while observing the speedometer; listen for unusual noise and check for binding or slipping. 10. After testing, recheck routing and fasteners for security and correct any issues found. Repair tip: If the speedometer still doesn't respond, remove one end and spin the inner cable by hand to confirm continuous rotation; a broken inner core often spins freely at one end and not the other.