

My Garage
My Account
Cart
This part fits
2003 Toyota 4Runner
Check another vehicle- Production Date: 08/2002-02/2004
- Fitting Vehicle Options: GRN21#, UZN21#
Toyota 04493-60350 Brake Master Cylinder Repair Kit
2003-2005 Toyota 4Runner 0449360350
Customer Questions & Expert Answers (2)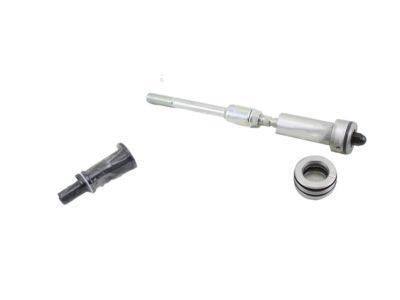
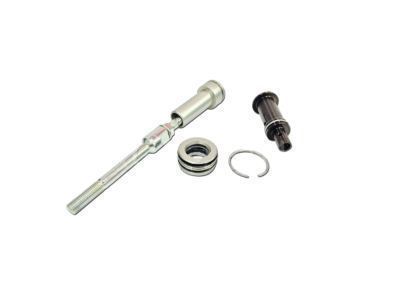
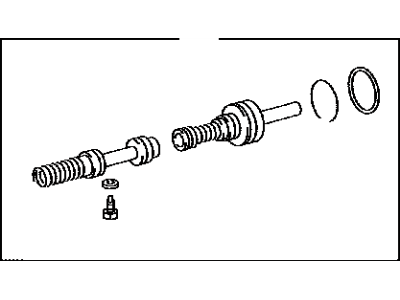
- Part DescriptionCylinder Kit, Brake Master
- Part Name Code04493
- ManufacturerToyota
This part fits
2003 Toyota 4Runner
Check another vehicle- Production Date: 08/2002-02/2004
- Fitting Vehicle Options: GRN21#, UZN21#
$65.95 MSRP: $92.97
You Save: $27.02 (30%)
Ships in 1-3 Business Days
1
- Related Parts
- Specifications
- Q&A
Product Specifications
Brand Genuine Toyota Part Name Code 04493 Manufacturer Part Number 04493-60350 Part Description Cylinder Kit, Brake Master Other Names Overhaul Kit Item Dimensions 14.1 x 11.9 x 2.1 inches Item Weight 1.10 Pounds Condition New Fitment Type Direct Replacement Manufacturer Toyota SKU 04493-60350 Warranty This genuine Toyota part is covered by warranty. Shipping & Return Shipping Policy Return Policy Warning: California's Proposition 65Customer Questions & Expert Answers
- Q:Can you verify fitment for this part? Posted by ToyotaPartsDeal Specialist
- A:You can Select Your Vehicle to check if 04493-60350 fits your vehicle.Posted by ToyotaPartsDeal Specialist
- Installation and Repair Tips by AI Expert
- Removal steps 1. Park on level ground, set the parking brake, chock wheels, wear eye protection and gloves. 2. Disconnect the negative battery cable to disable electrical systems and any fluid-level sensor. 3. Clean the area around the master cylinder reservoir cap to prevent contamination, then remove the cap and partially remove fluid with a syringe or suction tool to reduce spillage. 4. Identify and disconnect any electrical connector for the fluid-level sensor (if present). 5. Place a fluid catch container and absorbent rags under the work area; cap or plug brake line ports or use tubing to direct drained fluid into the container. 6. Using an appropriate flare/line wrench, loosen and remove the brake line fittings from the master cylinder, then immediately cap or plug the lines and ports to limit air ingress. 7. Support the master cylinder assembly and remove the mounting fasteners that secure it to the booster or firewall, keeping hands clear of the pushrod area. 8. Carefully pull the master cylinder straight off the mounting boss/pushrod, avoiding damage to the pushrod or seals, and set the old unit aside. 9. Clean any spilled fluid from painted surfaces immediately and dispose of contaminated rags and old fluid properly. Installation steps 1. Prepare the replacement/master cylinder repair kit components and bench-bleed the master cylinder before installation: secure it in a vise or fixture, fill the reservoir, install bleed tubes back into the reservoir, and slowly actuate the piston until bubbles stop (follow kit instructions). 2. Inspect the booster pushrod, mounting face, and mating surfaces for damage or contamination; replace seals or gaskets supplied in the kit as applicable. 3. Position the freshly bench-bled master cylinder onto the booster or mounting flange, aligning it carefully with the pushrod, and start the mounting fasteners by hand. 4. Tighten mounting fasteners to the manufacturer's specified torque (do not guess values). 5. Remove plugs from brake line ports, then reinstall the brake lines using a flare/line wrench; tighten fittings to the specified torque or until snug per manufacturer guidance. 6. Reconnect the fluid-level sensor electrical connector (if equipped). 7. Reconnect the negative battery cable. 8. Refill the master cylinder reservoir with the correct type of brake fluid to the proper level. 9. Bleed the brake system until all air is removed and the pedal feels firm-use the vehicle's specified bleeding sequence or, if unknown, commonly begin with the wheel farthest from the master cylinder and proceed toward the closest. 10. Inspect all fittings and the master cylinder for leaks while pressure is applied and during a static hold of the brake pedal. 11. Reinstall the reservoir cap and clean any spilled fluid from paint and trim. 12. Conduct a cautious road-test at low speed to confirm pedal performance and braking operation. Repair tip 1. Use dedicated flare/line wrenches to avoid rounding fittings, bench-bleed every rebuilt/new master cylinder before installation, and never let dirt or open air enter hydraulic ports.
- Q:
Why choose Toyota Parts Deal
- Dedicated Service
Your complete satisfaction is our #1 goal
- Lowest Prices
Best deals on genuine OE parts from dealerships
- Fast Delivery
Orders are processed and delivered promptly