This part fits the vehicle you selected:
My Vehicle: 5TFUW5F11CX232874 2012 Toyota Tundra 8 Cyl 5.7L DOHC EFI; SR5; 6-Speed Automatic Transmission; Double Cab; High Efficiency Twin Cam (Flex Fuel); S Type; USK56L-CRTSGA
Change VehicleThe vehicle options this part fits:
- Production Date: 04/2009-08/2013
- Fitting Vehicle Options: GSK5#, UPK5#, USK5#
Toyota 47201-0C070 Brake Master Cylinder Sub-Assembly
2007-2019 Toyota 472010C070
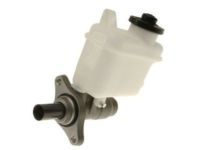


- Part DescriptionCylinder Sub-Assy, Brake Master
- Part Name Code47201
- Replaced By47201-0C071
- ManufacturerToyota
- Manufacturer's NotesThis part is discontinued.
This part fits the vehicle you selected:
5TFUW5F11CX232874 2012 Toyota Tundra 8 Cyl 5.7L DOHC EFI; SR5; 6-Speed Automatic Transmission; Double Cab; High Efficiency Twin Cam (Flex Fuel); S Type; USK56L-CRTSGA
The vehicle options this part fits:
- Production Date: 04/2009-08/2013
- Fitting Vehicle Options: GSK5#, UPK5#, USK5#
$179.44 MSRP: $257.31
You Save: $77.87 (31%)
Currently UnavailableDue to manufacturer supply shortage, this item isn’t currently available for ordering.
Product Specifications
| Brand | Genuine Toyota |
| Part Name Code | 47201 |
| Manufacturer Part Number | 47201-0C070 |
| Part Description | Cylinder Sub-Assy, Brake Master |
| Item Dimensions | 8.8 x 7.1 x 5.8 inches |
| Item Weight | 2.40 Pounds |
| Condition | New |
| Fitment Type | Direct Replacement |
| Manufacturer | Toyota |
| SKU | 47201-0C070 |
| Warranty | This genuine Toyota part is guaranteed by Toyota's factory warranty. |
| Shipping & Return | Shipping Policy Return Policy |
Warning: California’s Proposition 65
Customer Questions & Answers
- Q:Is the above part number correct or is there another correct number for my car? Posted by ToyotaPartsDeal Specialist
- A:You can Select Your Vehicle to check if 47201-0C070 fits your vehicle.Posted by ToyotaPartsDeal Specialist
- Q:How to remove and install a master cylinder? Posted by Customer
- A:To replace the Brake Master Cylinder and deal with the reservoir/grommet, start by placing rags under the brake line fittings and preparing caps or plastic bags to cover the ends of the lines once disconnected. Cover all painted surfaces, as brake fluid will damage paint. Unplug the brake fluid level warning switch electrical connector. Loosen the tube nuts at the ends of the brake lines where they enter the Brake Master Cylinder using a flare-nut wrench to prevent rounding off the flats on the nuts. Pull the brake lines away from the Brake Master Cylinder slightly and plug the ends to prevent contamination, being careful not to kink the hydraulic lines. Remove the Brake Master Cylinder mounting nuts and the Brake Master Cylinder from the vehicle. Remove the reservoir cap and discard any fluid remaining in the reservoir. Check the O-ring on the end of the Brake Master Cylinder, replacing it if cracked or hardened. Bench bleed the Brake Master Cylinder before installing it. It's recommended to mount the Brake Master Cylinder in a vise, clamping on the mounting flange. Attach a pair of bleeder tubes to the outlet ports of the Brake Master Cylinder. Fill the reservoir with the recommended brake fluid. Slowly push the pistons into the Brake Master Cylinder using a large Phillips screwdriver, expelling air from the pressure chambers into the reservoir. Repeat until no more air bubbles are present. Remove the bleed tubes and install plugs in the open ports to prevent fluid leakage and air from entering. Install the reservoir cap. Install the Brake Master Cylinder over the studs on the power brake booster, tightening the nuts only finger-tight at this time. Use a new gasket. Thread the brake line fittings into the Brake Master Cylinder, moving it slightly for ease of threading. Tighten the mounting nuts and brake line fittings securely. Plug in the electrical connector to the fluid level warning switch. Fill the Brake Master Cylinder reservoir with fluid, then bleed the Brake Master Cylinder and the brake system. Have an assistant depress the brake pedal and hold it down while loosening the fitting to allow air and fluid to escape; repeat this on both fittings until the fluid is clear of air bubbles. Tighten the fitting, then allow your assistant to return the pedal to its rest position. Repeat until the fluid is free of air bubbles. Check the operation of the brake system carefully before driving the vehicle. For reservoir/grommet replacement, if there is leakage between the reservoir and the Brake Master Cylinder body, the grommets can be replaced. Remove as much fluid as possible from the reservoir with a suction gun, syringe, or a poultry baster. Place rags under the Brake Master Cylinder to absorb any fluid that may spill. Remove the TORX screw that retains the reservoir to the Brake Master Cylinder and pull the reservoir out of the Brake Master Cylinder body. Pull the grommets out of the Brake Master Cylinder and replace them if they are hard, cracked, damaged, or have been leaking. Lubricate the new grommets with clean brake fluid and press them into place. Push the reservoir into the grommets and secure it with the screw. Refill the reservoir with the recommended brake fluid and check for leaks. Bleed the Brake Master Cylinder, followed by the remainder of the system.Posted by ToyotaPartsDeal Specialist
If you have any questions about this product, please don't hesitate to ask us. We will be happy to help you!
Why choose Toyota Parts Deal
- Dedicated Service
Your complete satisfaction is our #1 goal
- Lowest Prices
Best deals on genuine OE parts from dealerships
- Fast Delivery
Orders are processed and delivered promptly