My Garage
Cart
Make sure this part fits

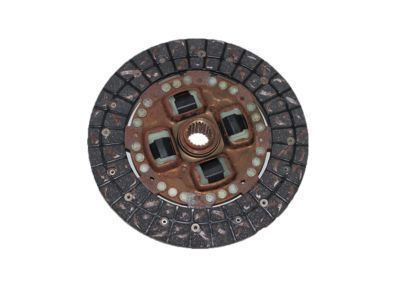
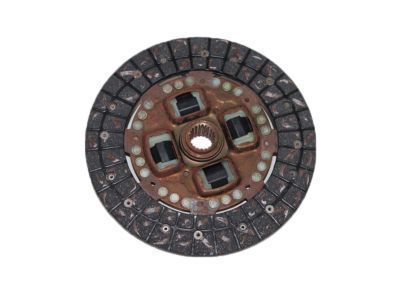
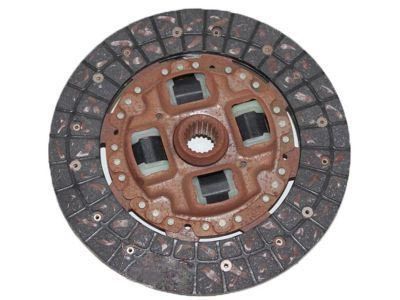
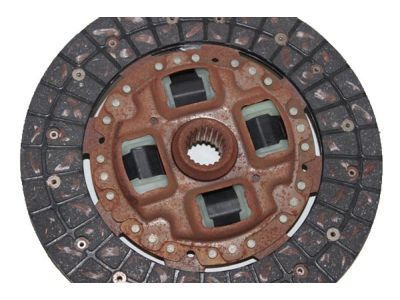
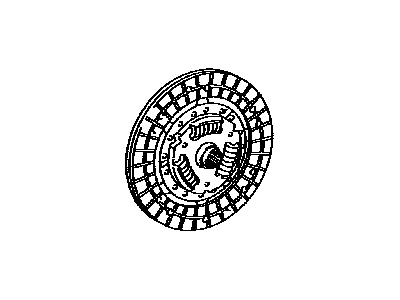
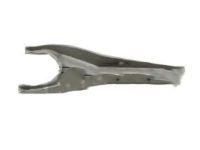
Toyota 31250-12360 Disc Assembly, Clutch

1995-2006 Toyota 3125012360

Customer Questions & Expert Answers (4)
Toyota 31250-12360 Disc Assembly, Clutch
  • Part Description
    Disc Assembly, Clutch
  • Part Name Code
    31250
  • Replaced By
    31250-12360-84
  • Manufacturer
    Toyota
Make sure this part fits
$46.87 MSRP: $65.64
You Save: $18.77 (29%)
Ships in 1-3 Business Days
1
ADD TO CART
  • Related Parts
  • Product Specifications
  • Vehicle Fitment
  • Customer Questions & Expert Answers
  • Product Specifications

    BrandGenuine Toyota
    Part Name Code31250
    Manufacturer Part Number31250-12360
    Part DescriptionDisc Assembly, Clutch
    Item Dimensions9.7 x 9.3 x 1.9 inches
    Item Weight2.20 Pounds
    ConditionNew
    Fitment TypeDirect Replacement
    ManufacturerToyota
    SKU31250-12360
    WarrantyThis genuine Toyota part is guaranteed by Toyota's factory warranty.
    Shipping & ReturnShipping Policy Return Policy
    Warning: California's Proposition 65
  • Vehicle Fitment

    Year Make Model Trim & Engine Important vehicle option details
    2004-2006 Scion xA4 Cyl 1.5L1NZFE; NCP61L-HHMNKA, NCP61L-HHPNKA
    2004-2006 Scion xB4 Cyl 1.5L1NZFE; NCP31L-DHMNKA, NCP31L-DHPNKA
    2000-2005, 1995-1998 Toyota CelicaGT, ST|4 Cyl 1.8L, 4 Cyl 2.2L1ZZFE, 2ZZGE; ZZT230L-BLMSHA, 5SFE, 7AFE; AT200L-BCMSKA, AT200L-BCPSKA, AT200L-BLMSKA, AT200L-BLMSKK, AT200L-BLPSKA, AT200L-BLPSKK, ST204L-BCMGKA, ST204L-BCMGKK, ST204L-BCMSKA, ST204L-BCPGKA, ST204L-BCPGKK, ST204L-BCPSKA, ST204L-BKMGKA, ST204L-BKPGKA, ST204L-BLMGKA, ST204L-BLMGKK, ST204L-BLMSKA, ST204L-BLPGKA, ST204L-BLPGKK, ST204L-BLPSKA, ZZT230L-BLPSHA, ZZT231L-BLFVFA, ZZT231L-BLPVFA
    1995-2006 Toyota CorollaCE, DX, LE, S, STD, VE, XR, XRS|4 Cyl 1.6L, 4 Cyl 1.8L1ZZFE, 2ZZGE, 4AFE, 7AFE; AE101L-AEHDKA, AE101L-AEHDKK, AE101L-AEHNKK, AE101L-AEMDKA, AE101L-AEMDKK, AE101L-AEMNKK, AE101L-DEHDKA, AE101L-DEHDKK, AE101L-DEHNKA, AE101L-DEHNKK, AE101L-DEMDKA, AE101L-DEMDKK, AE101L-DEMNKA, AE101L-DEMNKK, AE102L-AEMNKA, AE102L-AEMNKK, AE102L-AEPEKA, AE102L-AEPNKA, AE102L-AEPNKK, AE102L-AWMNKA, AE102L-AWMNKK, AE102L-AWPNKA, AE102L-AWPNKK, AE102L-DEMEKA, AE102L-DEMNKA, AE102L-DEMNKK, AE102L-DEPEKA, AE102L-DEPNKA, AE102L-DEPNKK, ZZE110L-DEHRKA, ZZE110L-DEHRKK, ZZE110L-DEMDKA, ZZE110L-DEMDKK, ZZE110L-DEMNKA, ZZE110L-DEMRKA, ZZE110L-DEMRKK, ZZE110L-DEMSKA, ZZE110L-DEMSKK, ZZE110L-DEPDKA, ZZE110L-DEPDKK, ZZE110L-DEPEKA, ZZE110L-DEPGKA, ZZE110L-DEPNKA, ZZE110L-DEPNKK, ZZE110L-DEPQKA, ZZE110L-DEPRKA, ZZE110L-DEPRKK, ZZE110L-DEPSKA, ZZE110L-DEPSKK, ZZE110L-DEPXKA, ZZE130L-AEMDKA, ZZE130L-AEMNKA, ZZE130L-AEPDKA, ZZE130L-AEPDKK, ZZE130L-AEPNKA, ZZE130L-AEPNKK, ZZE130L-DEMDKA, ZZE130L-DEMDKK, ZZE130L-DEMNKA, ZZE130L-DEMNKK, ZZE130L-DEMSKA, ZZE130L-DEMSKK, ZZE130L-DEPDKA, ZZE130L-DEPDKK, ZZE130L-DEPNKA, ZZE130L-DEPNKK, ZZE130L-DEPSKA, ZZE130L-DEPSKK, ZZE131L-DEFSFA, ZZE131L-DEFSFK, ZZE132L-DHMDKA, ZZE132L-DHMDKK, ZZE132L-DHMNKA, ZZE132L-DHMNKK, ZZE132L-DHPDKA, ZZE132L-DHPDKK, ZZE132L-DHPNKA, ZZE132L-DHPNKK, ZZE133L-DHFSFA, ZZE133L-DHFSFK, ZZE133L-DHPSFA, ZZE133L-DHPSFK, ZZE134L-DHPDKA, ZZE134L-DHPDKK, ZZE134L-DHPNKA, ZZE134L-DHPNKK
    2000-2005 Toyota Echo4 Cyl 1.5L1NZFE; NCP12L-BDMRKA, NCP12L-BDMRKK, NCP12L-BDPRKA, NCP12L-BDPRKK, NCP12L-BEMRKA, NCP12L-BEMRKK, NCP12L-BEPRKA, NCP12L-BEPRKK, NCP13L-AGMRKK, NCP13L-AGPRKK, NCP13L-AHMRKK, NCP13L-AHPRKK
    2000-2005 Toyota MR2 Spyder4 Cyl 1.8L1ZZFE; ZZW30L-AKGQHA, ZZW30L-AKLQHA, ZZW30L-AKMQHA
    2003-2006 Toyota MatrixCE, LE, S, STD, XR, XRS|4 Cyl 1.8L1ZZFE, 2ZZGE; ZZE130L-DEMDKA, ZZE130L-DEMDKK, ZZE130L-DEMNKA, ZZE130L-DEMNKK, ZZE130L-DEMSKA, ZZE130L-DEMSKK, ZZE130L-DEPDKA, ZZE130L-DEPDKK, ZZE130L-DEPNKA, ZZE130L-DEPNKK, ZZE130L-DEPSKA, ZZE130L-DEPSKK, ZZE131L-DEFSFA, ZZE131L-DEFSFK, ZZE132L-DHMDKA, ZZE132L-DHMDKK, ZZE132L-DHMNKA, ZZE132L-DHMNKK, ZZE132L-DHPDKA, ZZE132L-DHPDKK, ZZE132L-DHPNKA, ZZE132L-DHPNKK, ZZE133L-DHFSFA, ZZE133L-DHFSFK, ZZE133L-DHPSFA, ZZE133L-DHPSFK, ZZE134L-DHPDKA, ZZE134L-DHPDKK, ZZE134L-DHPNKA, ZZE134L-DHPNKK
  • Customer Questions & Expert Answers

    Q:
    I would like to know availability and if it is direct fit replacement Posted by ToyotaPartsDeal Specialist
    A:
    You can Select Your Vehicle to check if 31250-12360 fits your vehicle.
    Posted by ToyotaPartsDeal Specialist
    Q:
    How to remove the Clutch Disc and Pressure Plate on Toyota Celica? Posted by Customer
    A:
    The major components of the clutch are accessed by having to remove the transaxle but the engine remains in the vehicle. If major overhauling of the engine is to be done, then clutch should also be inspected and worn out part should be replaced because they are cheap in cost but may be so difficult to remove once the engine is taken off. The release cylinder has to be detached and shifted aside and the hose does not need to be disconnected from the release cylinder. The transaxle needs to be pulled out of the car and the engine needs to be properly supported usually on an engine lift. In all the mentioned configurations, it is indicated that the release fork and bearing can continue to remain incorporate with the transaxle. For enhancing the hold of the clutch disc during such processes like its removal, one should intend to insert a clutch alignment tool through the clutch disc hub. Check for indexing marks on the flywheel and on the pressure plate, reading these if there are any, otherwise create your own for reference when you are re-fitting them. Relieve spring pressure on the pressure plate to the flywheel by slackening the bolts in diagonal fashion and then taking out the bolts, the pressure plate and clutch disc. It is recommended to check every part of the unit but, at least, the flywheel needs to be examined for its cracks and damages, and the clutch disc lining for wears. The release bearing should also be replaced together with the clutch disc. Pressure plate should be examined for score marks and overheating and if they are the situation rectified than pressure plate should be changed. For optimum performance it is recommended that the flywheel and pressure plate contact surfaces be clean, free from any oil or grease. Before tightening up the bolts, align the clutch disc and pressure plate using an alignment tool in a correct manner. Before final tightening of the pressure plate-to-flywheel bolts, they should be tightened just enough to create slightly snug fit and at this stage, the clutch disc should be set symmetrically so as to balance it before the bolts are tight, they are tightened in a bolt star pattern while avoiding the ring wrench technique which could cause a distortion of the clutch disc. When tightening all the bolts, it is important to take out the adjustment tool and then apply grease on the interior part of the releasable bearing and all contacts. Last but not the least fit the clutch release bearing, the transaxle, the release cylinder and all other parts removed in this process should then be adequately tightened according to the recommended torque settings.
    Posted by ToyotaPartsDeal Specialist
    Q:
    How to remove and inspect of Clutch Disc and Pressure Plate on Toyota Corolla? Posted by Customer
    A:
    The clutch parts are usually accessed with the transaxle of the vehicle in place, although the engine remains a part of the car. In case of a major overhaul of the engine then the clutch should also be checked for signs of wear and expectedly repairing or replacing damaged parts is best done at this stage since parts of the clutch are relatively cheaper than the time it would take to access the clutch. The following procedures are based on assumed that the engine stays in the car. Start by sliding the release cylinder back and ensure it is out of the way but do not detach the hose. Subsequently, take out the transaxle from the car and make sure that the engine is effectively supported and maybe with an engine lift or support stand. If using a jack place a piece of wood between the jack and the oil pan and be careful as the oil pump pick up is towards the end of the pan and may distort the pan and lead to oil starvation. It is acceptable to leave the release fork and bearing connected to the transaxle for a while longer. For clamping support of the clutch disc, screw in a clutch alignment tool through the disc hub. Search the surface of the flywheel as well as the pressure plate for signs of indexing and in the absence of such signs, make them yourself once you are to reassemble the unit. Lose the pressure plate to the flywheel bolts diagonally, in order to ease the tension of the clutch spring, then take the bolts, then the pressure plate, as well as the clutch disc. While inspecting the engine components, examine the flywheel for presence of any crack or any defect on its surface and it should be corrected by resurfacing if there is any. For the clutch disc lining, see that they are worn by at most 1/32-inch above the rivet heads and appear for any damage. Products like the release bearing should be replaced together with the clutch disc. Check pressures of the pressure plate for signs of wear or damage, if worn replace the pressure plate. Several new shells about flywheel and pressure plate: Before the installation the machined surfaces of the flywheel and pressure plate have to be free of oil and grease. Insert the clutch disc on the flywheel with the help of an alignment tool and make sure that the pressure plate is installed in the correct manner. Now again tighten the pressure plate-to-flywheel bolts up to just 'snug' fit, align the clutch disc and then in a cross-hatch sequence tighten these bolts and finally use a torque wrench on them. In the inner groove of the release bearing as well as around the contact surfaces of the release lever and the input shaft bearing retainer apply HTL. The next step is to bolt in the clutch release bearing, the transaxle and the back in the components that were previously removed: everything must be tightened to the recommended torque.
    Posted by ToyotaPartsDeal Specialist
    Q:
    How to remove and install Clutch Disc,Pressure Plate and Release Bearing on Toyota Matrix? Posted by Customer
    A:
    Clutch components may be accessed by removing the transaxle, but the engine should not be removed unless it is being overhauled. In these cases, worn clutch components should be checked and replaced because their cost of replacement is much less than that of laborious access to them. Start with the release cylinder removal without hose disconnection when the engine remains in situ. After this, extract the transaxle out of the car providing assistance to the motor during removal either through an engine hoist or a jack under the engine with a piece of wood placed beneath to spread out loads. For now, keep the release bearing and release fork on the transaxle. To ease clutch disc removal, put a clutch alignment tool through its hub. Check for indexing marks on both flywheel and pressure plate; if they are missing, make scribe marks as guides for installation later on. Gradually loosen up bolts that hold together pressure plate and flywheel in a diagonal manner to relieve spring pressure and then take out bolts followed by pressure plate and clutch disc. Examine flywheel for any damage, so as to decide whether slight imperfections should be machined out at a machine shop. Evaluate thickness of clutch disc lining along with rivet condition and any signs of damage that might necessitate its replacement. Install new clutch discs alongside release bearings. Inspect machined surface of pressure plate as well as diaphragm spring fingers for any damages which can necessitate replacing entire assembly; you can remove minor glazing using emery cloth however. They do provide factory rebuilt units whenever getting another stock pressure plate is called for. Prior to installation, ensure oil-free surfaces on clean flywheels, pres-sure plates,and clutch discs handling them with clean hands all throughout. Place an alignment tool between the clutch disc and pressure plate before finger tightening bolts around it (Flynn & Rushing). Guide the alignment tool into position centralizing clutch disc between pressure plate bolts, and then tighten the bolts down in a crossover pattern to the specified torque. Take out alignment tool, apply high temperature grease onto inner groove of release bearing as well as contact areas of release lever and insert grease inside input-shaft bearing retainer from transaxle. Proceed to reinstall all of the following: clutch release bearing; transaxle; release cylinder; and every part previously taken off with all fasteners tightened to recommended torque specifications.
    Posted by ToyotaPartsDeal Specialist
    If you have any questions about this product, please don't hesitate to ask us. We will be happy to help you!

Genuine Toyota Part 31250-12360, the Right Choice

Get the reliability of purchasing Toyota part # 31250-12360 Disc Assembly, Clutch. It is also referred to as Clutch Disc. The first option should always be to use OEM parts. Toyota manufactures these components with high quality material and rigorously tested with high reliability and durability. This part fits 1995-2005 Celica, 1995-2006 Corolla, 2000-2005 Echo, 2003-2006 Matrix.

ToyotaPartsDeal.com is a leading supplier of genuine Toyota parts and accessories, such as 3125012360 Disc Assembly, Clutch. In need of OEM Toyota parts? We offer a wide selection of genuine parts available that are competitively priced and trusted across the market. All parts are warranted by the manufacturer. Combine that with our simple return policy and fast delivery service and your shopping experience will be stress-free and dependable. For detailed Toyota parts information, click here.

Why choose Toyota Parts Deal

  • Dedicated Service

    Your complete satisfaction is our #1 goal

  • Lowest Prices

    Best deals on genuine OE parts from dealerships

  • Fast Delivery

    Orders are processed and delivered promptly