My Garage
Cart
Make sure this part fits

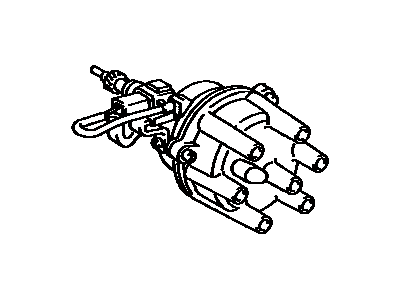
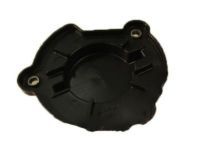
Toyota 19100-42040 Distributor Assembly

1986-1988 Toyota Supra 1910042040

Customer Questions & Expert Answers (3)
Toyota 19100-42040 Distributor Assembly
  • Part Description
    Distributor Assy
  • Part Name Code
    19100
  • Manufacturer
    Toyota
  • Manufacturer's Notes
    This part is discontinued.
Make sure this part fits
  • Related Parts
  • Product Specifications
  • Vehicle Fitment
  • Customer Questions & Expert Answers
  • Product Specifications

    BrandGenuine Toyota
    Part Name Code19100
    Manufacturer Part Number19100-42040
    Part DescriptionDistributor Assy
    Other NamesDistributor
    Item Dimensions8.1 x 6.0 x 5.7 inches
    Item Weight2.20 Pounds
    ConditionNew
    Fitment TypeDirect Replacement
    ManufacturerToyota
    SKU19100-42040
    WarrantyThis genuine Toyota part is guaranteed by Toyota's factory warranty.
    Shipping & ReturnShipping Policy Return Policy
    Warning: California's Proposition 65
  • Vehicle Fitment

    Year Make Model Trim & Engine Important vehicle option details
    1986-1988 Toyota Supra6 Cyl 3.0L7MGE, 7MGTE; MA70L-BJMVFA, MA70L-BJMVFK, MA70L-BJMVZA, MA70L-BJMVZK, MA70L-BJPVFA, MA70L-BJPVFK, MA70L-BJPVZA, MA70L-BJPVZK, MA70L-BLMVFA, MA70L-BLMVFK, MA70L-BLMVZA, MA70L-BLMVZK, MA70L-BLPVFA, MA70L-BLPVFK, MA70L-BLPVZA, MA70L-BLPVZK
  • Customer Questions & Expert Answers

    Q:
    Does it fit my car? Posted by ToyotaPartsDeal Specialist
    A:
    You can Select Your Vehicle to check if 19100-42040 fits your vehicle.
    Posted by ToyotaPartsDeal Specialist
    Q:
    How to overhaul the distributor and replace the driven gear on Toyota Supra? Posted by Customer
    A:
    When working with models ranging from 1979 through 1982, one has to start by disconnecting the distributor together with the O-ring from the main body outer flange of the gear. To reach the pick-up coil assembly, the cover has to be unbolted, and the pick-up coil assembly has to be slid out; the clamp, which belongs to this mechanism, has to be pulled out using the corresponding screws. Then, unbolt the vacuum advance unit from the main body, use the DC probe to check the break points and then unscrew the breaker plate to eliminate it. Slide out the grease stopper in the top of the signal rotor, unscrew the top of the shaft and then disengage its rotor assembly and springs from the shaft noting that springs should be placed with their corresponding pegs. Take off the shaft advance weights by unlodging the E-clips from the pivot shafts, and by broaching the opposite end of the pin and knocking the pin out of the gear; to dismantle the rotor shaft from the distributor body is gently eased out. Remove any dirt in the metal parts by using solvent, and dry the metal parts and check the cap for crack, the burnt or corroded terminals of the rotor, the rotation of the breaker plate, the gear, shaft bearing, housing for wear check the signal rotor for the smooth movement on the shaft with little side play check the centrifugal advance springs for crack and for sagging while checking the centrifugal weights the pick-up coil measurement by ohmm In the corresponding steps, replace any worn, damaged, or defective components before reassembling the item in the reverse manner and lubricate the shaft and bearing part with some oil before the others. Most the locating mark and stopper, then mount the signal rotor in the shaft and toggle the centrifugal advance by rotating the rotor to the right and letting is go only for it to turn immediately back into position. Modify the separation distance of the signal rotor with the signal generator; subsequently, fasten the signal generator mounting screws. In case of the distributing assembly, models made from and after 1983 cannot be overhauled, whereas for the 1983 through 1988 non-turbo models and all turbo models of the car, only the distributor driven gear can be replaced, but for 1989 and later non-turbo units, machining is out of the question. If a new distributor or cam position sensor driven gear is required then first, take out the distributor or cam position sensor, then to fix the driven gear on the housing of the vise you need to drill a mark on the driven gear to match the groove on the housing of the vise. In the distributor shaft place a matchmark on the circumference against the groove in the housing. They grind off of the gear and the pin with a grinding wheel. Use hammer and punch to knock out the pin, now take out the old drive gear, this one we can throw away. Next, ensure that the matchmark on the shaft tallies with the mark made when drilling the new gear into the housing; you can then hammer in a new pin with the help of punch to restring the distributor or cam position sensor back into place.
    Posted by ToyotaPartsDeal Specialist
    Q:
    How to remove and install Distributor on Toyota Supra? Posted by Customer
    A:
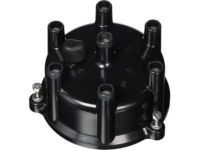
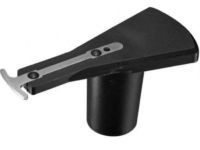
    With the cam position sensor similar to a distributor on the turbo models the procedure should call for the No.1 piston on its closed compression stroke and hence inhibit the engine from turning during the process of removal of the cam position sensor. Start by removing the negative terminal of the battery and pulling out the electrical connection of the sensor. For models from 1979 to 1982, vacuum advance unit hoses should be disconnected. First cylinder spark plug wire terminal should be found where there is a raised number "1" on the top of the distributor cap or starting from the number one spark plug wire. Take off the distributor cap and rotate the engine until the rotor comes to the position of the number one terminal to align the distributor with its preceding position using marks on the distributor base and the engine block. To replace it, you need to pull out the hold-down bolt and lift the distributor out, up or sideways; you dispose the old O-ring. For installation, if the crankshaft has moved, rotate the crank-shaft until number one piston is pushed back to TDC by rattling on the compression pressure. It is recommended that a new O-ring should be fitted to the sensor shaft and slid into the position inside the engine with its positioning in reference with the two marks made earlier. You may have to adjust the rotor on the engine block to match the facing of the camshaft gears, then put in the hold-down bolt until it is slightly tightened before putting the distributor cap back on. Connect the electrical connector back, secure any spark plug wires if necessary and then connect the negative terminal of the battery. Last of all, make sure the ignition timing is fine and twist the hold-down bolt to the extent it is supposed to be.
    Posted by ToyotaPartsDeal Specialist
    If you have any questions about this product, please don't hesitate to ask us. We will be happy to help you!

Genuine Toyota Part 19100-42040, the Right Choice

To ensure reliability, purchase Toyota part # 19100-42040 Distributor Assembly. It is sometimes referred to as Toyota Distributor. For unrivaled quality, OEM parts are the ultimate choice. These parts are manufactured by Toyota's official factory using top-quality materials and undergo strict testing procedures, ensuring outstanding dependability and long-lasting durability. This part fits 1986-1988 Toyota Supra.

ToyotaPartsDeal.com is a leading supplier of genuine Toyota parts and accessories such as Toyota 1910042040 Distributor Assembly. In need of OEM Toyota parts? Look no further than our extensive inventory of genuine Toyota parts, competitively priced to be highly exceptional in the market. They are all manufacturer-warrantied. Add to that, our easy return policy and swift delivery service, and your shopping experience promises to be the great pleasant ever. For detailed Toyota parts information, click here.

Why choose Toyota Parts Deal

  • Dedicated Service

    Your complete satisfaction is our #1 goal

  • Lowest Prices

    Best deals on genuine OE parts from dealerships

  • Fast Delivery

    Orders are processed and delivered promptly