

My Garage
My Account
Cart
This part fits
1976 Toyota Land Cruiser United States Of America; 6 Cyl 4.2L
Check another vehicle- Production Date: 03/1969-07/1980
- Fitting Vehicle Options: F, 2F.. FJ4#, 55
Toyota 15600-41010 Oil Filter Assembly
1969-1997 Toyota 1560041010
Customer Questions & Expert Answers (2)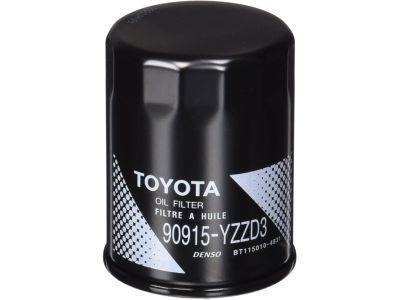
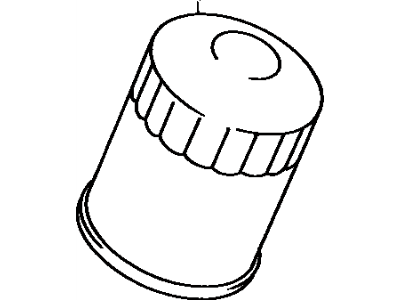
- Part DescriptionFilter Sub-Assy, Oil
- Replaced By
- ManufacturerToyota
This part fits
1976 Toyota Land Cruiser United States Of America; 6 Cyl 4.2L
Check another vehicle- Production Date: 03/1969-07/1980
- Fitting Vehicle Options: F, 2F.. FJ4#, 55
$11.89 MSRP: $16.62
You Save: $4.73 (29%)
1
- Related Parts
- Specifications
- Q&A
Product Specifications
Brand Genuine Toyota Manufacturer Part Number 15600-41010 Part Description Filter Sub-Assy, Oil Item Dimensions 16.0 x 11.8 x 3.2 inches Item Weight 1.10 Pounds Condition New Fitment Type Direct Replacement Manufacturer Toyota SKU 15600-41010 Warranty This genuine Toyota part is covered by warranty. Shipping & Return Shipping Policy Return Policy Warning: California's Proposition 65Customer Questions & Expert Answers
- Q:Does it fit my car? Posted by ToyotaPartsDeal Specialist
- A:You can Select Your Vehicle to check if 15600-41010 fits your vehicle.Posted by ToyotaPartsDeal Specialist
- Installation and Repair Tips by AI Expert
- Removal steps: 1. Park on level ground, set the parking brake, chock wheels, wear gloves and eye protection, and allow the engine to cool or warm slightly (caution: hot oil can burn). 2. If vehicle needs to be lifted for access, raise it with a jack and support securely on jack stands; never rely on a jack alone. 3. If you will be working near electrical components or want to prevent accidental starting, disconnect the negative battery cable. 4. Prepare a suitable oil drain pan and absorbent rags; place the pan under the oil drain area and filter location. 5. Drain engine oil into the pan by removing the drain plug or following the vehicle's drain procedure (some vehicles allow filter change without full drain - vary by design). 6. Gain clear access to the oil filter; remove any splash shields or covers as required for access (procedure varies by vehicle). 7. Break the filter seal using an appropriate oil-filter wrench or strap; turn counterclockwise (expect oil to spill) and remove the filter by hand. 8. For cartridge-style systems, remove the housing cap/fasteners and withdraw the element and O-rings following the housing design. 9. Clean the filter mounting surface and housing sealing area with a lint-free rag; remove old gasket material and debris without gouging the surface. 10. Inspect the filter mounting threads and sealing surface for damage and replace damaged components before installing a new filter. Installation steps: 1. Verify the replacement filter and any O-rings/gaskets are correct for the engine and inspect them for defects. 2. Lightly coat the new spin-on filter gasket or replacement O-rings with clean engine oil to help seal and ease removal later. 3. Thread a spin-on filter by hand until the gasket seats; then secure further only as recommended by the filter manufacturer or vehicle manual (do not invent torque values). 4. For cartridge filters, install the element and new O-rings into the housing, ensure correct O-ring placement, and reinstall the housing cap/fasteners, tightening to the manufacturer's specification. 5. Reinstall and tighten the drain plug or follow the vehicle's drain plug procedure (use the correct sealing washer if required and follow manufacturer tightening guidance). 6. Refill the engine with the correct type and amount of fresh oil per the vehicle manufacturer; use a funnel and check level with the dipstick after initial fill. 7. Reconnect the negative battery cable if it was disconnected. 8. Start the engine and run at idle briefly while checking visually for leaks at the filter, housing, and drain plug; shut off, wait a few minutes, then recheck oil level and add oil if necessary. 9. Lower the vehicle if raised, dispose of used oil and the old filter responsibly at a recycling facility, and monitor the filter area for leaks during the next few drives. Repair tip: 1. Keep the old filter for inspection-metal or unusual debris inside can indicate internal engine problems worth addressing.
- Q:
Why choose Toyota Parts Deal
- Dedicated Service
Your complete satisfaction is our #1 goal
- Lowest Prices
Best deals on genuine OE parts from dealerships
- Fast Delivery
Orders are processed and delivered promptly