This part fits the vehicle you selected:
My Vehicle: 1992 Toyota Land Cruiser 6 Cyl 4.0L; FJ80L-GNPNEA
Change VehicleThe vehicle options this part fits:
- Production Date: 01/1990-08/1992
- Fitting Vehicle Options: 3FE.. FJ80
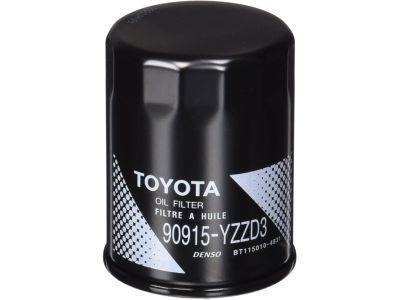
Toyota 15600-41010 Filter Assembly, Oil
1969-1997 Toyota 1560041010

- Part DescriptionFilter Sub-Assy, Oil
- Replaced By90915-40002
- ManufacturerToyota
This part fits the vehicle you selected:
1992 Toyota Land Cruiser 6 Cyl 4.0L; FJ80L-GNPNEA
The vehicle options this part fits:
- Production Date: 01/1990-08/1992
- Fitting Vehicle Options: 3FE.. FJ80
$11.07 MSRP: $15.47 1
You Save: $4.40 (29%)
Ships in 1-3 Business Days
Product Specifications
| Brand | Genuine Toyota |
| Manufacturer Part Number | 15600-41010 |
| Part Description | Filter Sub-Assy, Oil |
| Item Dimensions | 15.9 x 11.6 x 3.1 inches |
| Item Weight | 1.10 Pounds |
| Condition | New |
| Fitment Type | Direct Replacement |
| Manufacturer | Toyota |
| SKU | 15600-41010 |
| Warranty | This genuine Toyota part is guaranteed by Toyota's factory warranty. |
| Shipping & Return | Shipping Policy Return Policy |
Warning: California’s Proposition 65
Customer Questions & Answers
- Q:Does it fit my car? Posted by ToyotaPartsDeal Specialist
- A:You can Select Your Vehicle to check if 15600-41010 fits your vehicle.Posted by ToyotaPartsDeal Specialist
- Q:How to Change Oil Filter and Oil on a Toyota Land Cruiser? Posted by Customer
- A:Frequent oil changes are the best preventive maintenance for the engine, as aging oil becomes diluted and contaminated, leading to premature engine wear. Before starting the procedure, ensure that you have all the necessary tools, such as a drain pan, rubber gloves, breaker bar, socket, and filter wrench. Access to the underside of the vehicle is improved by lifting it on a hoist, driving it onto ramps, or supporting it with jackstands. Familiarize yourself with the location of the oil drain plug before the first oil change, and anticipate any potential problems. Park the vehicle on a level spot, start the engine and let it reach its normal operating temperature. Turn off the engine and remove the filler cap. Raise the vehicle and support it on jackstands, being cautious of the hot exhaust components. Place the drain pan under the drain plug and remove it using the proper size wrench. Allow the old oil to drain completely and inspect it for metal shavings. Wipe off the drain plug and clean the area around the drain plug opening before reinstalling the plug securely. Move the drain pan under the oil filter and loosen the filter using a filter wrench. Unscrew the filter by hand, tilting it to prevent oil spillage. Wipe off the mounting surface on the block and ensure no residue or old gasket remains. Smear engine oil on the rubber gasket of the new filter and screw it into place by hand. Add new oil to the engine through the oil filler cap, pouring three quarts of fresh oil. Wait for the oil to drain into the pan and check the level on the dipstick. If necessary, add enough oil to bring it to the appropriate level. Allow the engine to run for a minute and check for leaks at the drain plug and oil filter. Tighten them if necessary. Wait for the oil to trickle down and recheck the level on the dipstick. During the first few trips after an oil change, check for leaks and proper oil level. Dispose of the old oil at an oil reclamation center, auto repair shop, or gas station.Posted by ToyotaPartsDeal Specialist
If you have any questions about this product, please don't hesitate to ask us. We will be happy to help you!
Why choose Toyota Parts Deal
- Dedicated Service
Your complete satisfaction is our #1 goal
- Lowest Prices
Best deals on genuine OE parts from dealerships
- Fast Delivery
Orders are processed and delivered promptly


