

My Garage
My Account
Cart
This part fits
2011 Toyota Camry (VIN: 4T4BF3EKOBR154398) 4 Cyl 2.5L DOHC EFI; Automatic Transmission; 6-Speed Automatic Transmission; North America Product
Check another vehicle- Fitting Vehicle Options: ASV40.. NAP.. 6FC
Toyota 35168-73010 Transaxle Oil Pan Gasket
2008-2019 Toyota 3516873010
Customer Questions & Expert Answers (1)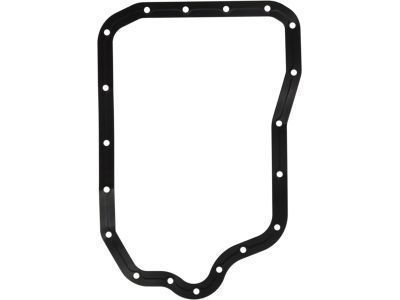
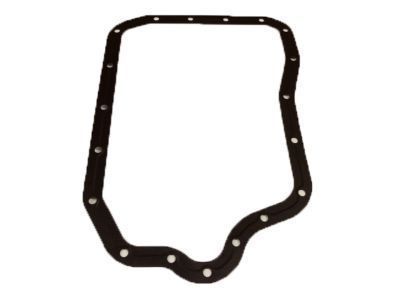
- Part DescriptionGasket, Automatic Transaxle Oil Pan
- Part Name Code35168A
- ManufacturerToyota
This part fits
2011 Toyota Camry (VIN: 4T4BF3EKOBR154398) 4 Cyl 2.5L DOHC EFI; Automatic Transmission; 6-Speed Automatic Transmission; North America Product
Check another vehicle- Fitting Vehicle Options: ASV40.. NAP.. 6FC
$20.34 MSRP: $28.43
You Save: $8.09 (29%)
Ships in 1-3 Business Days
1
- Related Parts
- Specifications
- Q&A
Product Specifications
Brand Genuine Toyota Part Name Code 35168A Manufacturer Part Number 35168-73010 Part Description Gasket, Automatic Transaxle Oil Pan Other Names Pan Gasket, Transmission Pan Gasket Item Dimensions 14.7 x 10.2 x 0.3 inches Item Weight 0.60 Pounds Condition New Fitment Type Direct Replacement Manufacturer Toyota SKU 35168-73010 Warranty This genuine Toyota part is covered by warranty. Shipping & Return Shipping Policy Return Policy Warning: California's Proposition 65Customer Questions & Expert Answers
- Installation & Repair Tips by AI Expert
- Removal - Safety and preparation 1. Ensure the engine is cool, park on a level surface, chock the wheels and wear eye/hand protection. 2. Disconnect the negative battery cable before working under the vehicle. 3. Raise and support the vehicle securely on jack stands or a lift; never rely on a jack alone. 4. Place an oil drain pan under the oil pan, then remove the oil drain plug and allow the oil to drain completely; collect and dispose of oil properly. 5. Remove any underbody shields or components that commonly restrict access to the oil pan (if equipped). 6. Disconnect any sensors, wiring harnesses, or attachments that are attached to or obstructing the oil pan, noting their routing and connectors. 7. Loosen oil pan fasteners progressively and evenly, then remove the fasteners and lower the pan-use a non-marring pry tool if the pan is stuck, avoiding damage to mating surfaces. 8. Remove the old gasket or sealant material from both the pan and block mating surfaces using a gasket scraper or equivalent, taking care not to gouge the surfaces. 9. Inspect the oil pan, drain plug, and mating surface for damage, corrosion, or distortion and set the pan and hardware aside for cleaning or replacement. Installation - Gasket fitment, assembly and testing 1. Clean and dry both mating surfaces thoroughly; remove all oil, old sealant, and debris. 2. If the replacement gasket requires sealant, use the specified product and follow its instructions; if using a preformed gasket, position it per the gasket design. 3. Align the oil pan against the block and start fasteners by hand to ensure correct alignment and thread engagement. 4. Tighten fasteners progressively in a crisscross or manufacturer-recommended sequence to seat the gasket evenly, stopping when fasteners are snug; final torque should be to the vehicle manufacturer's specification (do not guess torque values). 5. Reinstall the drain plug with a new washer if required and snug it securely (follow specified torque for the drain plug). 6. Reconnect any sensors, wiring, and removed shields or components, ensuring correct routing and connector engagement. 7. Lower the vehicle to the ground, reconnect the negative battery cable, and refill the engine with the correct type and amount of oil, replacing the oil filter if you removed or planned to replace it. 8. Start the engine and run at idle, checking for leaks around the oil pan and drain plug; shut off the engine and recheck oil level, topping as needed. 9. After a short run and cool-down, inspect again for leaks and re-torque bolts only to the specified values if required by the manufacturer. Repair tip 1. Use a soft plastic or brass scraper and a lint-free solvent for cleaning mating surfaces; avoid metal scrapers that can gouge, and replace any pan bolts or sealing washers that show corrosion or stretch.
Why choose Toyota Parts Deal
- Dedicated Service
Your complete satisfaction is our #1 goal
- Lowest Prices
Best deals on genuine OE parts from dealerships
- Fast Delivery
Orders are processed and delivered promptly