

My Garage
My Account
Cart
This part fits
2007 Toyota 4Runner
Check another vehicle- The location this part fits: Rear Driver Side
- Production Date: 02/2007-08/2009
- Fitting Vehicle Options: GRN21#, UZN21#
Toyota 90947-02F24 Flexible Hose
2003-2010 Toyota 9094702F24
Customer Questions & Expert Answers (3)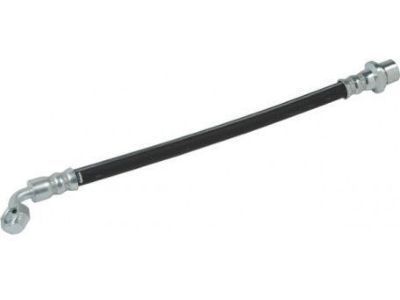
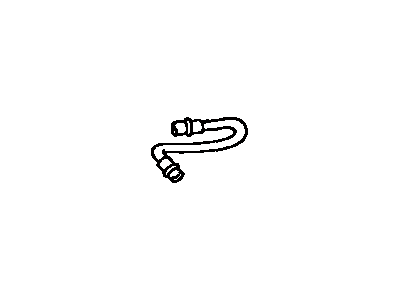
- Part DescriptionHose, Flexible(For Rear LH)
- Part Name Code47319F
- Comment(FOR REAR LH)
- PositionRear Driver Side
- Replaces
- ManufacturerToyota
This part fits
2007 Toyota 4Runner
Check another vehicle- The location this part fits: Rear Driver Side
- Production Date: 02/2007-08/2009
- Fitting Vehicle Options: GRN21#, UZN21#
$60.17 MSRP: $84.81
You Save: $24.64 (30%)
Ships in 1-3 Business Days
1
- Related Parts
- Specifications
- Q&A
Product Specifications
Brand Genuine Toyota Part Name Code 47319F Manufacturer Part Number 90947-02F24 Part Description Hose, Flexible(For Rear LH) Other Names Brake Hose, Flex Hose Item Dimensions 7.2 x 6.2 x 1.6 inches Item Weight 0.60 Pounds Position Rear Driver Side Condition New Fitment Type Direct Replacement Replaces 90947-02D32 Manufacturer Toyota SKU 90947-02F24 Warranty This genuine Toyota part is covered by warranty. Shipping & Return Shipping Policy Return Policy Warning: California's Proposition 65Customer Questions & Expert Answers
- Q:I would like to know availability and if it is direct fit replacement. Posted by ToyotaPartsDeal Specialist
- A:You can Select Your Vehicle to check if 90947-02F24 fits your vehicle.Posted by ToyotaPartsDeal Specialist
Installation and Repair Tips- Q:How should flexible hoses and metal brake lines be inspected and replaced on 2003 through 2009 Toyota 4Runner? Posted by Customer
- A:About every six months, with the vehicle raised and securely placed on jackstands, inspect the flexible hoses connecting the steel brake lines to the front and rear brake assemblies for cracks, chafing, leaks, blisters, and other damage, as these are crucial parts of the brake system. A light and mirror will aid in a thorough check, and any defective hose should be replaced with a new one. Begin by cleaning dirt from the hose ends, then disconnect the brake line from the hose fitting, taking care not to bend the frame bracket or line, and use penetrating oil if necessary. Remove the U-clip from the female fitting at the bracket and detach the hose. For rear calipers, disconnect the hose fitting from the caliper, discarding the copper washers and replacing them with new ones when attaching the new brake hose. Pass the female fitting through the frame or bracket, minimizing hose twist, and install the fitting. Secure the U-clip in the female fitting at the frame bracket, then attach the brake line to the hose fitting using a back-up wrench and tighten the tube nut securely. Ensure that suspension or steering components do not contact the hose by having an assistant push down on the vehicle and turn the steering wheel lock-to-lock during inspection. Finally, bleed the brake lines. When replacing brake lines, use the correct parts, avoiding copper tubing, and purchase steel brake lines from a dealer or auto parts store. Prefabricated brake lines with flared ends and installed fittings are available, and if bending is necessary, use a tube bender without crimping or damaging the line. Ensure the new line is well supported in brackets and has adequate clearance from moving or hot components. After installation, check the brake fluid reservoir level and add fluid as needed, then bleed the brake system and test the brakes carefully before returning the vehicle to normal operation.Posted by ToyotaPartsDeal Specialist
- Additional Installation and Repair Tips by AI Expert
- Removal steps 1. Park on level ground, chock wheels, set parking brake, wear safety glasses and gloves. 2. Disconnect the negative battery terminal and tuck the cable away. 3. Support the vehicle with jack stands if underbody access is required; never rely on a jack alone. 4. Relieve system pressure and remove any reservoir cap-do not loosen fittings while the system is pressurized; in most vehicles this means with the engine off and reservoir open. 5. Place a drain pan under the hose and be prepared to catch escaping fluid; have rags handy for spills. 6. Label or mark the hose routing and each fitting location/orientation so the new hose is installed the same way. 7. Remove retaining clamps or brackets that secure the hose, noting their positions. 8. Loosen and disconnect hose fittings using the correct wrenches (flare/line wrenches commonly); cap or plug open lines immediately to limit contamination. 9. Remove the old hose and any associated seals, O-rings, or washers; capture any residual fluid and clean surrounding areas. Installation steps 1. Compare the new hose to the old one for length, fitting type, and orientation; replace O-rings or crush washers with new ones as required. 2. Route the new hose following the original path, avoiding sharp edges, heat sources, and kinks; position clamps where they were originally located. 3. Hand-start fittings to ensure proper thread engagement, then snug them with the proper wrench-do not overtighten. 4. Reinstall any brackets or clamps to secure the hose; ensure there is no contact with moving parts or hot components. 5. Refill the system reservoir with the manufacturer-specified fluid to the correct level. 6. Reconnect the negative battery terminal. 7. Start the engine (or follow the applicable system start procedure) and operate the steering/brake controls slowly to circulate fluid and help purge air. 8. Bleed the hydraulic system according to common practice for that system type until no air is present and fluid level is stable. 9. Inspect all fittings and hose routing for leaks and proper clearance while the system is under normal operating conditions. 10. Lower the vehicle if raised, recheck fluid level, and clean any spilled fluid; dispose of old hydraulic fluid and contaminated materials properly. Repair tip: Use proper flare/line wrenches to avoid rounding fittings, and always install new sealing washers or O-rings when replacing hydraulic hoses.
- Q:
Why choose Toyota Parts Deal
- Dedicated Service
Your complete satisfaction is our #1 goal
- Lowest Prices
Best deals on genuine OE parts from dealerships
- Fast Delivery
Orders are processed and delivered promptly