My Garage
Cart
Make sure this part fits

Toyota 12372-0A020 INSULATOR, Engine Mounting, LH

1992-2004 Toyota 123720A020

Customer Questions & Expert Answers (6)
Toyota 12372-0A020 INSULATOR, Engine Mounting, LH
  • Part Description
    Insulator, Engine Mounting, LH(For Transverse Engine)
  • Part Name Code
    12372A
  • Comment
    (FOR TRANSVERSE ENGINE)
  • Position
    Driver Side
  • Replaces
    12372-20010, 12372-0A010, 12372-62080
  • Manufacturer
    Toyota
Make sure this part fits
$86.72 MSRP: $122.24
You Save: $35.52 (30%)
Ships in 1-2 Business Days
1
ADD TO CART
  • Related Parts
  • Product Specifications
  • Vehicle Fitment
  • Customer Questions & Expert Answers
  • Product Specifications

    BrandGenuine Toyota
    Part Name Code12372A
    Manufacturer Part Number12372-0A020
    Part DescriptionInsulator, Engine Mounting, LH(For Transverse Engine)
    Item Dimensions7.7 x 3.0 x 5.9 inches
    Item Weight2.40 Pounds
    PositionDriver Side
    ConditionNew
    Fitment TypeDirect Replacement
    Replaces12372-20010, 12372-0A010, 12372-62080
    ManufacturerToyota
    SKU12372-0A020
    WarrantyThis genuine Toyota part is guaranteed by Toyota's factory warranty.
    Shipping & ReturnShipping Policy Return Policy
    Warning: California's Proposition 65
  • Vehicle Fitment

    Year Make Model Trim & Engine Important vehicle option details
    1995-2004 Toyota AvalonXL, XLS|6 Cyl 3.0L1MZFE; MCX10L-AEPGKA, MCX10L-AEPGKK, MCX10L-AEPNKA, MCX10L-AEPNKK, MCX10L-AESGKA, MCX10L-AESGKK, MCX10L-AESNKA, MCX10L-AESNKK, MCX20L-AEPGKA, MCX20L-AEPGKK, MCX20L-AEPNKA, MCX20L-AEPNKK, MCX20L-AESGKA, MCX20L-AESNKA
    1992-2001 Toyota CamryCE, DX, LE, SE, XLE|4 Cyl 2.2L, 6 Cyl 3.0L1MZFE, 3VZFE, 5SFE, 5SFE; MCV10L-AEPDKK, 5SFE; MCV10L-CCPNKA, 5SFE; MCV20L-CEMDKA, 5SFNE; MCV20L-AEPDKK, MCV10L-AEPGKA, MCV10L-AEPNKA, MCV10L-AEPNKK, MCV10L-AEPSKA, MCV10L-CCPNKA, MCV10L-CCPNKK, MCV10L-CCPSKA, MCV10L-CEPDKK, MCV10L-CEPGKA, MCV10L-CEPNKA, MCV10L-CEPNKK, MCV10L-CEPSKA, MCV10L-CWPNKA, MCV10L-CWPNKK, MCV20L-AEPGKA, MCV20L-AEPGKK, MCV20L-AEPNKA, MCV20L-CEMNKA, MCV20L-CEPDKK, MCV20L-CEPGKA, MCV20L-CEPGKK, MCV20L-CEPNKA, MCV20L-CEPNKK, SXV10L-AEMDKA, SXV10L-AEMDKK, SXV10L-AEMNKK, SXV10L-AEPDKA, SXV10L-AEPDKK, SXV10L-AEPGKA, SXV10L-AEPNKA, SXV10L-AEPNKK, SXV10L-CCMDKA, SXV10L-CCMDKK, SXV10L-CCMNKK, SXV10L-CCPDKA, SXV10L-CCPDKK, SXV10L-CCPNKA, SXV10L-CCPNKK, SXV10L-CEMDKA, SXV10L-CEMDKK, SXV10L-CEMNKK, SXV10L-CEPDKA, SXV10L-CEPDKK, SXV10L-CEPGKA, SXV10L-CEPNKA, SXV10L-CEPNKK, SXV10L-CWMDKK, SXV10L-CWPDKA, SXV10L-CWPDKK, SXV10L-CWPNKA, SXV10L-CWPNKK, SXV20L-AEMDKK, SXV20L-AEPDKK, SXV20L-AEPGKA, SXV20L-AEPNKA, SXV20L-AEPNKK, SXV20L-CEMDKA, SXV20L-CEMDKK, SXV20L-CEMNKK, SXV20L-CEPDKA, SXV20L-CEPDKK, SXV20L-CEPGKA, SXV20L-CEPNKA, SXV20L-CEPNKK, SXV23L-AEPNCA, VCV10L-AEMNKK, VCV10L-AEMSKA, VCV10L-AEPDKA, VCV10L-AEPDKK, VCV10L-AEPGKA, VCV10L-AEPNKA, VCV10L-AEPNKK, VCV10L-AEPSKA, VCV10L-CEMSKA, VCV10L-CEPDKA, VCV10L-CEPGKA, VCV10L-CEPNKA, VCV10L-CEPSKA, VCV10L-CWPNKA, VCV10L-CWPNKK
    1998-2003 Toyota SiennaCE, LE|6 Cyl 3.0L1MZFE; MCL10L-GFSDKA, MCL10L-GFSDKK, MCL10L-GFSGKA, MCL10L-GFSGKK, MCL10L-PFSDKA, MCL10L-PFSDKK, MCL10L-PFSGKA, MCL10L-PFSGKK, MCL10L-SESDKA, MCL10L-SESDKK
    1999-2003 Toyota Solara4 Cyl 2.2L, 4 Cyl 2.4L, 6 Cyl 3.0L1MZFE, 2AZFE, 5SFE; ACV20L-GCMNKA, ACV20L-GCPNKA, ACV20L-GCPNKK, ACV20L-GKPNKA, MCV20L-GCMNKA, MCV20L-GCMNKK, MCV20L-GCPNKA, MCV20L-GCPNKK, MCV20L-GKPNKA, MCV20L-GKPNKK, SXV20L-GCMNKA, SXV20L-GCPNKA, SXV20L-GCPNKK, SXV20L-GKPNKA
  • Customer Questions & Expert Answers

    Q:
    Does it fit my car? Posted by ToyotaPartsDeal Specialist
    A:
    You can Select Your Vehicle to check if 12372-0A020 fits your vehicle.
    Posted by ToyotaPartsDeal Specialist
    Q:
    How to check and replace Engine Mount in 3.5L V6 engine on Toyota Sienna? Posted by Customer
    A:
    Engine mounts hardly demand service intervention most of the time; however, damaged or worn down engine mounts should be replaced as soon as possible so as not to increase the load on driveline components that may result in either damage or wear. During the check the engine has to be raised a little to put minimal weight on the mounts, so they can be heard and checked for leakage. Lift the car and support it on safe jack stands and center a jack beneath the engine oil pan and put a large wood block between the jack head and oil pan in a manner that does not place the wood block under the drain plug, then lift the engine off the hangers just enough to relieve pressure off the mounts but not the wood block. Look for cracks or hardness or delamination of the rubber type and try to see if relative movement is possible between the mount plates and the engine or frame with a large screwdriver or pry bar. If such movement is observed ensure that you lower the engine and then tighten the mount fasteners. To remove a mount, remove the cable clamp from the end of the negative terminal of the battery and elevate the car on jackstands if not already standing on them; then, raise the engine as well. Take out the bolts, lift the engine and unbolt the mount by using the engine lift or floor jack and wedging a wooden plank under the oil pan. When replacing a single mount, and constructing the equipment to be a pair of mounts only, first loosen the mount-to-engine bracket nut on the other mount to enable arranged elevation of the engine for mount extraction. Analyzing the process of installation, it is its reverse with the moment of applying the non-hardening thread locking compound on the mount bolts/nuts and check the tightened condition of the same.
    Posted by ToyotaPartsDeal Specialist
    Q:
    How to check and replace Engine Mount in 3.0L and 3.3L V6 engine on Toyota Sienna? Posted by Customer
    A:
    Engine mounts seldom require attention, but broken or deteriorated mounts should be replaced immediately to prevent damage or wear on driveline components. During the check, the engine must be raised slightly to remove the weight from the mounts. Raise the vehicle and support it securely on jackstands, then position a jack under the engine oil pan with a large block of wood between the jack head and the oil pan. Carefully raise the engine just enough to take the weight off the mounts, avoiding positioning the wood block under the drain plug. Inspect the mounts for cracked, hardened rubber or separation from the metal plates, noting that the rubber may split down the center. Check for relative movement between the mount plates and the engine or frame using a large screwdriver or pry bar; if movement is noted, lower the engine and tighten the mount fasteners. Apply rubber preservative to the mounts to slow deterioration. To replace the mounts, disconnect the negative battery cable and raise the vehicle securely on jackstands if not already done. For the right engine mount, remove the two stays mounted on either side of the bracket on the engine, then remove the mount-to-bracket nuts and detach the mount. The rear mount bracket cradles the insulator, retained by a through-bolt to the chassis bracket; remove the through-bolt and the insulator bolts to take out the rear engine mount. For the front engine mount, remove the nut holding the insulator to the engine bracket, followed by the three bolts securing the insulator to the chassis. Additionally, there is a shock-absorbing mount between the engine and chassis, to the left of the conventional front engine mount; remove the through bolt connecting the mount to the suspension subframe, then the nut and bushing at the top of the shock absorber, and detach the shock from the engine bracket. Installation follows the reverse order of removal, using thread locking compound on the mount bolts and nuts, ensuring they are tightened securely.
    Posted by ToyotaPartsDeal Specialist
    Q:
    What are the steps involved in removing engine mounts, specifically the right, rear, and front engine mounts for the 1999 Toyota Avalon? Posted by Customer
    A:
    Remove the through-bolt and mount fasteners for each location. On the rear mount, remove chassis plugs to access bolts.
    Posted by ToyotaPartsDeal Specialist
    See expert answers on similar Engine Mount
    Q:
    How do you remove the rear mount in the 2001 Toyota Solara? Posted by Customer
    A:
    To remove the rear mount in V6 models, you need to take out the through-bolt at the rear mount, raise the engine, remove the nuts from below, and remove the insulator.
    Posted by ToyotaPartsDeal Specialist
    See expert answers on similar Engine Mount
    Q:
    How does the process for transaxle mount replacement compare to engine mount replacement for the 2001 Toyota Solara? Posted by Customer
    A:
    For transaxle mount replacement, you can follow a similar procedure to engine mount replacement. The key steps involve supporting the transaxle and removing and installing the transaxle mount using appropriate fasteners and thread locking compound.
    Posted by ToyotaPartsDeal Specialist
    See expert answers on similar Engine Mount
    If you have any questions about this product, please don't hesitate to ask us. We will be happy to help you!

Genuine Toyota Part 12372-0A020, the Right Choice

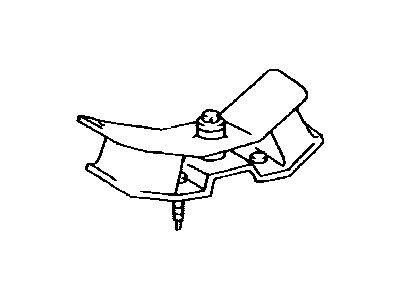
Get the reliability of purchasing Toyota part # 12372-0A020 INSULATOR, Engine Mounting, LH. It is also referred to as Engine Mount. The first option should always be to use OEM parts. Toyota manufactures these components with high quality material and rigorously tested with high reliability and durability. This part fits 1995-2004 Avalon, 1992-2001 Camry, 1998-2003 Sienna, 1999-2003 Solara.

ToyotaPartsDeal.com is a leading supplier of genuine Toyota parts and accessories, such as 123720A020 INSULATOR, Engine Mounting, LH. In need of OEM Toyota parts? We offer a wide selection of genuine parts available that are competitively priced and trusted across the market. All parts are warranted by the manufacturer. Combine that with our simple return policy and fast delivery service and your shopping experience will be stress-free and dependable. For detailed Toyota parts information, click here.

Why choose Toyota Parts Deal

  • Dedicated Service

    Your complete satisfaction is our #1 goal

  • Lowest Prices

    Best deals on genuine OE parts from dealerships

  • Fast Delivery

    Orders are processed and delivered promptly