

My Garage
My Account
Cart
This part fits
1999 Toyota Land Cruiser
Check another vehicle- The location this part fits: Driver Side
- Production Date: 01/1998-08/2002
- Fitting Vehicle Options: UZJ100
Toyota 43202-60020 Steering Knuckle Left Hand
1998-2007 Toyota Land Cruiser 4320260020
Customer Questions & Expert Answers (2)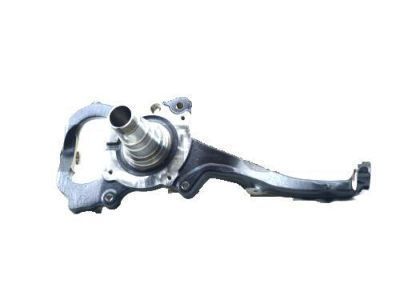
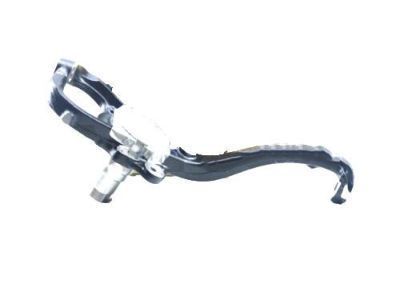
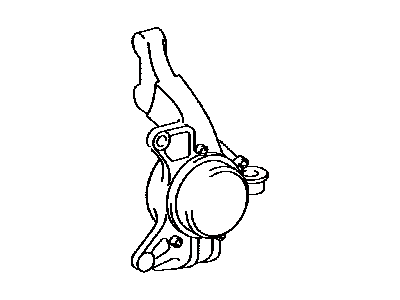
- Part DescriptionKnuckle, Steering, LH
- Part Name Code43212
- PositionDriver Side
- ManufacturerToyota
This part fits
1999 Toyota Land Cruiser
Check another vehicle- The location this part fits: Driver Side
- Production Date: 01/1998-08/2002
- Fitting Vehicle Options: UZJ100
$756.17 MSRP: $1129.07
You Save: $372.90 (34%)
Ships in 1-3 Business Days
1
- Related Parts
- Specifications
- Q&A
Product Specifications
Brand Genuine Toyota Part Name Code 43212 Manufacturer Part Number 43202-60020 Part Description Knuckle, Steering, LH Other Names Knuckle Item Dimensions 17.9 x 10.9 x 7.6 inches Item Weight 24.00 Pounds Position Driver Side Condition New Fitment Type Direct Replacement Manufacturer Toyota SKU 43202-60020 Warranty This genuine Toyota part is covered by warranty. Shipping & Return Shipping Policy Return Policy Warning: California's Proposition 65Customer Questions & Expert Answers
- Q:Is the above part number correct or is there another correct number for my car? Posted by ToyotaPartsDeal Specialist
- A:You can Select Your Vehicle to check if 43202-60020 fits your vehicle.Posted by ToyotaPartsDeal Specialist
- Installation and Repair Tips by AI Expert
- Removal: 1. Park on level ground, chock opposite wheels, set the parking brake, lift the vehicle and support securely on jack stands; remove the wheel. 2. Disconnect the negative battery terminal and isolate the battery before touching any electrical connectors. 3. Locate and disconnect any electrical connectors attached to the knuckle assembly (ABS sensor, wheel-speed sensor, etc.), label or note their routing, and secure wiring out of the way. 4. Remove the brake caliper and its mounting bracket as needed and support the caliper so the hose is not under tension; do not let it hang by the brake hose. 5. Remove the brake rotor if required to access knuckle fasteners or hub components. 6. Detach any steering/suspension links commonly attached to the knuckle (tie-rod end, sway bar link) using the proper puller or separator; support the steering rack/arm to prevent over-travel. 7. Separate the upper or lower ball joint or control arm studs from the knuckle using appropriate tools; support the hub/knuckle to prevent sudden drops. 8. Remove the fasteners that join the knuckle to the strut, spindle, or hub assembly (design varies); retain hardware separately and note orientation. 9. Remove the knuckle assembly from the vehicle, taking care with the wheel bearing/hub - some designs require the hub or bearing to be removed first. 10. Inspect mating surfaces, fasteners, wheel bearing condition, and sensor rings while the knuckle is off. Installation: 1. Compare the replacement knuckle to the removed unit and transfer any brackets, shields, sensors, or bearings per the design before installation. 2. Position and support the knuckle, align it with the hub/strut and control-arm/ball-joint locations, and start fasteners by hand where possible. 3. Reconnect and seat ball joints or control arm studs into the knuckle; install tie-rod end and other steering links, using new cotter pins or locking hardware where commonly required. 4. Reinstall the hub/bearing and rotor if removed, and fit the brake rotor back onto the hub. 5. Reinstall the brake caliper and mounting bracket, ensuring pads are properly seated and any brake hardware is installed. 6. Reconnect any electrical connectors (ABS/wheel-speed sensors) and secure wiring to original routing so it is not pinched or strained. 7. Lower the vehicle to the ground before final tightening where required by the vehicle's design, then tighten all fasteners to factory specifications (consult the service manual for correct values). 8. Reconnect the negative battery terminal. 9. Pump the brake pedal to restore firm pedal feel before moving the vehicle and verify ABS and related warning lights are off. 10. Perform a careful test drive to check steering, braking, and suspension behavior, and have a professional wheel alignment performed as this commonly changes when the knuckle is replaced. Repair tip: use penetrating oil on corroded fasteners, support components before separating joints, avoid hammering sensor tone rings, and replace damaged or single-use hardware (cotter pins, castle nuts) rather than reusing them.
- Q:
Why choose Toyota Parts Deal
- Dedicated Service
Your complete satisfaction is our #1 goal
- Lowest Prices
Best deals on genuine OE parts from dealerships
- Fast Delivery
Orders are processed and delivered promptly