My Garage
Cart
Make sure this part fits

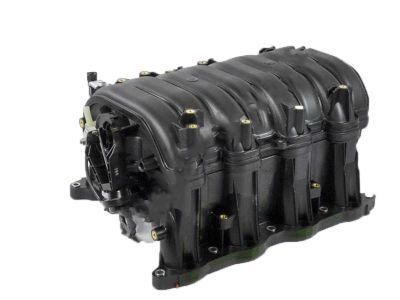
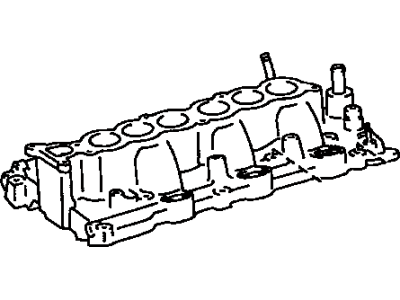
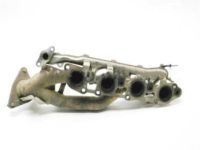
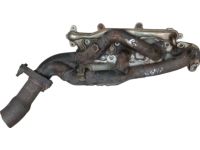
Toyota 17120-50020 Manifold, Intake

2004-2010 Toyota 1712050020

Customer Questions & Expert Answers (5)
Toyota 17120-50020 Manifold, Intake
  • Part Description
    Manifold, Intake
  • Part Name Code
    17111
  • Replaces
    17120-50010, 17120-50011
  • Manufacturer
    Toyota
Make sure this part fits
$1153.61 MSRP: $1698.10
You Save: $544.49 (33%)
Ships in 1-3 Business Days
1
ADD TO CART
  • Related Parts
  • Product Specifications
  • Vehicle Fitment
  • Customer Questions & Expert Answers
  • Product Specifications

    BrandGenuine Toyota
    Part Name Code17111
    Manufacturer Part Number17120-50020
    Part DescriptionManifold, Intake
    Other NamesIntake Manifold
    Item Dimensions17.8 x 14.2 x 8.1 inches
    Item Weight24.50 Pounds
    ConditionNew
    Fitment TypeDirect Replacement
    Replaces17120-50010, 17120-50011
    ManufacturerToyota
    SKU17120-50020
    WarrantyThis genuine Toyota part is guaranteed by Toyota's factory warranty.
    Shipping & ReturnShipping Policy Return Policy
    Warning: California's Proposition 65
  • Vehicle Fitment

    Year Make Model Trim & Engine Important vehicle option details
    2004-2009 Toyota 4RunnerLimited, SR5|6 Cyl 4.0L, 8 Cyl 4.7L1GRFE, 2UZFE; GRN210L-GKAGKA, GRN210L-GKAZKA, GRN210L-GKPGKA, GRN210L-GKPZKA, GRN215L-GKAGKA, GRN215L-GKAZKA, GRN215L-GKPGKA, GRN215L-GKPZKA, UZN210L-GKAGKA, UZN210L-GKAZKA, UZN215L-GKAGKA, UZN215L-GKAZKA
    2005-2007 Toyota Land Cruiser8 Cyl 4.7L2UZFE; UZJ100L-GNAEKA
    2004-2010 Toyota SequoiaLimited, Platinum, SR5|8 Cyl 4.6L, 8 Cyl 4.7L, 8 Cyl 5.7L1URFE, 2UZFE, 2UZFE; UCK35L-GKBLKA, 3URFBE, 3URFE; UCK35L-GKBLKA, UCK35L-GKBSKA, UCK35L-GKSLKA, UCK35L-GKSSKA, UCK45L-GKBLKA, UCK45L-GKBSKA, UCK45L-GKSLKA, UCK45L-GKSSKA, UCK60L-GKALKA, UCK60L-GKASKA, UCK65L-GKALKA, UCK65L-GKASKA, UPK60L-GKTLKA, UPK60L-GKTSKA, UPK65L-GKTLKA, UPK65L-GKTSKA, USK60L-GKTLKA, USK60L-GKTSKA, USK60L-GKTZKA, USK65L-GKTLGA, USK65L-GKTLKA, USK65L-GKTSGA, USK65L-GKTSKA, USK65L-GKTZGA, USK65L-GKTZKA
    2004-2010 Toyota TundraDLX, Limited, SR5|6 Cyl 3.4L, 6 Cyl 4.0L, 8 Cyl 4.6L, 8 Cyl 4.7L, 8 Cyl 5.7L1GRFE, 1URFE, 2UZFE, 3URFBE, 3URFE; GSK30L-ARBSKA, 5VZFE; GSK30L-ARBSKA, GSK30L-ARFSKA, GSK30L-TRBDKA, GSK30L-TRBDKK, GSK30L-TRFDKA, GSK50L-TRADKA, GSK51L-CRASKA, GSK51L-THADKA, UCK30L-ARBLKA, UCK30L-ARBSKA, UCK30L-ARBSKK, UCK30L-ARSLKA, UCK30L-ARSSKA, UCK30L-ARSSKK, UCK30L-ASBLKA, UCK30L-ASBSKA, UCK30L-ASSLKA, UCK30L-ASSSKA, UCK30L-TRBDKA, UCK31L-PRBLKA, UCK31L-PRBSKA, UCK31L-PRBSKK, UCK31L-PRSLKA, UCK31L-PRSSKA, UCK31L-PRSSKK, UCK40L-ARBLKA, UCK40L-ARBLKK, UCK40L-ARBSKA, UCK40L-ARBSKK, UCK40L-ARSLKA, UCK40L-ARSLKK, UCK40L-ARSSKA, UCK40L-ARSSKK, UCK40L-ASBLKA, UCK40L-ASBSKA, UCK40L-ASSLKA, UCK40L-ASSSKA, UCK40L-TRBDKA, UCK40L-TRBDKK, UCK40L-TRSDKK, UCK40L-TRSSKA, UCK41L-PRBLKA, UCK41L-PRBLKK, UCK41L-PRBSKA, UCK41L-PRBSKK, UCK41L-PRSLKA, UCK41L-PRSLKK, UCK41L-PRSSKA, UCK41L-PRSSKK, UCK50L-TRADKA, UCK51L-CRALKA, UCK51L-CRASKA, UCK51L-PSALKA, UCK51L-PSASKA, UCK51L-THADKA, UCK52L-CHASKA, UCK55L-TRADKA, UCK56L-CRALKA, UCK56L-CRASKA, UCK56L-PSALKA, UCK56L-PSASKA, UCK56L-THADKA, UCK57L-CHASKA, UPK50L-TRTDKA, UPK51L-CRTLKA, UPK51L-CRTSKA, UPK51L-PSTLKA, UPK51L-PSTSKA, UPK51L-THTDKA, UPK52L-CHTSKA, UPK55L-TRTDKA, UPK56L-CRTLKA, UPK56L-CRTSKA, UPK56L-PSTLKA, UPK56L-PSTSKA, UPK56L-THTDKA, UPK57L-CHTSKA, USK50L-TRTDKA, USK51L-CRTLKA, USK51L-CRTSKA, USK51L-PSTLKA, USK51L-PSTSKA, USK51L-THTDKA, USK52L-CHTSKA, USK55L-TRTDGA, USK55L-TRTDKA, USK56L-CRTLGA, USK56L-CRTLKA, USK56L-CRTSGA, USK56L-CRTSKA, USK56L-PSTLGA, USK56L-PSTLKA, USK56L-PSTSGA, USK56L-PSTSKA, USK56L-THTDGA, USK56L-THTDKA, USK57L-CHTSGA, USK57L-CHTSKA, VCK30L-ARMSKA, VCK30L-ARSSKA, VCK30L-TRMDKA, VCK30L-TRSDKA, VCK30L-TRSDKK, VCK40L-ARMSKA, VCK40L-ARSSKA
  • Customer Questions & Expert Answers

    Q:
    Does it fit my car? Posted by ToyotaPartsDeal Specialist
    A:
    You can Select Your Vehicle to check if 17120-50020 fits your vehicle.
    Posted by ToyotaPartsDeal Specialist
    Q:
    How to remove and install the upper and lower intake manifolds in V6 engine on 2003 through 2009 Toyota 4Runner? Posted by Customer
    A:
    The upper intake manifold, otherwise known as the Intake Air Surge Tank as used by Toyota, needs the nut on the negative terminals of the battery to be loosened before a cover of the engine, the air intake duct and the air filter housing can be removed. This is followed by coolant hoses from the throttle body where one needs to be, clamped off and disconnected from the nipple, which should be repeated on the other side of the car as well; the EVAP system fuel vapor feed hose should be disconnected along with the ventilation hose and throttle body wiring. Conventional connectors on the Vacuum Switching Valve have to be disconnected, and the bolts of the throttle body bracket needs to be unscrewed so that the bracket is removed. The baffle plate located ahead of the engine coupled with the two intake manifold support brackets referred to as surge tank stays have to be removed together with the bolts and nuts under the intake manifold to unbolster the upper intake manifold. The condition of the upper intake manifold gasket must be ascertained and if it is to be okay it can be put back for use. That is, installation occurs in the reverse sequence so that the mounting bolts, as well as nuts, are tightened to the desired torque. As for the lower intake manifold which Toyota refers to as Intake manifold, the removal of the upper intake manifold is a Sure necessity. When changing the lower intake manifold, the fuel rail is to be removed; whereas, if replacing gaskets only, unbolting the fuel supply/reject connections is enough. The lower intake manifold bolts are then removed to take out the manifold and old gaskets should be thrown away and the two mating surfaces ought to be cleaned well. New gaskets must be used during installation, and the lower INTAKE MANIFOLD BOLTS should be tightened to the specified torque.
    Posted by ToyotaPartsDeal Specialist
    Q:
    How to remove and install the upper and lower intake manifolds in V8 engine on 2003 through 2009 Toyota 4Runner? Posted by Customer
    A:
    To remove the lower intake manifold, first relieve the fuel system pressure. Disconnect the cable from the negative battery terminal and remove the throttle body. Clearly label and detach all remaining wires, hoses, and brackets attached to the upper intake manifold. Remove the mounting bolt for the EVAP vacuum switching valve and separate it from the upper intake manifold. Evenly loosen the intake manifold fasteners, making several passes to avoid warping, then remove the mounting nuts and bolts to detach the upper intake manifold from the lower intake manifold, taking care not to pry between the gasket mating surfaces if it is stuck. When removing the upper intake manifold, note that it can remain attached to the lower manifold if access to other components is needed, while the throttle body can also stay attached if the coolant hoses are clamped off and disconnected. Next, remove the fuel rail and injectors, then label and detach all remaining wires, hoses, and brackets attached to the lower intake manifold, coolant outlets, and rear coolant bypass casting. Remove the mounting nuts and bolts to detach the intake manifold from the cylinder heads, starting with the outer bolts and working inward, ensuring even separation to avoid damage. For installation, remove all traces of old gasket material and sealant from the upper and lower intake manifolds and cylinder heads, cleaning the mating surfaces with brake system cleaner while plugging the cylinder head ports with rags. Install new gaskets, position the lower intake manifold on the engine, and install the fasteners, tightening them in three or four equal steps from the center outwards to avoid warping. Install a new gasket and the upper intake manifold onto the lower intake manifold, then install and tighten the nuts and bolts in the same manner. Finally, install the remaining parts in reverse order of removal, check the coolant level, and run the engine to check for fuel, vacuum, and coolant leaks around the throttle body hoses.
    Posted by ToyotaPartsDeal Specialist
    Q:
    How to remove and install the upper and lower intake manifolds in V6 engine on Toyota Sequoia? Posted by Customer
    A:
    The upper intake manifold, referred to by Toyota as the intake air surge tank, requires the disconnection of the negative battery terminal, removal of the engine cover, and the air intake duct along with the air filter housing. Next, coolant hoses from the throttle body should be clamped off and disconnected, followed by the disconnection of the EVAP system fuel vapor feed hose, ventilation hose, and throttle body wiring. Two Vacuum Switching Valve electrical connectors need to be disconnected, and the throttle body bracket bolts should be removed to take off the bracket. The baffle plate must be removed, along with both bolts from each intake manifold support bracket, which Toyota calls surge tank stays, before removing the two intake manifold mounting nuts and four mounting bolts to detach the upper intake manifold. The condition of the upper intake manifold gasket should be checked, replacing it if necessary, and installation follows the reverse order of removal, ensuring that the mounting bolts and nuts are tightened to the specified torque. For the lower intake manifold, known as the intake manifold by Toyota, the upper intake manifold must first be removed. If replacing the lower intake manifold, the fuel rail should be removed; however, if only replacing gaskets, disconnecting the fuel supply and return line connections is sufficient. The lower intake manifold bolts should be removed to detach the manifold, and old gaskets must be discarded while cleaning the mating surfaces thoroughly. Installation is again the reverse of removal, using new gaskets and ensuring the bolts are tightened to the specified torque.
    Posted by ToyotaPartsDeal Specialist
    Q:
    How to remove and install the intake manifold in V8 engine on Toyota Tundra? Posted by Customer
    A:
    Regarding the 2UZ-FE engines, it is recommended to start with the following operations, turning on the ignition and relieving the fuel system pressure and disconnecting the cable of the negative terminal of the battery. Depending on your vehicle, the upper intake manifold comes off after the throttle body is detached, and after this, label and disconnect any wires, hoses and brackets that are connected to the throttle body. Set the mounting bolt for the EVAP vacuum switching valve aside, then loosen the intake manifold fasteners by turning them on and off around evenly and at last, disconnect the upper intake manifold with the lower intake manifold, but if doing so, do not apply any force between gasket surfaces. If getting to the other parts, the upper intake manifold does not have to be removed from the lower one, and the throttle body does not have to be disconnected as well if the coolant hoses are clamped off. Subsequently, disconnect all the wires, hoses and brackets from the lower intake manifold, the fuel rail and injectors have to be removed and identified, and the lower intake manifold has to be unbolted from the cylinder heads, starting from outermost bolts to avoid damages. For 1UR-FE, 3UR-FE, and 3UR-FBE engines the following components have to be detached, the engine cover, the windshield wiper motor and the linkage, cowl panel bolts, and the cooling system should be drained; besides, the air intake duct and the throttle body should be removed. Bolt, label, and remove all the wires, hoses, and brackets from the intake manifold, all water bypass hoses, and fuel rail insulators also need to be removed. Remove the intake manifold from the cylinder heads in the same manner as the bolts; outer nuts first before the inner ones. For the installation on 2UZ-FE engines, first, remove all the old gasket materials from the intake manifolds and cylinder heads, and then new gaskets must be put in their place, put the lower intake manifold into its place correctly and finally, tighten the fasteners in m stages to the desired torque of 11 N-m. Place a new gasket and the upper intake manifold with torque in same way, then put the rest of the parts back in the reverse way. Moreover, look for the coolant level, start the engine and look for any sign of leakage. Regarding 1UR-FE, 3UR-FE, and 3UR-FBE engines, remove old gasket pieces, put the new gaskets in their place, set the intake manifold, fasten its bolts with lsd tightening indications, and reinstall all the remaining parts and the liquid to fill in the cooling system and check for leakage.
    Posted by ToyotaPartsDeal Specialist
    If you have any questions about this product, please don't hesitate to ask us. We will be happy to help you!

Genuine Toyota Part 17120-50020, the Right Choice

Get the reliability of purchasing Toyota part # 17120-50020 Manifold, Intake. It is also referred to as Intake Manifold. The first option should always be to use OEM parts. Toyota manufactures these components with high quality material and rigorously tested with high reliability and durability. This part fits 2004-2009 4Runner, 2005-2007 Land Cruiser, 2004-2010 Sequoia, 2004-2010 Tundra.

ToyotaPartsDeal.com is a leading supplier of genuine Toyota parts and accessories, such as 1712050020 Manifold, Intake. In need of OEM Toyota parts? We offer a wide selection of genuine parts available that are competitively priced and trusted across the market. All parts are warranted by the manufacturer. Combine that with our simple return policy and fast delivery service and your shopping experience will be stress-free and dependable. For detailed Toyota parts information, click here.

Why choose Toyota Parts Deal

  • Dedicated Service

    Your complete satisfaction is our #1 goal

  • Lowest Prices

    Best deals on genuine OE parts from dealerships

  • Fast Delivery

    Orders are processed and delivered promptly