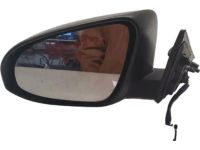
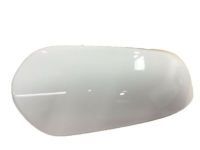
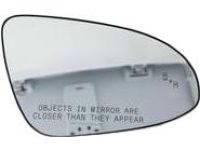
My Garage
Cart
Make sure this part fits

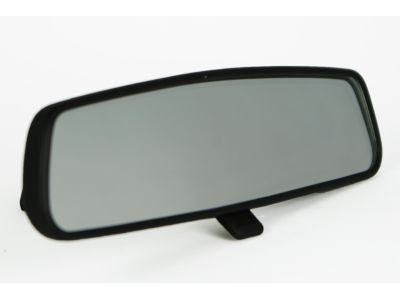
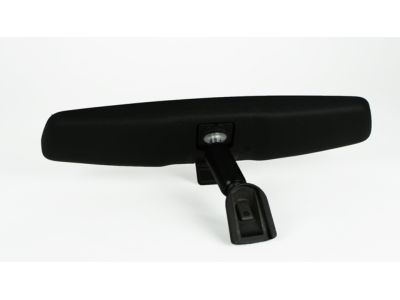
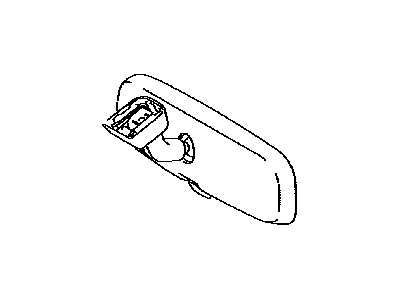
Toyota 87810-06080 Inner Rear View Mirror Assembly

2007-2023 Toyota 8781006080

Customer Questions & Expert Answers (8)
Toyota 87810-06080 Inner Rear View Mirror Assembly
  • Part Description
    Mirror Assy, Inner Rear View
  • Part Name Code
    87810
  • Position
    Rear Inner
  • Manufacturer
    Toyota
Make sure this part fits
$77.68 MSRP: $109.50
You Save: $31.82 (30%)
Ships in 1-2 Business Days
1
ADD TO CART
  • Related Parts
  • Product Specifications
  • Vehicle Fitment
  • Customer Questions & Expert Answers
  • Product Specifications

    BrandGenuine Toyota
    Part Name Code87810
    Manufacturer Part Number87810-06080
    Part DescriptionMirror Assy, Inner Rear View
    Other NamesMirror Assembly, Mirror Inside
    Item Dimensions15.8 x 12.1 x 2.9 inches
    Item Weight2.00 Pounds
    PositionRear Inner
    ConditionNew
    Fitment TypeDirect Replacement
    ManufacturerToyota
    SKU87810-06080
    WarrantyThis genuine Toyota part is guaranteed by Toyota's factory warranty.
    Shipping & ReturnShipping Policy Return Policy
    Warning: California's Proposition 65
  • Vehicle Fitment

    Year Make Model Trim & Engine Important vehicle option details
    2013-2018 Toyota AvalonLimited, XLE, XLE Premium, XLE Touring Or Touring|4 Cyl 2.5L, 6 Cyl 3.5L2ARFXE, 2GRFE; AVX40L-AEXGBA, AVX40L-AEXPBA, GSX40L-AETGKA, GSX40L-AETPKA, GSX40L-AETQKA
    2007-2017 Toyota CamryLE, N, SE, XLE, XSE|4 Cyl 2.4L, 4 Cyl 2.5L, 6 Cyl 3.5L2ARFE, 2ARFXE, 2AZFE, 2AZFXE, 2GRFE; ACV40L-CEAGKA, ACV40L-CEANKA, ACV40L-CEASKA, ACV40L-CEMNKA, ACV40L-CEMSKA, AHV40L-CEXGBA, ASV40L-CEFNKA, ASV40L-CEFSKA, ASV40L-CETGKA, ASV40L-CETNKA, ASV40L-CETSKA, ASV50L-CETEKA, ASV50L-CETGKA, ASV50L-CETNKA, ASV50L-CETPKA, ASV50L-CETSKA, AVV50L-CEXGBA, AVV50L-CEXNBA, AVV50L-CEXSBA, GSV40L-CETGKA, GSV40L-CETNKA, GSV40L-CETSKA, GSV50L-CETGKA, GSV50L-CETSKA
    2009-2017 Toyota CorollaCE, ECO, ECOSW, LE, S, STD, XRS|4 Cyl 1.8L, 4 Cyl 2.4L2AZFE, 2ZRFAE, 2ZRFE; AZE141L-DEASKA, AZE141L-DEASKK, AZE141L-DEMSKA, AZE141L-DEMSKK, ZRE142L-AEPDKA, ZRE142L-AEPNKA, ZRE142L-DEMDKA, ZRE142L-DEMDKK, ZRE142L-DEMSKA, ZRE142L-DEMSKK, ZRE142L-DEPDKA, ZRE142L-DEPDKK, ZRE142L-DEPNKA, ZRE142L-DEPNKK, ZRE142L-DEPSKA, ZRE142L-DEPSKK, ZRE172L-DEFDKA, ZRE172L-DEFDKK, ZRE172L-DEFSKA, ZRE172L-DEFSKK, ZRE172L-DEPDKA, ZRE172L-DEPDKK, ZRE172L-DEXDKA, ZRE172L-DEXDKK, ZRE172L-DEXNKA, ZRE172L-DEXNKK, ZRE172L-DEXPPA, ZRE172L-DEXPPK, ZRE172L-DEXQPA, ZRE172L-DEXQPK, ZRE172L-DEXSKA, ZRE172L-DEXSKK
    2009-2014 Toyota Matrix4 Cyl 1.8L, 4 Cyl 2.4L2AZFE, 2ZRFE; AZE141L-DHANKA, AZE141L-DHANKK, AZE141L-DHMNKA, AZE141L-DHMNKK, AZE144L-DHPNKA, AZE144L-DHPNKK, AZE146L-DHASKA, AZE146L-DHASKK, AZE146L-DHMSKA, AZE146L-DHMSKK, ZRE142L-DHMDKA, ZRE142L-DHMDKK, ZRE142L-DHPDKA, ZRE142L-DHPDKK
    2009-2016 Toyota RAV4LE, Limited, SE, Sport, STD, XLE|4 Cyl 2.5L, 6 Cyl 3.5L2ARFE, 2GRFE; ASA33L-CNPGKA, ASA33L-CNPGKK, ASA33L-CNPSKA, ASA33L-CNPSKK, ASA33L-CNPXKA, ASA33L-CNPXKK, ASA38L-CNPGKA, ASA38L-CNPGKK, ASA38L-CNPSKA, ASA38L-CNPSKK, ASA38L-CNPXKA, ASA38L-CNPXKK, ASA42L-CNTGKA, ASA42L-CNTGKK, ASA42L-CNTMKA, ASA42L-CNTMKK, ASA42L-CNTSKA, ASA42L-CNTSKK, ASA42L-CNTXKA, ASA42L-CNTXKK, ASA44L-CNTGKA, ASA44L-CNTGKK, ASA44L-CNTMKA, ASA44L-CNTMKK, ASA44L-CNTSKA, ASA44L-CNTSKK, ASA44L-CNTXKA, ASA44L-CNTXKK, GSA33L-CNAGKA, GSA33L-CNAGKK, GSA33L-CNASKA, GSA33L-CNASKK, GSA33L-CNAXKA, GSA33L-CNAXKK, GSA38L-CNAGKA, GSA38L-CNAGKK, GSA38L-CNASKA, GSA38L-CNASKK, GSA38L-CNAXKA, GSA38L-CNAXKK
    2009-2022 Toyota SequoiaLimited, Platinum, SR5|8 Cyl 4.6L, 8 Cyl 4.7L, 8 Cyl 5.7L1URFE, 2UZFE, 3URFBE, 3URFE; UCK60L-GKALKA, UCK60L-GKASKA, UCK65L-GKALKA, UCK65L-GKASKA, UPK60L-GKTLKA, UPK60L-GKTSKA, UPK65L-GKTLKA, UPK65L-GKTSKA, USK60L-GKTLKA, USK60L-GKTSKA, USK60L-GKTZKA, USK65L-GKTLGA, USK65L-GKTLKA, USK65L-GKTSGA, USK65L-GKTSKA, USK65L-GKTZGA, USK65L-GKTZKA
    2008-2018 Toyota SiennaCE, LE, SE, STD, XLE|4 Cyl 2.7L, 6 Cyl 3.5L1ARFE, 2GRFE, 2GRFKS; ASL30L-PFTEKA, ASL30L-PRTEKA, GSL20L-PFADKK, GSL20L-PFAEKA, GSL20L-PFAEKK, GSL20L-PFAQKA, GSL20L-PFAQKK, GSL20L-PRADKK, GSL20L-PRAEKA, GSL20L-PRAEKK, GSL20L-PRAQKA, GSL20L-PRAQKK, GSL23L-SBADKA, GSL23L-SBADKK, GSL25L-PFADKK, GSL25L-PFAEKA, GSL25L-PFAEKK, GSL25L-PFAQKA, GSL25L-PFAQKK, GSL30L-PFTDKA, GSL30L-PFTEKA, GSL30L-PFTQKA, GSL30L-PFZDHA, GSL30L-PFZEHA, GSL30L-PFZQHA, GSL30L-PRTEKA, GSL30L-PRTQKA, GSL30L-PRTSKA, GSL30L-PRZEHA, GSL30L-PRZQHA, GSL30L-PRZSHA, GSL33L-SBTDKA, GSL33L-SBZDHA, GSL33L-SEZDHA, GSL35L-PFTDKA, GSL35L-PFTEKA, GSL35L-PFTQKA, GSL35L-PFZEHA, GSL35L-PFZQHA, GSL35L-PFZSHA
    2011-2023 Toyota TacomaBase, Limited, SR5|4 Cyl 2.7L, 6 Cyl 3.5L, 6 Cyl 4.0L1GRFE, 2GRFKS, 2TRFE; GRN225L-CRFDKA, GRN245L-CRADKA, GRN245L-CRFDKA, GRN245L-PRADKA, GRN245L-PRFDKA, GRN250L-PRADKA, GRN265L-CRADKA, GRN265L-CRFDKA, GRN265L-PRADKA, GRN270L-PRADKA, GRN305L-CRFSHA, GRN305L-CRTSHA, GRN305L-PRFSHA, GRN305L-PRTLHA, GRN305L-PRTSHA, GRN310L-PRTLHA, GRN310L-PRTSHA, GRN325L-CRTSHA, GRN325L-PRTLHA, GRN325L-PRTSHA, GRN330L-PRTLHA, GRN330L-PRTSHA, TRN220L-TRMDKA, TRN220L-TRPDKA, TRN225L-CRMDKA, TRN225L-CRPDKA, TRN225L-PRPDKA, TRN240L-TRMDKA, TRN240L-TRPDKA, TRN245L-CRMDKA, TRN245L-CRMSKA, TRN245L-CRPDKA, TRN245L-CRTSKA, TRN260L-TRMDKA, TRN265L-CRMDKA, TRN265L-CRPDKA, TRN265L-CRTSKA, TRN265L-PRPDKA, TRN265L-PRTSKA
    2009-2021 Toyota TundraLimited, Platinum, SR5|6 Cyl 4.0L, 8 Cyl 4.6L, 8 Cyl 4.7L, 8 Cyl 5.7L1GRFE, 1URFE, 2UZFE, 3URFBE, 3URFE; GSK50L-TRADKA, GSK51L-CRASKA, GSK51L-THADKA, GSK51L-THASKA, UCK50L-TRADKA, UCK51L-CRALKA, UCK51L-CRASKA, UCK51L-PSALKA, UCK51L-PSASKA, UCK51L-THADKA, UCK52L-CHASKA, UCK55L-TRADKA, UCK56L-CRALKA, UCK56L-CRASKA, UCK56L-PSALKA, UCK56L-PSASKA, UCK56L-THADKA, UCK57L-CHASKA, UPK50L-TRTDKA, UPK51L-CRTLKA, UPK51L-CRTSKA, UPK51L-PSTLKA, UPK51L-PSTSKA, UPK51L-THTDKA, UPK52L-CHTSKA, UPK55L-TRTDKA, UPK56L-CRTLKA, UPK56L-CRTSKA, UPK56L-PSTLKA, UPK56L-PSTSKA, UPK56L-THTDKA, UPK57L-CHTSKA, USK50L-TRTDKA, USK51L-CRTLGA, USK51L-CRTLKA, USK51L-CRTSGA, USK51L-CRTSKA, USK51L-PSTLGA, USK51L-PSTLKA, USK51L-PSTSGA, USK51L-PSTSKA, USK51L-PSTZGA, USK51L-PSTZKA, USK51L-THTDKA, USK51L-THTSGA, USK51L-THTSKA, USK52L-CHTSGA, USK52L-CHTSKA, USK55L-TRTDGA, USK55L-TRTDKA, USK56L-CRTLGA, USK56L-CRTLKA, USK56L-CRTSGA, USK56L-CRTSKA, USK56L-PSTLGA, USK56L-PSTLKA, USK56L-PSTSGA, USK56L-PSTSKA, USK56L-PSTZGA, USK56L-PSTZKA, USK56L-THTDGA, USK56L-THTDKA, USK56L-THTSGA, USK56L-THTSKA, USK57L-CHTSGA, USK57L-CHTSKA
    2009-2013 Toyota VenzaN|4 Cyl 2.7L, 6 Cyl 3.5L1ARFE, 2GRFE; AGV10L-AWTGKA, AGV15L-AWTGKA, GGV10L-AWTGKA, GGV15L-AWTGKA
  • Customer Questions & Expert Answers

    Q:
    I just want to confirm I'm purchasing a correct part before placing an order Posted by ToyotaPartsDeal Specialist
    A:
    You can Select Your Vehicle to check if 87810-06080 fits your vehicle.
    Posted by ToyotaPartsDeal Specialist
    Q:
    How to Remove and Install Car Mirrors on 2007 Through 2015 Toyota Avalon? Posted by Customer
    A:
    The process of replacing Avalon outside mirrors starts with removing the interior trim cover and disconnecting electrical connections if necessary then using a socket to remove the three retaining nuts which separates the mirror from the vehicle body. Performing installation follows exactly the opposite steps used for removal. Detach sensor cover clips on the inside mirror before taking off the cover and electrical connector. The Torx screw at the windshield base needs to be taken out to install or remove the mirror. Automotive parts stores sell adhesive kits that enable users to reattach the mount plate through proper use of provided instructions.
    Posted by ToyotaPartsDeal Specialist
    Q:
    How to Remove and Install Car Mirrors on a Toyota Camry? Posted by Customer
    A:
    The process of replacing Camry outside mirrors starts with removing the interior trim cover and disconnecting electrical connections if necessary then using a socket to remove the three retaining nuts which separates the mirror from the vehicle body. Performing installation follows exactly the opposite steps used for removal. Detach sensor cover clips on the inside mirror before taking off the cover and electrical connector. The Torx screw at the windshield base needs to be taken out to install or remove the mirror. Automotive parts stores sell adhesive kits that enable users to reattach the mount plate through proper use of provided instructions.
    Posted by ToyotaPartsDeal Specialist
    Q:
    How to Remove and Install Car Mirrors on a Toyota Sienna? Posted by Customer
    A:
    For power mirror equipped models, begin by removing the door trim panel and the plastic watershield, then take off the access hole cover on 2007 and later models. Disconnect the electrical connector from the mirror if applicable, then remove the three mirror retaining bolts to detach the mirror from the vehicle, ensuring to trace the electrical harness down into the door and disconnect the connector for electric mirrors. Installation follows the reverse order of removal. For inside mirrors on 2006 and earlier models, use a very thin screwdriver or a thick feeler gauge blade to push into the bottom of the mirror mount while pulling up on the inside mirror to release it, then wiggle the mirror upward to remove it. To install, reinsert the spring if it was removed, slide the mirror base onto the mount, and push downward until secured. For 2007 and later models, disconnect the wiring from the mirror if equipped, remove the screw at the base, and slide the mirror upward to remove it, with installation being the reverse of removal. If the mount plate has come off the windshield for any model, adhesive kits are available at auto parts stores to resecure it, following the included instructions.
    Posted by ToyotaPartsDeal Specialist
    Q:
    How to Remove and Install the Outer and Inner Car Mirrors on a Toyota Sequoia? Posted by Customer
    A:
    To fully uninstall the outside mirror, the trim panel for the door must be pulled off first, followed by the removal of the bolts or nuts that hold the mirror to the door of the car and the disconnecting of the electrical connector alongside pulling out of the mirror. The procedure of installation is actually the opposite to the procedure of removal. To remove the outside mirror glass, insert your hand at the top of the mirror near the interior panel and while applying inward pressure, use a plastic wedge to pry the base of the glass from the bottom till the four clips releases. After you have unscrewed and taken off the mirror glass, you should have to detach the heater electrical connectors if there are any. To affix the glass, make sure that the electrical connectors are properly connected, align the clips on the mirror base and on pressing the glass the clips lock in position. For the inside mirror, first, the sensor cover clips should be releases, next the cover(s) should be removed and if there's one then the electrical connector should be disconnected as well. For replacement of mirror or just to uninstall it, unscrew the Torx screw from the base at the windshield and then pop the mirror from the base. If the mount plate has been removed from the windshield, then different adhesive kits can be purchased in auto parts stores, and then the mount plate can be fixed there, strictly following the instructions given to the buyer.
    Posted by ToyotaPartsDeal Specialist
    Q:
    How Do Electric Rear Car Mirrors Operate and What Steps Should Be Taken if They Malfunction on Toyota Sienna? Posted by Customer
    A:
    Most electric rear view mirrors utilize two motors for adjustments, one for vertical movement and another for horizontal movement. The control switch features a selector that directs voltage to either the left or right side mirror. With the ignition ON but the engine OFF, roll down the windows and operate the mirror control switch through all functions for both mirrors, listening for the sound of the electric motors. If the motors are audible but the mirror glass remains stationary, there may be an issue with the drive mechanism, necessitating removal and disassembly of the mirror to identify the problem. If there is no sound from the mirrors, check the fuse. If the fuse is intact, remove the mirror control switch from the dashboard and check its continuity. After reconnecting the switch, locate the wire leading from the switch to ground; while keeping the switch connected, use a jumper wire to connect this wire to ground. If the mirror operates normally, repair the faulty ground connection. If the mirror remains unresponsive, remove it and check for voltage at the wires connected to the mirror while the ignition is ON and the selector switch is set to the appropriate side. Operate the mirror switch in all positions, ensuring there is voltage at one of the switch-to-mirror wires in each position, except the neutral "off" position. If voltage is absent in any position, inspect the circuit between the mirror and control switch for any opens or shorts. If voltage is present, test the mirror off the vehicle using jumper wires, replacing it if it fails this test.
    Posted by ToyotaPartsDeal Specialist
    Q:
    How to Remove and Install the Outer and Inner Car Mirrors on a Toyota Tundra? Posted by Customer
    A:
    To fully uninstall the outside mirror, the trim panel for the door must be pulled off first, followed by the removal of the bolts or nuts that hold the mirror to the door of the car and the disconnecting of the electrical connector alongside pulling out of the mirror. The procedure of installation is actually the opposite to the procedure of removal. To remove the outside mirror glass, insert your hand at the top of the mirror near the interior panel and while applying inward pressure, use a plastic wedge to pry the base of the glass from the bottom till the four clips releases. After you have unscrewed and taken off the mirror glass, you should have to detach the heater electrical connectors if there are any. To affix the glass, make sure that the electrical connectors are properly connected, align the clips on the mirror base and on pressing the glass the clips lock in position. For the inside mirror, first, the sensor cover clips should be releases, next the cover(s) should be removed and if there's one then the electrical connector should be disconnected as well. For replacement of mirror or just to uninstall it, unscrew the Torx screw from the base at the windshield and then pop the mirror from the base. If the mount plate has been removed from the windshield, then different adhesive kits can be purchased in auto parts stores, and then the mount plate can be fixed there, strictly following the instructions given to the buyer.
    Posted by ToyotaPartsDeal Specialist
    Q:
    How do you remove the outside mirrors for the 2014 Toyota RAV4? Posted by Customer
    A:
    1. Pry off the mirror trim cover on the inside of the door. 2. Remove the door trim panel. 3. Disconnect the mirror electrical connector. 4. Remove the three mirror retaining bolts and detach the mirror from the door (for electric mirrors, disconnect the electrical connector). 5. Installation is the reverse of removal.
    Posted by ToyotaPartsDeal Specialist
    See expert answers on similar Car Mirror
    If you have any questions about this product, please don't hesitate to ask us. We will be happy to help you!

Genuine Toyota Part 87810-06080, the Right Choice

To ensure reliability, purchase Toyota part # 87810-06080 Inner Rear View Mirror Assembly. It is sometimes referred to as Toyota Car Mirror. For unrivaled quality, OEM parts are the ultimate choice. These parts are manufactured by Toyota's official factory using top-quality materials and undergo strict testing procedures, ensuring outstanding dependability and long-lasting durability. This part fits 2013-2018 Toyota Avalon, 2007-2017 Toyota Camry, 2008-2018 Toyota Sienna, 2011-2023 Toyota Tacoma.

ToyotaPartsDeal.com is a leading supplier of genuine Toyota parts and accessories such as Toyota 8781006080 Inner Rear View Mirror Assembly. In need of OEM Toyota parts? Look no further than our extensive inventory of genuine Toyota parts, competitively priced to be highly exceptional in the market. They are all manufacturer-warrantied. Add to that, our easy return policy and swift delivery service, and your shopping experience promises to be the great pleasant ever. For detailed Toyota parts information, click here.

Why choose Toyota Parts Deal

  • Dedicated Service

    Your complete satisfaction is our #1 goal

  • Lowest Prices

    Best deals on genuine OE parts from dealerships

  • Fast Delivery

    Orders are processed and delivered promptly