

My Garage
My Account
Cart
This part fits
1997 Toyota 4Runner
Check another vehicle- Production Date: 11/1995-08/2000
- Fitting Vehicle Options: RZN18#, VZN18#
Toyota 42603-35630 Wheel Hub Ornament Sub-Assembly
1995-2002 Toyota 4260335630
Customer Questions & Expert Answers (3)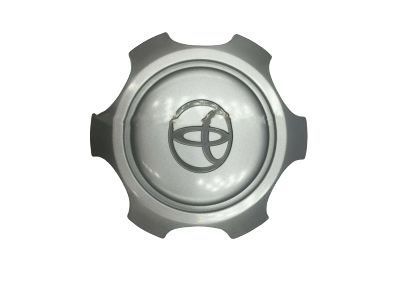
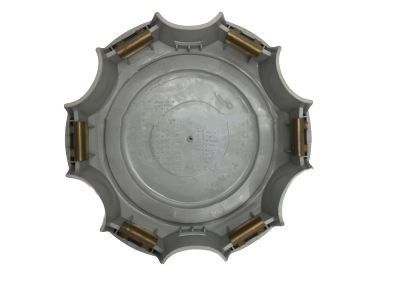
- Part DescriptionOrnament Sub-Assy, Wheel Hub
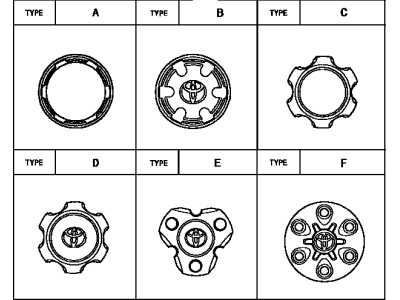
- *ALU,TYPE B:REFER TO ILLUSTRATION
- Part Name Code42603
- PositionRear
- Replaced By
- ManufacturerToyota
- Require Quantity4
- Package Quantity1
This part fits
1997 Toyota 4Runner
Check another vehicle- Production Date: 11/1995-08/2000
- Fitting Vehicle Options: RZN18#, VZN18#
$65.95 MSRP: $92.97
You Save: $27.02 (30%)
Ships in 1-3 Business Days
1
- Related Parts
- Specifications
- Q&A
Product Specifications
Brand Genuine Toyota Part Name Code 42603 Manufacturer Part Number 42603-35630 Part Description Ornament Sub-Assy, Wheel Hub Item Dimensions 2.2 x 6.4 x 6.6 inches Item Weight 0.70 Pounds Position Rear Condition New Fitment Type Direct Replacement Manufacturer Toyota SKU 42603-35630 Warranty This genuine Toyota part is covered by warranty. Shipping & Return Shipping Policy Return Policy Warning: California's Proposition 65Customer Questions & Expert Answers
- Q:Is the part number correct or is there another correct number for my car? Posted by ToyotaPartsDeal Specialist
- A:You can Select Your Vehicle to check if 42603-35630 fits your vehicle.Posted by ToyotaPartsDeal Specialist
- Installation and Repair Tips by AI Expert
- Removal steps 1. Park on a level surface, set the parking brake, and chock a wheel opposite the one you're working on. 2. Gather needed tools: jack and jack stands, lug wrench, plastic trim tool or flat pry tool wrapped in cloth, soft-faced hammer, and a clean cloth. 3. If the wheel cover contains electrical parts (lights or integrated sensors), disconnect the negative battery terminal before proceeding; otherwise this may be unnecessary. 4. If the design requires wheel removal to access the cover, slightly loosen lug nuts while the vehicle is on the ground before lifting. 5. Raise and securely support the vehicle on jack stands if wheel removal is required to reach the cover. 6. Inspect the cover to identify how it is retained (snap clips, retaining ring, lug-nut retention, screws, etc.) and remove any visible fasteners or caps first. 7. Work a protected plastic trim tool or wrapped flat tool between the cover edge and wheel; pry gently and work around the circumference to release clips gradually rather than forcing a single point. 8. Remove the cover and place it on a clean surface; inspect clips, retainers, and the wheel for damage or debris. Installation steps 1. Clean the wheel mating surface and inspect or replace any damaged clips, retainers, or fasteners before installation. 2. If you previously disconnected the battery for electrical components, keep it disconnected until the cover is correctly seated and any electrical connections are rechecked. 3. Align the cover to the wheel according to its attachment style (aligning locating tabs, lug openings, or clip positions) without forcing it. 4. Seat the cover evenly by applying pressure around the perimeter in stages until all clips engage, or install the retaining ring/screws and tighten by hand as required. 5. If the wheel was removed, reinstall the wheel, hand-tighten lug nuts, lower the vehicle to the ground, then tighten lug nuts to the manufacturer's specification using a torque wrench. 6. Reconnect the negative battery terminal if it was disconnected and verify any electrical functions related to the cover (lights, sensors) operate normally. 7. Spin the wheel to confirm the cover clears braking and suspension components and does not rub; reposition or replace if interference occurs. 8. Tip: Use a soft-faced hammer or a padded block tapped evenly around the edge if the cover needs a gentle final seating-avoid excessive force that can break clips.
- Q:I have a 1995 with 16in 1996 4runner sr5 wheels, 3 spoke v style. I need the center caps that are taller than the back ones to clear the autohubs with dust cover. Will this one work and what's the height? Thanks. I can send pictures too for reference Posted by Customer: 1995 Toyota 4Runner
- A:42603-35510 THESE ARE THE TALLER ONES 42603-35520 THESE ARE THE SHORTER ONESPosted by ToyotaPartsDeal Specialist 3/8/2022
- Q:
Why choose Toyota Parts Deal
- Dedicated Service
Your complete satisfaction is our #1 goal
- Lowest Prices
Best deals on genuine OE parts from dealerships
- Fast Delivery
Orders are processed and delivered promptly