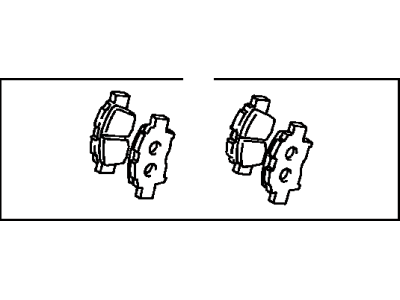
Begin by applying the handbrake and loosening the front wheel nuts before jacking up the front of the car and supporting it on axle stands. Remove the front wheels and work on one brake assembly at a time, using the assembled brake for reference if needed. Slacken and remove the lower caliper guide pin bolt, using a slim open-ended spanner to prevent the guide pin from rotating. With the lower guide pin bolt removed, pivot the caliper upwards to access the pads, noting how the upper and lower support plates are fitted as they may fall out when the pads are removed. Withdraw the two brake pads, each equipped with an anti-squeal shim, from the caliper mounting bracket. Check for grease or oil on the friction material, which could indicate a leaking hub bearing, torn driveshaft boot, or leaking caliper. Measure the thickness of each brake pad's friction material, excluding the backing plate; if either pad is worn to the specified minimum thickness or less, all four pads must be renewed. Renew the pads if any are contaminated with oil or grease, as there is no effective way to degrease them once contaminated. If the brake pads are still serviceable, clean them carefully with a fine wire brush, paying attention to the sides and back of the metal backing. If the pads appear glazed, roughening the surface of the friction material may help restore braking effectiveness. Clean out any grooves in the friction material and remove large embedded particles of dirt or debris, also cleaning the pad locations in the caliper body or mounting bracket. Before fitting the pads, ensure that the spacers slide easily in the caliper body bushes and are a reasonably tight fit. Brush away dirt from the caliper and piston, taking care not to inhale any dust that may contain asbestos. Inspect the dust seal around the piston for damage and check the piston for fluid leaks, corrosion, or damage. Push the caliper piston back into the caliper to create space for the new pads, which may require considerable effort; use a G-clamp, sliding-jaw pliers, or suitable pieces of wood as levers. If the recommended method of opening a bleed screw before pushing back the piston is not used, the fluid level in the reservoir may rise and overflow, so ensure there is enough space in the brake fluid reservoir to accommodate the displaced fluid, siphoning some off if necessary. Any spilled brake fluid on paintwork should be washed off immediately with clean water. Where applicable, refit the pad upper and lower support plates to the mounting bracket. Although not essential, applying a little copper brake grease to the edges of the pads where they will slide in the mounting bracket can be beneficial, as well as applying some to the backs of the pads where they contact the caliper pistons, ensuring no grease contacts the pad friction material or the disc. Install the pads and anti-squeal shims, ensuring the friction material of each pad is against the brake disc, and if using genuine Toyota pads, the inner pad should have the wear indicator plate facing upwards. Pivot the caliper down into position and install the guide pin bolt, tightening it to the specified torque setting while retaining the guide pin with an open-ended spanner. After completing the installation, firmly depress the brake pedal a few times to bring the pads to their normal working position, checking the brake fluid level in the reservoir and topping up if necessary. Finally, conduct a short road test to ensure the brakes function correctly and to bed-in the new linings to the contours of the disc, avoiding heavy braking during the initial drives as new linings will not provide maximum braking efficiency until they have bedded-in.