My Garage
Cart
Make sure this part fits

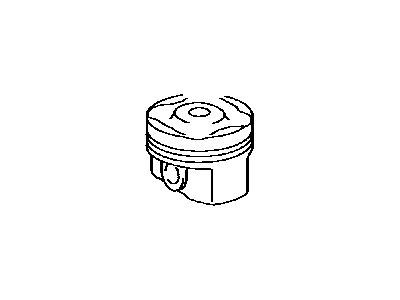
Toyota 13101-0D090 Piston Sub-Assy, W/Pin

2003-2006 Toyota 131010D090

Customer Questions & Expert Answers (3)
Toyota 13101-0D090 Piston Sub-Assy, W/Pin
  • Part Description
    Piston Sub-Assy, W/Pin
  • Part Name Code
    13101
  • Replaced By
    13101-22170
  • Manufacturer
    Toyota
Make sure this part fits
$96.51 MSRP: $136.05
You Save: $39.54 (30%)
Ships in 1-3 Business Days
1
ADD TO CART
  • Related Parts
  • Product Specifications
  • Vehicle Fitment
  • Customer Questions & Expert Answers
  • Product Specifications

    BrandGenuine Toyota
    Part Name Code13101
    Manufacturer Part Number13101-0D090
    Part DescriptionPiston Sub-Assy, W/Pin
    Manufacturer NoteSTD
    Item Dimensions3.9 x 3.7 x 3.4 inches
    Item Weight1.20 Pounds
    ConditionNew
    Fitment TypeDirect Replacement
    Require Quantity4
    ManufacturerToyota
    SKU13101-0D090
    WarrantyThis genuine Toyota part is guaranteed by Toyota's factory warranty.
    Shipping & ReturnShipping Policy Return Policy
    Warning: California's Proposition 65
  • Vehicle Fitment

    Year Make Model Trim & Engine Important vehicle option details
    2003-2006 Toyota CorollaCE, LE, S, STD, XR, XRS|4 Cyl 1.8L1ZZFE, 2ZZGE; ZZE130L-AEMDKA, ZZE130L-AEMNKA, ZZE130L-AEPDKA, ZZE130L-AEPDKK, ZZE130L-AEPNKA, ZZE130L-AEPNKK, ZZE130L-DEMDKA, ZZE130L-DEMDKK, ZZE130L-DEMNKA, ZZE130L-DEMNKK, ZZE130L-DEMSKA, ZZE130L-DEMSKK, ZZE130L-DEPDKA, ZZE130L-DEPDKK, ZZE130L-DEPNKA, ZZE130L-DEPNKK, ZZE130L-DEPSKA, ZZE130L-DEPSKK, ZZE131L-DEFSFA, ZZE131L-DEFSFK, ZZE132L-DHMDKA, ZZE132L-DHMDKK, ZZE132L-DHMNKA, ZZE132L-DHMNKK, ZZE132L-DHPDKA, ZZE132L-DHPDKK, ZZE132L-DHPNKA, ZZE132L-DHPNKK, ZZE133L-DHFSFA, ZZE133L-DHFSFK, ZZE133L-DHPSFA, ZZE133L-DHPSFK, ZZE134L-DHPDKA, ZZE134L-DHPDKK, ZZE134L-DHPNKA, ZZE134L-DHPNKK
    2003-2006 Toyota MatrixCE, LE, S, STD, XR, XRS|4 Cyl 1.8L1ZZFE, 2ZZGE; ZZE130L-DEMDKA, ZZE130L-DEMDKK, ZZE130L-DEMNKA, ZZE130L-DEMNKK, ZZE130L-DEMSKA, ZZE130L-DEMSKK, ZZE130L-DEPDKA, ZZE130L-DEPDKK, ZZE130L-DEPNKA, ZZE130L-DEPNKK, ZZE130L-DEPSKA, ZZE130L-DEPSKK, ZZE131L-DEFSFA, ZZE131L-DEFSFK, ZZE132L-DHMDKA, ZZE132L-DHMDKK, ZZE132L-DHMNKA, ZZE132L-DHMNKK, ZZE132L-DHPDKA, ZZE132L-DHPDKK, ZZE132L-DHPNKA, ZZE132L-DHPNKK, ZZE133L-DHFSFA, ZZE133L-DHFSFK, ZZE133L-DHPSFA, ZZE133L-DHPSFK, ZZE134L-DHPDKA, ZZE134L-DHPDKK, ZZE134L-DHPNKA, ZZE134L-DHPNKK
  • Customer Questions & Expert Answers

    Q:
    Does it fit my car? Posted by ToyotaPartsDeal Specialist
    A:
    You can Select Your Vehicle to check if 13101-0D090 fits your vehicle.
    Posted by ToyotaPartsDeal Specialist
    Q:
    How to remove and install Piston on Toyota Corolla? Posted by Customer
    A:
    Before even getting down to the piston and connecting rod assemblies, the cylinder head, the upper part of oil pan, and the oil pan have to be detached. Run your finger nail over the top of the travel of the rings in each cylinder; any ridges felt should be ground out with a ridge reamer to avoid ultimate breakage of the piston. Once you have eliminated the ridges, position the engine in such a way that the crankshaft is at the upper part. Measure the connectivity of the connecting-rod small end by using feeler gauges, making sure that the endplay is not over the service limit; if this is the case, new connecting rods may be required. Identify connecting rods and caps and then loosen, separate the connecting rod cap bolts without dropping the bearing insert. At the open top of the engine push the connecting rod/piston assembly out, making sure the first and last step to removes all the ridge materials has been followed. Do this for the rest of the cylinders; after that, tighten the connecting rods caps and bearing inserts lightly by hand just to cover the bearing face. The pistons and connecting rods have been ground and can now be further checked for wear and anyone required can be replaced. This measures the interference of the top ring land while fitting new piston rings, measure the ring end gaps and also piston ring side clearance. Lay out the piston/connecting rod assemblies and new ring sets to be matched according to their numbers for the assembly process. Slide the top ring into the first cylinder, align it with the cylinder walls and using the feeler gauges, check the end gap. If it is small, insert the ring ends and gently sand them in a way to expand the space for the watch straps. End gap north of 0.040-inch is problematic rather than large end gap in and of itself being a negative attribute. Repeat this for each ring making sure of the match between the two strings. After you have identified the end gaps, fit the rings on the pistons in a sequence starting with the oil control ring, then the middle ring, and then the top ring with due consideration to the direction. It is recommended that before installation processes and procedures the cylinder walls should be clean, Cylinder edge chamfered and the crankshaft installed. Scrape the grease off the two bearing surfaces of the connecting rod and cap, and put the new upper bearing insert into the cap without greasing it. Align the gaps in the piston ring along the cylinder at an interval of 90-degrees remove the piston and apply engine oil to the piston and the rings before compressing the piston ring compressor and finally placing the piston in the cylinder. Place the piston/connecting rod assembly into the cylinder bore such that the marks are oriented in the proper manner. Services to be performed include checking the connecting rod bearing oil clearance by using Plastigage and replacing the bearing inserts in case they are worn out. Once the Plastigage material has been cleaned, put another thin layer of the said substance on the bearing faces, reinsert the connecting rod and then retighten the rod cap. Repeat the same process for the rest of the assemblies, make sure that all assemblies and their surfaces are clean and oriented correctly through out the process. Last of all, turn the crankshaft to search for any binding and to recheck the connecting rod again for the endplay and adjustment if needed.
    Posted by ToyotaPartsDeal Specialist
    Q:
    How to remove and install piston/connecting rod assemblies on Toyota Matrix? Posted by Customer
    A:
    To do so, the cylinder head, upper part of the oil pan, and the oil pan itself have to be removed from the engine before pulling out the piston and connecting rod assemblies. Look for any ridges that are at the extreme end of the ring travel in every cylinder and which must always be trimmed using a specific tool to enhance the lifter of the piston. After that, demarcate the crank shaft, turn the engine to have the crankshaft on the upper most side after removing the ridges. With the connecting rod in place and the piston at TDC, measure the connecting rod endplay with feeler gauges, meaning that if the amount is over the service limit, then the new connecting rods may be required. It is worthy to identify the connecting rods and caps then you can loose and remove the connecting rod cap bolts without dropping the bearing insert. Slide the connecting rod/piston assembly out through the top of the engine you made, be sure to take out all ridges. Stack the caps in order and place the inserts back in position to avoid further harm in case of a review. Before fitting new piston rings the end gaps should be measured and the piston ring side clearance should be checked. Lay down the piston/connecting rod assemblies and new ring sets in order to ensure that corresponding sets are assembled together. Place the first cylinder and the top ring at their proper position and measure the end gap with the help of the feeler gauges and get on with the adjustment if the measurements are not correct. It is to be noted that the correct orientation of the rings must be placed. The first step to fit the rings is to properly place the oil control ring, middle, and the top rings. Scrub the cylinder liners, deburred the corner radii, and make sure the crankshaft is inserted before setting the pistons/connecting rods in. Oil the piston and rings, apply a piston ring compressor and then thread the assembly into the cylinder properly. Inspect the clearance of the connecting rod bearing oil by using Plastigage, comparing the sizes of the bearing as well as its cleanliness. The usage of Plastigage should be skinned, on the bearing faces lubricate using grease or assembly lube, and finally screw the rod cap bolts up to the appropriate torque. Apply the same process for all the assemblies, make sure they are clean and they are installed with right orientation. Last but not the least, perform a crankshaft rocking motion to feel for binding and for the second time, check the connecting rod end play and fix them if there is some problem.
    Posted by ToyotaPartsDeal Specialist
    If you have any questions about this product, please don't hesitate to ask us. We will be happy to help you!

Genuine Toyota Part 13101-0D090, the Right Choice

Get the reliability of purchasing Toyota part # 13101-0D090 Piston Sub-Assy, W/Pin. It is also referred to as Piston. The first option should always be to use OEM parts. Toyota manufactures these components with high quality material and rigorously tested with high reliability and durability. This part fits 2003-2006 Corolla, 2003-2006 Matrix.

ToyotaPartsDeal.com is a leading supplier of genuine Toyota parts and accessories, such as 131010D090 Piston Sub-Assy, W/Pin. In need of OEM Toyota parts? We offer a wide selection of genuine parts available that are competitively priced and trusted across the market. All parts are warranted by the manufacturer. Combine that with our simple return policy and fast delivery service and your shopping experience will be stress-free and dependable. For detailed Toyota parts information, click here.

Why choose Toyota Parts Deal

  • Dedicated Service

    Your complete satisfaction is our #1 goal

  • Lowest Prices

    Best deals on genuine OE parts from dealerships

  • Fast Delivery

    Orders are processed and delivered promptly