My Garage
My Account
Cart
This part fits
2009 Toyota Prius United States Of America; NHW20L-AHEEBA
Check another vehicle- Production Date: 05/2007-03/2009
- Fitting Vehicle Options: 1NZFXE.. NHW20
Toyota G9020-47031 Drive Motor Inverter Cooler Water Pump
2004-2009 Toyota Prius G902047031
Customer Questions & Expert Answers (7)
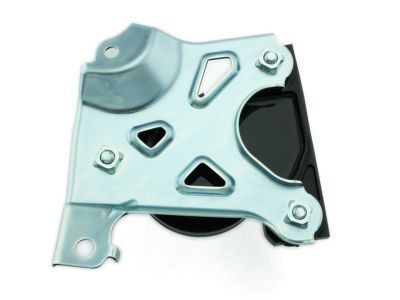


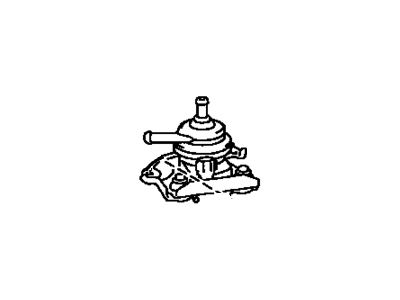
- Part DescriptionWater Pump Assembly with Motor & Bracket
- Part Name Code16290A
- Replaces
- ManufacturerToyota
This part fits
2009 Toyota Prius United States Of America; NHW20L-AHEEBA
Check another vehicle- Production Date: 05/2007-03/2009
- Fitting Vehicle Options: 1NZFXE.. NHW20
$162.23 MSRP: $230.63
You Save: $68.40 (30%)
Ships in 1-3 Business Days
1
- Related Parts
- Specifications
- Q&A
Product Specifications
Brand Genuine Toyota Part Name Code 16290A Manufacturer Part Number G9020-47031 Part Description Water Pump Assembly with Motor & Bracket Other Names Pump Item Dimensions 7.4 x 7.3 x 7.2 inches Item Weight 2.90 Pounds Condition New Fitment Type Direct Replacement Replaces G9020-47030 Manufacturer Toyota SKU G9020-47031 Warranty This genuine Toyota part is covered by warranty. Shipping & Return Shipping Policy Return Policy Warning: California's Proposition 65Customer Questions & Expert Answers
- Q:Will the following parts fit my car? Posted by ToyotaPartsDeal Specialist
- A:You can Select Your Vehicle to check if G9020-47031 fits your vehicle.Posted by ToyotaPartsDeal Specialist
Installation and Repair Tips- Q:How to remove and install the water pump on a Toyota Prius? Posted by Customer
- A:For 2004-2009 models, begin by draining the cooling system and removing the engine drive belt. Support the right end of the engine with a floor jack, using a block of wood to protect the oil pan, then remove the right-side engine mount and bracket. Use a screwdriver to prevent the pulley from turning while removing the three pulley bolts, then take off the pulley. Remove the fasteners holding the water pump to the engine block and take out the water pump, noting the length and position of the bolts. Clean all sealing surfaces and replace the gasket with a new one, then install the fasteners in their original positions and tighten them to the proper torque specifications. Reinstall the remaining parts in reverse order, refill the cooling system, run the engine, and check for leaks and proper operation. Disconnect the wiring harness and remove the three bolts and inlet air filter assembly, then drain the engine coolant and disconnect the wiring from the water pump. Remove the five mounting bolts and pull the water pump from the timing chain cover, discarding the gasket O-ring. For installation, reverse the removal process, replacing the gasket O-ring with a new one and tightening the bolts to the proper torque specifications.Posted by ToyotaPartsDeal Specialist
- Q:What are the signs of a failing water pump in my Toyota Prius? Posted by Customer
- A:A failure in the water pump can have serious consequences for the engine, leading to overheating. To check the functionality of the water pump, start the engine and let it warm up to normal operating temperature, then squeeze the right-side radiator hose. If the water pump is working properly, a pressure surge should be felt as the hose is released. Water pumps are designed with weep or vent holes, and if the pump seal fails, coolant will leak from this hole. To locate the hole, a flashlight may be needed to look through the space behind the pulley just below the water pump shaft. Additionally, if the water pump shaft bearings fail, a howling sound may be heard at the front of the engine while it is running. Checking for bearing wear can be done by rocking the water pump pulley up and down, feeling for any play. It's important not to mistake drive belt slippage, which causes a squealing sound, for water pump failure. Applying automotive drive belt dressing on the belt can help eliminate the belt as a possible cause of the noise.Posted by ToyotaPartsDeal Specialist
- Additional Installation and Repair Tips by AI Expert
- Removal steps: 1. Park on level ground, chock wheels, set parking brake, and allow the engine and cooling system to cool. 2. Disconnect the 12-volt battery negative terminal using insulated tools. 3. Follow the vehicle manufacturer's procedure to isolate the high-voltage hybrid system (remove service/interlock to disable HV) and confirm the system is safe before proceeding. 4. Place a drain pan and drain the cooling system to capture coolant for proper disposal or recycling. 5. Remove or move obstructing components (covers, intake parts, fan shroud, accessory drive components) as required for access - the exact items vary by design. 6. If the pump is belt-driven, relieve the accessory belt tensioner and remove the belt; if the pump is behind a timing/cover, remove that cover per the service manual. 7. Label and disconnect coolant hoses attached to the pump, catching residual coolant. 8. Remove the pump mounting fasteners and any associated brackets, keeping hardware organized for reassembly. 9. Remove the pump from the engine, protecting openings from dirt and inspecting the mounting area and connected components for wear or damage. 10. Clean up spilled coolant and safely store or discard contaminated materials. Installation steps: 1. Clean and dry the pump mounting surface; remove old gasket material without gouging the surface. 2. Install a new pump gasket or seal and position the new or rebuilt pump in place. 3. Hand-start mounting fasteners, then snug progressively and evenly (use a crisscross pattern where applicable); obtain final torque values from the manufacturer or service manual. 4. Reinstall any removed covers, brackets, pulleys, and the accessory or timing belt, setting belt tension per manufacturer procedure and verifying correct routing. 5. Reconnect coolant hoses and replace worn clamps; ensure hose ends are fully seated. 6. Refill the cooling system with the correct type and concentration of coolant specified by the manufacturer. 7. Bleed air from the cooling system following the vehicle manufacturer's bleeding procedure (methods vary - vacuum fill, bleed valves, or run/idle/heat cycle). 8. Reconnect the 12-volt battery negative terminal and restore the hybrid high-voltage system per manufacturer procedure. 9. Start the vehicle per hybrid-safe procedures and run to normal operating temperature while checking for leaks, abnormal noises, and dash warnings. 10. After a cool-down, recheck coolant level, hose connections, and fasteners; top off coolant if necessary. 11. Properly dispose of old coolant and replaced parts in accordance with local regulations. Repair tip: Replace related wearable items (drive belts, tensioner, thermostat, and radiator hoses) while you have good access to reduce duplicated labor and future leaks.
- Q:Does this inverter pump come with a gasket? Posted by Customer
- A:No, the inverter pump does not use a gasketPosted by ToyotaPartsDeal Specialist 10/5/2021
- Q:Can the belt be changed while changing this pump? Posted by Customer
- A:This is the inverter pump for electric vehicles, therefore no belt will need to be changedPosted by ToyotaPartsDeal Specialist 10/5/2021
- Q:Is this a water pump for the engine? Posted by Customer
- A:No, this is the hybrid inverter water pump for the electric vehiclesPosted by ToyotaPartsDeal Specialist 19/2/2021
- Q:
Why choose Toyota Parts Deal
- Dedicated Service
Your complete satisfaction is our #1 goal
- Lowest Prices
Best deals on genuine OE parts from dealerships
- Fast Delivery
Orders are processed and delivered promptly