My Garage
My Account
Cart
This part fits
2000 Toyota Land Cruiser
Check another vehicle- Production Date: 01/1998-08/2002
- Fitting Vehicle Options: UZJ100
Toyota 89413-60020 Speed Sensor
1998-2019 Toyota 8941360020
Customer Questions & Expert Answers (2)
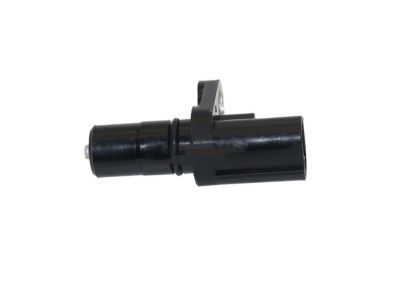
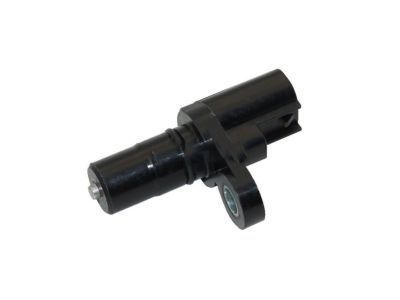

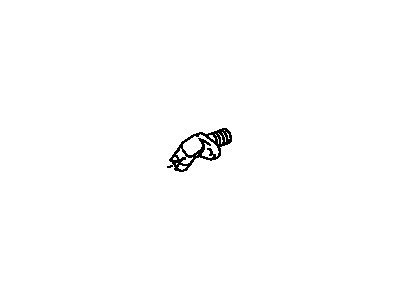
- Part DescriptionSensor, Transmission Revolution
- Replaced By
- ManufacturerToyota
This part fits
2000 Toyota Land Cruiser
Check another vehicle- Production Date: 01/1998-08/2002
- Fitting Vehicle Options: UZJ100
$97.81 MSRP: $118.43
You Save: $20.62 (18%)
Ships in 1-3 Business Days
1
- Related Parts
- Specifications
- Q&A
Product Specifications
Brand Genuine Toyota Manufacturer Part Number 89413-60020 Part Description Sensor, Transmission Revolution Item Dimensions 4.5 x 2.6 x 1.8 inches Item Weight 0.60 Pounds Condition New Fitment Type Direct Replacement Manufacturer Toyota SKU 89413-60020 Warranty This genuine Toyota part is covered by warranty. Shipping & Return Shipping Policy Return Policy Warning: California's Proposition 65Customer Questions & Expert Answers
- Q:I just want to confirm I'm purchasing a correct part before placing an order Posted by ToyotaPartsDeal Specialist
- A:You can Select Your Vehicle to check if 89413-60020 fits your vehicle.Posted by ToyotaPartsDeal Specialist
- Installation and Repair Tips by AI Expert
- Removal steps 1. Park vehicle on a level surface, set the parking brake, chock wheels, and wear eye protection and gloves. 2. Raise and support the vehicle with jack stands if access under the vehicle or wheel removal is required; never rely on a jack alone. 3. Disconnect and isolate the negative battery terminal to prevent electrical shorts. 4. Locate the speed sensor - typically the vehicle speed sensor is mounted on the transmission housing or a wheel speed (ABS) sensor is at a wheel hub; consult a diagram if unsure. 5. Clean the area around the sensor to keep dirt out of the opening when the sensor is removed. 6. Release and unplug the electrical connector(s); depress any locking tabs and protect the wiring from sharp edges. 7. Remove the retaining fastener(s) or clips that hold the sensor; fastener type and number commonly vary by design. 8. Withdraw the sensor straight out (a slight twist may help) and take care not to damage the sensor tip, seal, or wiring. 9. Inspect the sensor mounting bore, O-ring or seal, and wiring harness for corrosion, damage, or contamination. Installation steps 1. Compare the new sensor with the removed unit to confirm correct type and orientation before installing. 2. Fit a new O-ring or seal if provided; lightly coat it with a small amount of appropriate lubricant (for example clean transmission fluid or a manufacturer-recommended lubricant) if applicable. 3. Insert the sensor straight into the bore until fully seated; avoid forcing or rocking the sensor during installation. 4. Reinstall the retaining fastener(s)/clips and secure the sensor - tighten to the manufacturer's specification. 5. Reconnect the electrical connector(s) and secure any harness clips so wiring is routed clear of moving parts and heat sources. 6. Reconnect the negative battery terminal. 7. Start the vehicle and check for abnormal warning lights; use a scan tool to read and clear any stored codes and to monitor sensor output if available. 8. Perform a cautious road test to confirm speedometer, transmission shift behavior, and ABS (if applicable) operate correctly; recheck the sensor area for leaks and the connector for security after the test. 9. Repair tip: Always replace damaged O-rings/seals and clean the mounting bore; if faults persist, inspect harness continuity and grounds before replacing additional components.
- Q:
Why choose Toyota Parts Deal
- Dedicated Service
Your complete satisfaction is our #1 goal
- Lowest Prices
Best deals on genuine OE parts from dealerships
- Fast Delivery
Orders are processed and delivered promptly