

My Garage
My Account
Cart
This part fits
2016 Toyota 4Runner
Check another vehicle- Production Date: 08/2013-08/2019
- Fitting Vehicle Options: GRN28#
Toyota 87106-33270 Damper Servo Sub-Assembly(For Recirculation)
2007-2024 Toyota 8710633270
Customer Questions & Expert Answers (2)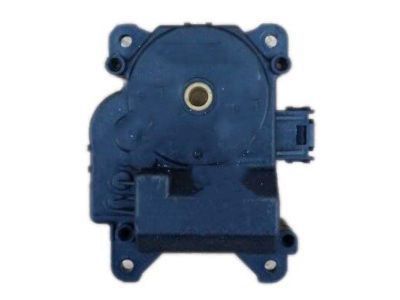
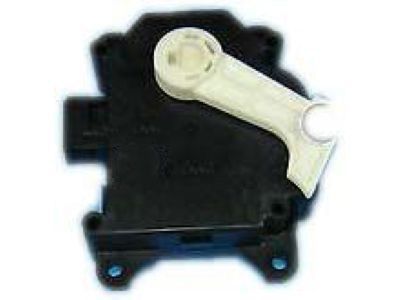
- Part DescriptionServo Sub-Assy, Damper(For Recirculation)
- ManufacturerToyota
This part fits
2016 Toyota 4Runner
Check another vehicle- Production Date: 08/2013-08/2019
- Fitting Vehicle Options: GRN28#
$134.89 MSRP: $191.77
You Save: $56.88 (30%)
Ships in 1 Business Day
1
- Related Parts
- Specifications
- Q&A
Product Specifications
Brand Genuine Toyota Manufacturer Part Number 87106-33270 Part Description Servo Sub-Assy, Damper(For Recirculation) Other Names Door Actuator, Servo Item Dimensions 6.3 x 4.9 x 3.6 inches Item Weight 1.40 Pounds Condition New Fitment Type Direct Replacement Manufacturer Toyota SKU 87106-33270 Warranty This genuine Toyota part is covered by warranty. Shipping & Return Shipping Policy Return Policy Warning: California's Proposition 65Customer Questions & Expert Answers
- Q:I just want to confirm I'm purchasing a correct part before placing an order. Posted by ToyotaPartsDeal Specialist
- A:You can Select Your Vehicle to check if 87106-33270 fits your vehicle.Posted by ToyotaPartsDeal Specialist
- Installation and Repair Tips by AI Expert
- Removal: 1. Park vehicle on level ground, key off, parking brake set, and wear eye protection and gloves. 2. Disconnect the negative battery cable and wait until residual power dissipates (commonly a few minutes). 3. Remove any trim, glove box, kick panel, or insulation necessary to gain access to the HVAC housing; access procedures vary by vehicle. 4. Identify the blend door actuator(s) on the HVAC housing; locations and number can differ by design. 5. Note or mark the actuator orientation and the position of any linkage or splines before loosening so you can reinstall in the same orientation. 6. Disconnect the actuator electrical connector by depressing the locking tab and pulling straight out; avoid prying on terminals. 7. Remove the fasteners or retaining clips that secure the actuator to the housing and carefully withdraw the actuator from its shaft or linkage. 8. Inspect the actuator mounting, linkage, and surrounding HVAC components for damage or debris. Installation: 1. Verify the replacement actuator matches the original in connector type, mounting pattern, and shaft orientation. 2. Position the actuator onto the shaft or linkage in the same orientation noted during removal and engage splines or clips without forcing. 3. Install and snug the mounting fasteners or clips by hand first, then tighten securely (do not invent torque values). 4. Reconnect the actuator electrical connector until it locks. 5. Reconnect the negative battery cable and ensure all tools are removed from the work area. 6. Test the HVAC system by cycling modes and temperature/airflow controls; confirm the blend door moves smoothly, there are no unusual noises, and airflow/temperature responds as expected. 7. Reinstall any removed trim or panels and perform a final functional check. Repair tip: Apply a small amount of dielectric grease to the electrical connector contacts to help prevent corrosion, and if the system seems to require calibration after installation, a vehicle-specific actuator relearn procedure may be necessary.
- Q:
Why choose Toyota Parts Deal
- Dedicated Service
Your complete satisfaction is our #1 goal
- Lowest Prices
Best deals on genuine OE parts from dealerships
- Fast Delivery
Orders are processed and delivered promptly