

My Garage
My Account
Cart
This part fits
1997 Toyota 4Runner
Check another vehicle- Production Date: from 11/1995
- Fitting Vehicle Options: RZN18#, VZN18#
Toyota 77360-35010 Fuel Filler Opening Lid Hinge Spring
1996-2008 Toyota 7736035010
Customer Questions & Expert Answers (2)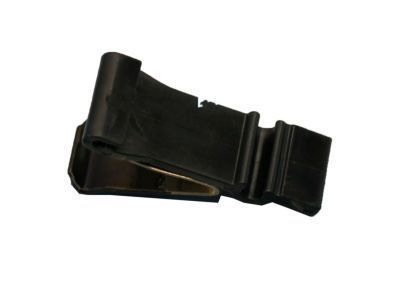
- Part DescriptionSpring, Fuel Filler Opening Lid Hinge
- Part Name Code77366
- Replaced By
- ManufacturerToyota
This part fits
1997 Toyota 4Runner
Check another vehicle- Production Date: from 11/1995
- Fitting Vehicle Options: RZN18#, VZN18#
$3.80 MSRP: $5.31
You Save: $1.51 (29%)
Ships in 1-3 Business Days
1
- Related Parts
- Specifications
- Q&A
Product Specifications
Brand Genuine Toyota Part Name Code 77366 Manufacturer Part Number 77360-35010 Part Description Spring, Fuel Filler Opening Lid Hinge Item Dimensions 14.2 x 11.7 x 2.1 inches Item Weight 1.40 Pounds Condition New Fitment Type Direct Replacement Manufacturer Toyota SKU 77360-35010 Warranty This genuine Toyota part is covered by warranty. Shipping & Return Shipping Policy Return Policy Warning: California's Proposition 65Customer Questions & Expert Answers
- Q:Does it fit my car? Posted by ToyotaPartsDeal Specialist
- A:You can Select Your Vehicle to check if 77360-35010 fits your vehicle.Posted by ToyotaPartsDeal Specialist
- Installation and Repair Tips by AI Expert
- Removal steps: 1. Park on level ground, set the parking brake, chock wheels and work in a well-ventilated, well-lit area. 2. Protect adjacent paint with masking tape or a soft cloth where tools or the door could contact the body. 3. Support the fuel door with a hand, tape, or a prop to prevent it from falling or snapping closed. 4. Disconnect the negative battery terminal before touching any electrical connectors or powered release mechanisms. 5. Remove any trim or access panel that covers the hinge fasteners; designs vary so access method may differ. 6. If present, unplug any electrical connector for a release actuator or light, depressing locking tabs as needed. 7. Mark hinge-to-door and hinge-to-body positions with a scribe or marker to preserve alignment for reinstallation. 8. While supporting the door, loosen and remove the hinge fasteners and retain any shims, washers, or clips in an organized way. 9. Remove the hinge and set aside hardware for inspection or replacement. Installation steps: 1. Clean mating surfaces, inspect the new hinge and mounting area for damage or corrosion, and remove any dirt or rust. 2. Apply a light film of appropriate lubricant to the hinge pivot and anti-seize or thread lubricant to fastener threads if desired. 3. Position the hinge using the alignment marks you made and start fasteners by hand so components remain movable for adjustment. 4. Reconnect any electrical connector and apply dielectric grease to the terminals if available. 5. Adjust the door gap and flushness as needed, then snug fasteners progressively; tighten to the vehicle manufacturer specification if known. 6. Remove supports and operate the fuel door several times to check smooth movement, proper latching, and that it does not bind or rub. 7. Reinstall any trim or access panels removed earlier. 8. Reconnect the negative battery terminal and verify any electrical release or light functions normally. 9. Final check: confirm fuel filler access, inspect for loose hardware, and touch up exposed metal or replace corroded fasteners as needed (repair tip).
- Q:
Why choose Toyota Parts Deal
- Dedicated Service
Your complete satisfaction is our #1 goal
- Lowest Prices
Best deals on genuine OE parts from dealerships
- Fast Delivery
Orders are processed and delivered promptly