

My Garage
My Account
Cart
This part fits
1977 Toyota Land Cruiser United States Of America
Check another vehicle- Production Date: 09/1977-07/1980
- Fitting Vehicle Options: BJ40, FJ4#, 55
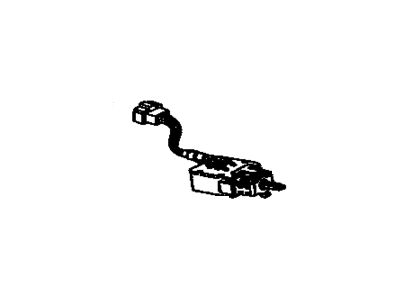
Toyota 84652-27010 Windshield Wiper Switch Assembly
1977-1984 Toyota Land Cruiser 8465227010
Customer Questions & Expert Answers (2)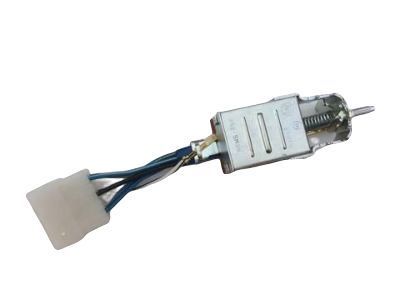
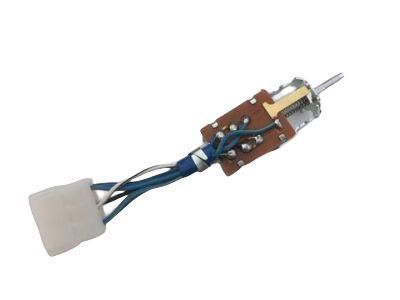
- Part DescriptionSwitch Assy, Windshield Wiper
- Part Name Code84650
- ManufacturerToyota
This part fits
1977 Toyota Land Cruiser United States Of America
Check another vehicle- Production Date: 09/1977-07/1980
- Fitting Vehicle Options: BJ40, FJ4#, 55
$102.41 MSRP: $144.36
You Save: $41.95 (30%)
Ships in 1-3 Business Days
1
- Related Parts
- Specifications
- Q&A
Product Specifications
Brand Genuine Toyota Part Name Code 84650 Manufacturer Part Number 84652-27010 Part Description Switch Assy, Windshield Wiper Other Names Wiper Switch Item Dimensions 8.9 x 4.8 x 3.3 inches Item Weight 0.80 Pounds Condition New Fitment Type Direct Replacement Manufacturer Toyota SKU 84652-27010 Warranty This genuine Toyota part is covered by warranty. Shipping & Return Shipping Policy Return Policy Warning: California's Proposition 65Customer Questions & Expert Answers
- Q:I just want to confirm I'm purchasing a correct part before placing an order Posted by ToyotaPartsDeal Specialist
- A:You can Select Your Vehicle to check if 84652-27010 fits your vehicle.Posted by ToyotaPartsDeal Specialist
- Installation and Repair Tips by AI Expert
- Removal steps 1. Park on a level surface, set the parking brake, remove the ignition key, and open the hood to allow easy access to the battery area. 2. Disconnect the negative battery terminal and isolate it so it cannot contact the battery post or metal surfaces; wait a minute for capacitors to discharge. 3. Remove any trim, dash or steering-column covers that commonly conceal the wiper switch using appropriate trim tools; keep fasteners organized. 4. Photograph or mark the switch orientation and connector positions so you can restore them exactly. 5. Depress connector release tabs and carefully unplug the electrical connector(s); gently rock if needed-do not pull on wiring. 6. Remove the switch retaining screws, nuts, or release the snap clips that typically secure the switch to the dash or column. 7. Pull the switch assembly straight out through the opening, feeding the wiring harness through without kinking or stretching. 8. Inspect the switch, harness, and connectors for corrosion, broken wires, or damaged insulation and address any issues before installing a replacement. Installation steps 1. Confirm the replacement switch matches the original in function and connector shape; compare terminals visually. 2. If desired, lightly coat connector terminals with approved dielectric grease to inhibit corrosion (use sparingly). 3. Route the harness through the opening the same way it came out, avoiding sharp edges and pinch points. 4. Position the switch in the dash or column opening and engage any snap clips or align screw holes without forcing it. 5. Secure the switch with its original fasteners, snugging by hand or with hand tools until the part is seated (do not over-tighten). 6. Reconnect the electrical connector(s) until the retention tab clicks and wires are free of tension. 7. Reinstall any trim or covers and return fasteners to their original locations. 8. Reconnect the negative battery terminal and tighten it snugly. 9. Test all switch functions with the ignition on: low/high speeds, intermittent/interval settings (if equipped), washer operation, and verify the wipers return to the parked position and operate smoothly. 10. If you observe binding, noise, intermittent operation, or electrical issues, disconnect the battery and recheck connector seating and switch alignment. Repair tip: Label or photograph connectors during removal and keep small fasteners in a labeled container to speed correct reassembly.
- Q:
Why choose Toyota Parts Deal
- Dedicated Service
Your complete satisfaction is our #1 goal
- Lowest Prices
Best deals on genuine OE parts from dealerships
- Fast Delivery
Orders are processed and delivered promptly