My Garage
My Account
Cart
This part fits
2007 Toyota Prius United States Of America; NHW20L-AHEEBA
Check another vehicle- Production Date: 11/2005-03/2009
- Fitting Vehicle Options: 1NZFXE.. NHW20
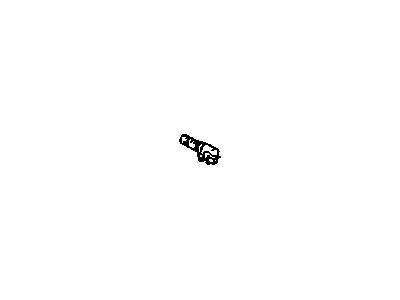
Toyota 15330-21011 Camshaft Timing Oil Control Valve Asssmbly
2000-2018 Toyota 1533021011
Customer Questions & Expert Answers (3)
- Part DescriptionValve Assy, Camshaft Timing Oil Control
- Part Name Code11101J
- Replaces
- ManufacturerToyota
This part fits
2007 Toyota Prius United States Of America; NHW20L-AHEEBA
Check another vehicle- Production Date: 11/2005-03/2009
- Fitting Vehicle Options: 1NZFXE.. NHW20
$108.43 MSRP: $152.85
You Save: $44.42 (30%)
Ships in 1 Business Day
1
- Related Parts
- Specifications
- Q&A
Product Specifications
Brand Genuine Toyota Part Name Code 11101J Manufacturer Part Number 15330-21011 Part Description Valve Assy, Camshaft Timing Oil Control Other Names Control Valve Item Dimensions 13.1 x 7.4 x 3.0 inches Item Weight 0.80 Pounds Condition New Fitment Type Direct Replacement Replaces 15330-21020, 15330-21010 Manufacturer Toyota SKU 15330-21011 Warranty This genuine Toyota part is covered by warranty. Shipping & Return Shipping Policy Return Policy Warning: California's Proposition 65Customer Questions & Expert Answers
- Q:Does it fit my car? Posted by ToyotaPartsDeal Specialist
- A:You can Select Your Vehicle to check if 15330-21011 fits your vehicle.Posted by ToyotaPartsDeal Specialist
Installation and Repair Tips- Q:How to Check the Spool Valve and Variable Timing Sprocket on a Toyota Prius? Posted by Customer
- A:The VVT system is utilized across all models, varying intake camshaft timing by directing oil pressure to adjust the intake camshaft sprocket actuator assembly, which enhances engine power output, fuel economy, and reduces emissions under specific conditions. Key components include the Powertrain Control Module (PCM), VVT oil control valve (OCV), OCV filter, and intake camshaft sprocket actuator assembly. The PCM activates the oil control valve based on inputs from various sensors, directing oil pressure to either advance or retard the camshaft. The actuator assembly features an inner hub with fixed vanes that utilize oil pressure to rotate the camshaft, allowing for adjustments of up to 21 degrees. Regular checks of the VVT system begin with inspecting the oil control valve filter for clogs, as issues often arise from the valve and filter, necessitating routine oil and filter changes. The operation of the oil control valve is assessed by measuring resistance and checking the plunger's movement when voltage is applied. The final check involves removing the valve cover and intake camshaft to clean the camshaft snout and ensure proper installation of the actuator assembly, which should rotate freely when air pressure is applied. If any components do not function correctly, replacements are necessary, and reassembly follows the reverse order of disassembly.Posted by ToyotaPartsDeal Specialist
- Additional Installation and Repair Tips by AI Expert
- Removal steps 1. Park on level ground, chock wheels, wear eye protection and gloves, and ensure good lighting and ventilation. 2. Disable electrical power: disconnect the 12V battery negative terminal and follow the manufacturer's procedure to isolate the high-voltage system; confirm HV indicators are off before proceeding. 3. If the valve controls a pressurized fluid circuit, relieve system pressure per accepted practice and have a drain container and clean plugs/caps ready to limit fluid loss. 4. Clean the area around the spool valve to keep contaminants out of the system before opening lines or connectors. 5. Photograph and label electrical connectors, hoses, and their routing to aid reassembly. 6. Disconnect electrical connectors and any sensor leads; cover exposed connectors immediately to prevent contamination. 7. Disconnect fluid lines or hoses, catching any drained fluid and capping or plugging openings to prevent dirt entry. 8. Support adjacent components as needed, then unfasten the valve mounting hardware and remove the spool valve assembly. 9. Inspect mating surfaces, ports, and seals for damage and note which seals or O-rings will require replacement. Installation steps 1. Clean mating surfaces and ports thoroughly and install new O-rings or seals; lightly lubricate seals with the correct system fluid if recommended. 2. Position the replacement spool valve carefully to avoid damaging seals, then install and snug the mounting hardware-final torques must follow the vehicle's specifications. 3. Reconnect fluid lines and routing, making sure hoses and fittings seat fully and clamps or retainers are engaged. 4. Reconnect electrical connectors to their correct locations using your reference photos or labels; ensure connectors lock and wiring is routed clear of heat or moving parts. 5. If the system was opened to fluid, refill and bleed the hydraulic circuit using the proper procedure to remove air (procedure varies by design). 6. Reconnect the 12V battery negative and follow the manufacturer's procedure to re-enable the high-voltage system; verify no HV warnings remain before testing. 7. Perform functional checks: cycle the affected system, check for leaks, watch for warning lights, and use a scan tool or built-in self-tests if available to confirm valve operation. 8. Road-test as appropriate and recheck for leaks, noises, or diagnostic codes after the test. Repair tip 1. Always replace seals and O-rings when removing spool valves; reused seals commonly cause leaks and faults.
- Q:
Why choose Toyota Parts Deal
- Dedicated Service
Your complete satisfaction is our #1 goal
- Lowest Prices
Best deals on genuine OE parts from dealerships
- Fast Delivery
Orders are processed and delivered promptly