

My Garage
My Account
Cart
This part fits
2014 Toyota Prius V United States Of America; ZVW41L-AXXEBA
Check another vehicle- Production Date: 06/2012-11/2018
- Fitting Vehicle Options: 2ZRFXE.. ZVW41
Toyota 25620-37120 Valve Assembly, EGR W/MO
2010-2017 Toyota 2562037120
Customer Questions & Expert Answers (2)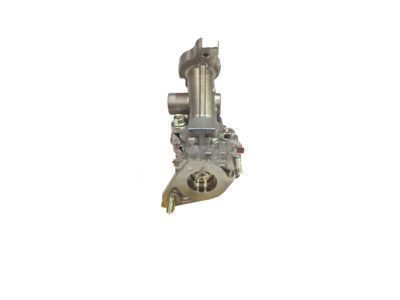
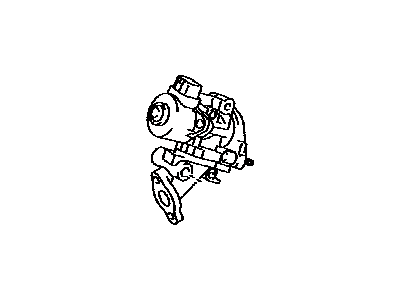
- Part DescriptionValve Assy, EGR
- Part Name Code25620
- Replaces
- ManufacturerToyota
This part fits
2014 Toyota Prius V United States Of America; ZVW41L-AXXEBA
Check another vehicle- Production Date: 06/2012-11/2018
- Fitting Vehicle Options: 2ZRFXE.. ZVW41
$302.75 MSRP: $434.12
You Save: $131.37 (31%)
Ships in 1-3 Business Days
1
- Related Parts
- Specifications
- Q&A
Product Specifications
Brand Genuine Toyota Part Name Code 25620 Manufacturer Part Number 25620-37120 Part Description Valve Assy, EGR Other Names EGR Valve Item Dimensions 5.9 x 5.0 x 4.8 inches Item Weight 1.60 Pounds Condition New Fitment Type Direct Replacement Replaces 25620-37110 Manufacturer Toyota SKU 25620-37120 Warranty This genuine Toyota part is covered by warranty. Shipping & Return Shipping Policy Return Policy Warning: California's Proposition 65Customer Questions & Expert Answers
- Installation & Repair Tips by AI Expert
- Removal steps 1. Park on level ground, set parking brake, wear safety glasses and gloves; allow engine and cooling system to cool. 2. If the vehicle is a hybrid, follow the manufacturer procedure to de-energize the high-voltage system before working; if unsure, get qualified assistance. 3. Disconnect the 12-volt battery negative terminal to isolate vehicle electronics. 4. Photograph and label any electrical connectors, vacuum lines, and hoses attached to the EGR valve area for reassembly. 5. If the EGR valve or cooler has coolant lines, drain or capture enough coolant to prevent spills and plug or cap lines to minimize fluid loss. 6. Remove or move aside intake plumbing or other components that typically block access; note that access procedures vary by design and may require removal of the intake manifold or related parts. 7. Disconnect electrical connector(s), vacuum/boost lines, and coolant hoses from the EGR valve; plug lines to prevent contamination or leaks. 8. Loosen and remove the valve fasteners and any bracketry; retain fasteners and note their positions. 9. Remove the EGR valve and old gasket(s); keep any gasket material from falling into intake passages. 10. Clean mating surfaces on the valve and mounting flange without gouging; inspect passages and hardware for carbon buildup or damage. 11. Cap or seal open ports and cover exposed openings until installation to prevent contamination. 12. Repair tip: keep parts organized and use the photos taken earlier to ensure correct reconnection. Installation steps 1. Verify mating surfaces are clean and dry; compare the new EGR valve and gaskets to the removed parts to confirm fit. 2. Install new gasket(s) as required and position the EGR valve; start fasteners by hand to align components. 3. Tighten fasteners progressively and evenly to seat the gasket-use manufacturer torque values if available (do not guess specs). 4. Reconnect coolant hoses, vacuum lines, and electrical connectors; ensure hose clamps and connectors are secure and routed free of interference. 5. Reinstall any intake plumbing or components that were removed for access. 6. Refill and top up cooling system if coolant was drained, and bleed air from the cooling system per standard practice for the vehicle design. 7. Reconnect the 12-volt battery negative terminal. 8. If the vehicle is a hybrid, follow the manufacturer procedure to re-enable the high-voltage system. 9. Start the engine and check for coolant, vacuum, or exhaust leaks and listen for abnormal noises; monitor for any warning lights. 10. Use a scan tool to check and clear any EGR-related fault codes and verify commanded and actual EGR operation where possible. 11. Road test to confirm proper drivability and recheck for leaks and stored codes after the test. 12. Repair tip: if persistent carbon buildup is present, consider cleaning intake/EGR passages or use a smoke/leak test to locate hard-to-find leaks.
- Q:Does this assembly come with the black gasket? Posted by James M. / 2013 Toyota Prius
- A:NO, YOU WILL NEED 27627-37010Answered by Toyota Parts Specialist Ryan / Nov 21, 2024
Why choose Toyota Parts Deal
- Dedicated Service
Your complete satisfaction is our #1 goal
- Lowest Prices
Best deals on genuine OE parts from dealerships
- Fast Delivery
Orders are processed and delivered promptly