

My Garage
My Account
Cart
This part fits
2003 Toyota 4Runner
Check another vehicle- The location this part fits: Outer
- Production Date: 08/2002-04/2004
- Fitting Vehicle Options: GRN21#, UZN21#
Toyota 68290-35031 Back Door Glass Weatherstrip Assembly Outer
2003-2009 Toyota 4Runner 6829035031
Customer Questions & Expert Answers (8)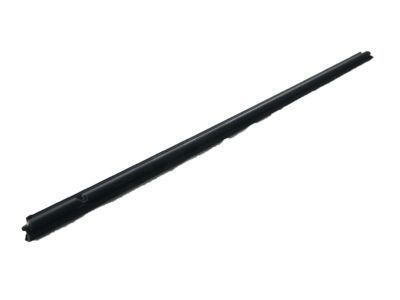
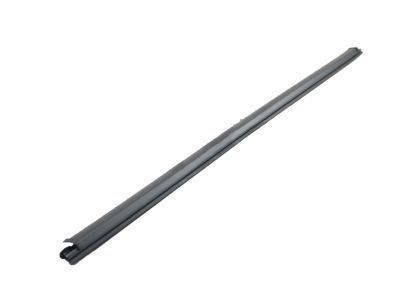
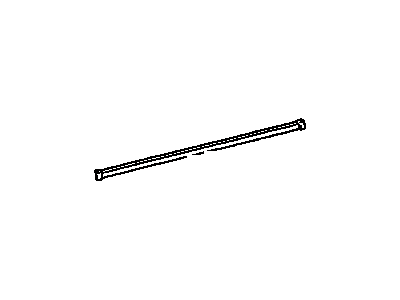
- Part DescriptionWeatherstrip Assy, Back Door Glass, Outer
- Part Name Code68290A
- PositionOuter
- Replaces
- ManufacturerToyota
This part fits
2003 Toyota 4Runner
Check another vehicle- The location this part fits: Outer
- Production Date: 08/2002-04/2004
- Fitting Vehicle Options: GRN21#, UZN21#
$52.35 MSRP: $73.17
You Save: $20.82 (29%)
Ships in 1-3 Business Days
1
- Related Parts
- Specifications
- Q&A
Product Specifications
Brand Genuine Toyota Part Name Code 68290A Manufacturer Part Number 68290-35031 Part Description Weatherstrip Assy, Back Door Glass, Outer Other Names Belt Weatherstrip Item Dimensions 49.4 x 4.2 x 2.1 inches Item Weight 1.40 Pounds Position Outer Condition New Fitment Type Direct Replacement Replaces 68290-35030 Manufacturer Toyota SKU 68290-35031 Warranty This genuine Toyota part is covered by warranty. Shipping & Return Shipping Policy Return Policy Warning: California's Proposition 65Customer Questions & Expert Answers
- Q:Can you verify fitment for this part? Posted by ToyotaPartsDeal Specialist
- A:You can Select Your Vehicle to check if 68290-35031 fits your vehicle.Posted by ToyotaPartsDeal Specialist
- Installation and Repair Tips by AI Expert
- Removal steps 1. Park on level ground, engage the parking brake, wear gloves and eye protection. 2. If the weather strip is near powered door components or airbag wiring, disconnect the negative battery cable and secure it away; wait the manufacturer-recommended time before touching electrical connectors. 3. Open the door/hatch/panel to expose the weather strip; support the panel if needed to prevent it from moving. 4. Remove or loosen any trim pieces or retainers that cover the weather strip using plastic trim tools to avoid damage. 5. Locate and release retaining clips or fasteners as they are exposed; do not force parts-work along the length to free each clip. 6. Peel the weather strip out of its channel, working slowly; if adhesive holds it, gently soften the adhesive with low heat or use a plastic scraper to separate the seal from the flange. 7. Remove residual adhesive and dirt from the mounting flange using a plastic scraper and an appropriate adhesive cleaner; dry the surface thoroughly. 8. Inspect the flange and clips for damage and replace any broken retainers before installation. Installation steps 1. Confirm the mating surface is clean, dry, and free of old adhesive; replace damaged clips or retainers prior to fitting the new seal. 2. If the new weather strip requires adhesive or primer, follow the adhesive manufacturer's instructions; commonly apply a thin, even bead or primer as specified for the product. 3. Align the new weather strip to a starting point without stretching it; work along the length pressing it into the channel so clips or bulbed beads seat evenly. 4. Engage all clips and fasteners fully; use gentle pressure and a trim tool where needed to avoid pinching or distorting the seal. 5. Reinstall any trim pieces or panels that were removed, ensuring they are seated and fastened correctly. 6. Reconnect the negative battery cable if it was disconnected, then secure the terminal. 7. Close and open the door/hatch several times to confirm proper fit, uniform compression, and that no binding or interference occurs. 8. Perform a quick water or fingertip check along the seal to confirm there are no gaps; adjust or reseat the strip if necessary. Repair tip: Mark the original weather strip orientation with masking tape before removal and avoid stretching the new strip during installation to maintain proper fit.
- Q:Does this include the gasket that glides along the window, ensuring a waterproof seal? Posted by Customer: 2004 Toyota 4Runner
- A:no it does notPosted by ToyotaPartsDeal Specialist 2/6/2025
- Q:Will this work on either side? Posted by Customer
- A:Yes, this specific piece will work on either side of the rear glassPosted by ToyotaPartsDeal Specialist 31/10/2020
- Q:Is there anything besides the weatherstripping that is needed when installing/removing this product? Posted by Customer
- A:No, everything is given in the package nothing extra is neededPosted by ToyotaPartsDeal Specialist 31/10/2020
- Q:How many end pieces does this come with? Posted by Customer
- A:This product comes with two small end piecesPosted by ToyotaPartsDeal Specialist 30/10/2020
- Q:Does this part come with instructions showing how to install it? Posted by Customer
- A:No, there are no instructions included with this part numberPosted by ToyotaPartsDeal Specialist 30/10/2020
- Q:Can you provide the part numbers for a 2004 Sequoia Posted by Customer
- A:The front drivers side will be part number 75720-0C010, the front passenger side is 75710-0C010, the rear drivers side is 75740-0C010, and the rear passenger side is 75730-0C010Posted by ToyotaPartsDeal Specialist 28/10/2020
- Q:
Why choose Toyota Parts Deal
- Dedicated Service
Your complete satisfaction is our #1 goal
- Lowest Prices
Best deals on genuine OE parts from dealerships
- Fast Delivery
Orders are processed and delivered promptly