My Garage
My Account
Cart
This part fits
1997 Toyota Land Cruiser
Check another vehicle- Production Date: 01/1995-01/1998
- Fitting Vehicle Options: FZJ80
Toyota 56121-60100 Windshield Weatherstrip
1991-1997 Toyota Land Cruiser 5612160100
Customer Questions & Expert Answers (2)
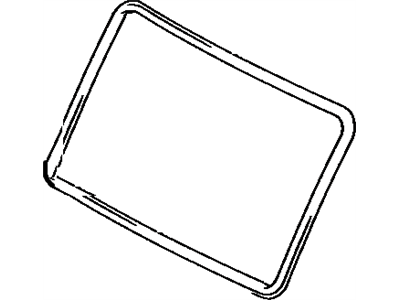
- Part DescriptionWeatherstrip, Windshield
- Part Name Code56121
- Replaces
- ManufacturerToyota
This part fits
1997 Toyota Land Cruiser
Check another vehicle- Production Date: 01/1995-01/1998
- Fitting Vehicle Options: FZJ80
$105.83 MSRP: $149.19
You Save: $43.36 (30%)
Ships in 1-3 Business Days
1
- Related Parts
- Specifications
- Q&A
Product Specifications
Brand Genuine Toyota Part Name Code 56121 Manufacturer Part Number 56121-60100 Part Description Weatherstrip, Windshield Other Names Weatherstrip Item Dimensions 25.0 x 10.6 x 10.3 inches Item Weight 6.10 Pounds Condition New Fitment Type Direct Replacement Replaces 56121-60090, 56121-60060 Manufacturer Toyota SKU 56121-60100 Warranty This genuine Toyota part is covered by warranty. Shipping & Return Shipping Policy Return Policy Warning: California's Proposition 65Customer Questions & Expert Answers
- Q:Will the following parts fit my car? Posted by ToyotaPartsDeal Specialist
- A:You can Select Your Vehicle to check if 56121-60100 fits your vehicle.Posted by ToyotaPartsDeal Specialist
- Installation and Repair Tips by AI Expert
- Removal steps 1. Park on level ground, set parking brake, chock wheels, and wear eye protection and gloves. 2. Assemble common tools and materials: plastic trim tools, flat screwdriver, adhesive remover, lint-free rags, heat source (hair dryer/heat gun), utility knife, replacement weatherstrip, and replacement clips/adhesive as needed. 3. If the work area contains electrical items (power windows/locks or door-mounted airbag wiring), disconnect the negative battery cable and observe the manufacturer-specified wait period before working near airbag components. 4. Remove any trim or moulding that covers the weatherstrip attachment area using plastic trim tools to avoid damage; keep fasteners organized and note their locations. 5. If the weatherstrip is commonly retained by clips, gently pry an end and work the clips free with a trim tool; if it is adhesive-bonded, apply gentle heat to soften the adhesive and peel the strip away slowly; if fasteners are present, remove them. 6. Retain the old weatherstrip as a template, then inspect the mounting flange/channel for corrosion, dents, or old adhesive and remove residue with an appropriate cleaner. 7. Clean and dry the mounting surfaces thoroughly before beginning installation. Installation steps 1. Verify the replacement weatherstrip matches the original shape and length, using the old strip as a template if needed. 2. Replace any broken clips or fasteners; for clip-in types, fit clips to the new strip or vehicle as applicable. 3. If adhesive is required, follow the adhesive manufacturer's directions and apply a thin, even bead to the mounting surface or the strip contact area. 4. Starting at an end or corner, seat the weatherstrip into the channel or onto the flange, pressing evenly to engage clips or bond adhesive; avoid stretching the material while fitting. 5. Trim any excess material cleanly with a sharp knife only where necessary, taking care not to cut into the mounting surface. 6. Reinstall interior trim and moulding, returning fasteners to their original positions. 7. Reconnect the negative battery cable last, and follow any manufacturer guidance if airbag circuits were disturbed. 8. Check the seal by closing the door/panel several times, inspecting for uniform compression and alignment; perform a water or draft test to confirm there are no leaks. 9. If sealing or fit is unsatisfactory, adjust seating, replace faulty clips, or reapply adhesive as required. Repair tip: Mark the original weatherstrip position with painter's tape before removal to speed alignment during installation.
- Q:
Why choose Toyota Parts Deal
- Dedicated Service
Your complete satisfaction is our #1 goal
- Lowest Prices
Best deals on genuine OE parts from dealerships
- Fast Delivery
Orders are processed and delivered promptly