

My Garage
My Account
Cart
Genuine 1987 Toyota Supra Piston
Engine Pistons- Select Vehicle by Model
- Select Vehicle by VIN
Select Vehicle by Model
orMake
Model
Year
Select Vehicle by VIN
For the most accurate results, select vehicle by your VIN (Vehicle Identification Number).
6 Pistons found
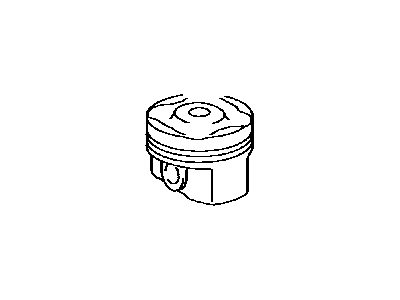
1987 Toyota Supra Piston Sub-Assembly with Pin
Part Number: 13101-42070$74.94 MSRP: $105.63You Save: $30.69 (30%)Ships in 1-3 Business DaysProduct Specifications- Other Name: Piston Sub-Assy, W/Pin
- Manufacturer Note: STD,STD
- Replaced by: 13101-42070-02
- Part Name Code: 13101
- Item Weight: 1.20 Pounds
- Item Dimensions: 3.9 x 3.6 x 3.5 inches
- Condition: New
- Fitment Type: Direct Replacement
- Require Quantity: 6
- SKU: 13101-42070
- Warranty: This genuine Toyota part is covered by warranty.
- Product Specifications
- Other Name: Piston Sub-Assy, W/Pin
- Manufacturer Note: O/S 0.50,O/S 0.50
- Replaced by: 13103-42070
- Part Name Code: 13101
- Item Weight: 1.20 Pounds
- Item Dimensions: 3.9 x 3.8 x 3.5 inches
- Condition: New
- Fitment Type: Direct Replacement
- Require Quantity: 6
- SKU: 13103-42060
- Warranty: This genuine Toyota part is covered by warranty.
1987 Toyota Supra Piston Sub-Assembly with Pin
Part Number: 13103-42050$111.71 MSRP: $157.46You Save: $45.75 (30%)Product Specifications- Other Name: Piston Sub-Assy, W/Pin
- Manufacturer Note: O/S 0.50,O/S 0.50
- Replaced by: 13103-42080
- Part Name Code: 13101
- Item Weight: 1.20 Pounds
- Item Dimensions: 4.0 x 3.8 x 3.3 inches
- Condition: New
- Fitment Type: Direct Replacement
- Require Quantity: 6
- SKU: 13103-42050
- Warranty: This genuine Toyota part is covered by warranty.
- Product Specifications
- Other Name: Piston Sub-Assy, W/Pin; Piston
- Manufacturer Note: STD,STD
- Part Name Code: 13101
- Item Weight: 1.20 Pounds
- Item Dimensions: 3.9 x 3.8 x 3.4 inches
- Condition: New
- Fitment Type: Direct Replacement
- Require Quantity: 6
- SKU: 13101-42060
- Warranty: This genuine Toyota part is covered by warranty.
- Product Specifications
- Other Name: Piston Sub-Assy, W/Pin
- Manufacturer Note: STD,STD
- Replaced by: 13101-42080-02
- Part Name Code: 13101
- Item Weight: 1.20 Pounds
- Item Dimensions: 3.9 x 3.7 x 3.4 inches
- Condition: New
- Fitment Type: Direct Replacement
- Require Quantity: 6
- SKU: 13101-42050
- Warranty: This genuine Toyota part is covered by warranty.
- Product Specifications
- Other Name: Piston Sub-Assy, W/Pin
- Replaces: 13103-42060
- Part Name Code: 13101
- Item Weight: 1.20 Pounds
- Item Dimensions: 4.0 x 3.7 x 3.3 inches
- Condition: New
- Fitment Type: Direct Replacement
- SKU: 13103-42070
- Warranty: This genuine Toyota part is covered by warranty.
1987 Toyota Supra Piston
With ToyotaPartsDeal.com, you have access to an extensive inventory of genuine 1987 Toyota Supra Piston, all priced competitively. Feel secure in your purchase, as all our OEM 1987 Toyota Supra Piston are covered by warranty. Plus, we offer a hassle-free return policy and speedy delivery service.
1987 Toyota Supra Piston Parts Questions & Experts Answers
- Q:How to remove the piston and connecting rod assemblies for the 1987 Toyota Supra?Posted by Stepfan C.A:Before the piston and connecting rod assemblies can be lifted form the crankcase, the cylinder head(s), oil pan, and oil pump must be dismantled. Place your finger and feel for any ridge at the upper limit of ring travel, around ¼ inch from the topmost part of each cylinder. When ridges are formed due to carbon deposits or cylinder wear they need to be scraped off with a special tool because any attempt of cutting them off with a grinding wheel can lead to the piston breakage. Once the cylinder ridges are cut, stand the engine upside down with the crankshaft upwards. Prior to the removal of the connecting rods, the end play should be inspected using the feeler gauges the play is removed. In case of an end play that is beyond the service limit, it will be essential that new connecting rods will be required. Look on the Conn rods and caps for the identification and if you do not find any labels on them, use a small punch and mark them. Turn each connecting rod cap nut, in sequence with the feels, and finally fully unscrew the number one connecting rod cap and the bearing insert without letting the latter drop off the crankshaft. To protect the crankshaft journal and the cylinder wall while removing pistons, slide a short piece of plastic or rubber hose over each of the connecting rod cap bolt. Eject the bearing insert and forcing the connecting rod/piston out through the top of the engine with a wooden hammer handle. If resistance is met, double check to make sure that there is no ridge material left on the cylinder. Following this for the rest of the cylinders in line and your compressor will be back in good shape. The connecting rod caps and bearing inserts have to be reinstalled in their corresponding rods and the cap nuts tightened just enough to do so to avoid damaging the bearing surfaces inadvertently. The pistons must not be pulled out of the connecting rods or when found, should not be disconnected in anyway without proper repair procedures.Answered by Toyota Parts Specialist Bruce / Aug 06, 2024
Related 1987 Toyota Supra Parts
 1987 Toyota Supra Timing Belt
 1987 Toyota Supra Power Steering Hose
 1987 Toyota Supra Master Cylinder Repair Kit
 1987 Toyota Supra Input Shaft Bearing
 1987 Toyota Supra Pilot Bearing
 1987 Toyota Supra Rod Bearing
 1987 Toyota Supra Hydraulic Hose
 1987 Toyota Supra Power Steering Reservoir
 1987 Toyota Supra Piston Ring Set