
Why choose ToyotaPartsDeal
- High-Grade Parts
The best site to buy Toyota Supra genuine parts for years has been ToyotaPartsDeal.com. We're the best online store for genuine parts. Toyota Supra parts you could ever need are available here at the finest quality and best value on the web that will have your vehicle performing past its limits.
- Value For Money
What makes us the best choice for OEM Toyota Supra parts? You get tremendous savings because our goal is to offer unbeatable prices. At ToyotaPartsDeal.com, Our products offer the same performance and reliability as their OEM counterparts without having to break your wallet.
- Quick Delivery
Everything you need for routine maintenance and repair can be found in our complete Toyota Supra parts catalog. Having the best OEM parts inventory available, the parts for your vehicle will arrive fast no matter your location in the nation. You'll be back on the open road before you know it.
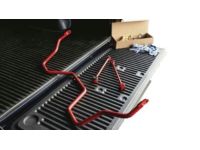
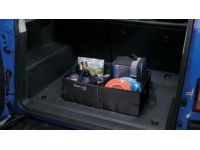
Popular Genuine Toyota Supra Parts
- Power Train/Chassis Parts View More >
- Body Parts View More >
- Engine/Fuel/Tool Parts View More >
- Electrical Parts View More >


Shop Genuine Toyota Supra Parts with ToyotaPartsDeal.com
Toyota Supra is a sports car and grand tourer manufactured by Toyota from 1978 to 2002. The first Toyota Supra was introduced in 1978 and based on the Toyota Celica liftback. Toyota Supra possesses all Japanese automaker's merits, which brought Motor Trend's Import Car of the Year award, its name on Car and Driver magazine's Ten Best List, and Popular Mechanics' Design & Engineering award to it. It had been produced through four generations. In May 1986, the third generation Toyota Supra (A70; 1986-1993) was released. As a separate model, it was powered by engines ranging from 2.0 L 1G-GTE inline 6-cylinder engines to 3.0 L 7M-GTE inline 6-cylinder engines while available transmissions were 5-speed manual transmissions and 4-speed automatic transmissions. In April 1993, the official mass production of the fourth-generation Toyota Supra (A80; 1993-2002) began. Both aspiration and turbo models were available. It was powered by a 3 L Toyota 2JZ-GE inline 6-cylinder engine and a 3 L Toyota 2JZ-GTE inline 6-cylinder Twin Turbo engine equipped with a 5-speed and 6-speed manual transmission and a 4-speed automatic transmission.
Toyota Supra, a powerful sports car, may experience performance issues over time. Common problems include engine issues, such as slow acceleration, poor fuel economy, oil leaks, and dropping oil pressure, often indicated by an illuminated Check Engine Light. To address these problems, inspect the spark plug, oil pump, oil pump gasket, and oil filter. Suspension and transmission failures can manifest as excessive steering wheel vibration, grinding noises, steering pulling to one side, and difficulty shifting gears. Check the control arm, transfer case seal, and bell housing for potential issues. Additionally, maintain often-overlooked parts like wheel seals, which prevent dirt and moisture accumulation, ensuring smooth wheel performance, and replace seat belts after every accident to keep your Toyota Supra in optimal condition.
When it comes to quality and durability, OEM parts reign supreme. They are manufactured to meet Toyota's exacting factory specifications and undergo rigorous quality control. In search of high-grade auto parts that are easy on the wallet? Welcome to our top-tier online store. We stock a wide range of genuine parts for your Toyota Supra, all competitively priced. Rest assured, our parts are supported by the manufacturer's warranty. Over time, you'll appreciate the significant savings and reduced hassle by choosing our trusted parts.
Toyota Supra Parts Questions & Answers
- Q: How to remove and install headlights on Toyota Supra?A:On 1982 and later models, raise the headlights and disconnect the negative cable from the battery, ensuring the headlights remain up. Next, remove the four screws from the headlight bezel and lift it off, followed by removing the four screws from the headlight retaining ring to take off the ring. Pull out the headlight far enough to unplug the electrical connector and remove the headlight. After installation, be certain to adjust the headlights.
- Q: How to replace front Coil Springs and Shock Absorber on Toyota Supra?A:If the shock absorbers, struts, or coil springs are leaking fluid, worn out, or physically damaged, before proceeding, check all possible alternatives because once there is a problem with the strut/shock absorber assembly, the entire assembly must be replaced. Springs can be incorporated in the strut assemblies and may be available in exchange, therefore, it prove useful to cost and consider the availability of parts when disassembling the vehicle. Start by removing the shock absorber or strut and spring assembelage, and clamp it in a wooden padded vise. Fit a spring compressor on this bearing following the manufacturer's procedures and compress a spring until pressure is fully released and can be checked by reshaping the spring. Using a screwdriver or prybar to hold the suspension support and damper rod from turning, use a socket wrench to and turn the damper rod nut counterclockwise. Pull out the nut and suspension support, examining the moving parts of the bearing and the rubber; if the latter has perished or is worn out, replace with a new one. Remove the spring seat and upper insulator from the damper shaft and inspect rubber spring seat and if it is damaged, replace it. After holding onto the end carefully, this lifted the compressed spring off the assembly, being cautious to avoid the end. Remove the rubber bumper and dust boot with reference to the damper rod by sliding it and inspect the lower insulator for signs of wear and replace those that are worn. To assemble the strut, get the dust boot, and rubber bumper and stretch the damper rod to add maximum length while putting the components downwards. If replacing the lower insulator, properly install it in its seat. Sit the coil spring onto the lower insulator such that ends of it fit into the recess. Next, fit another insulator and place the spring seat on; the flat of the damper rod should fit in the upper flats of the spring seat, and the ''out'' mark should face the lower bracket. Last but not the least, fit back the dust seal and suspension support on the damper rod, tighten the nut in conformity to the torque specifications, and finally drop in the strut/ shock absorber & coil spring set up.
- Q: How to remove and install the front bumper on Toyota Supra?A:Remove the radiator grille, then take out the turn signal/fog light. Next, remove the bumper cover fasteners. To detach the bumper, extract the mounting bolts located on either end. Installation is the reverse of the removal procedure.
- Q: How to Remove and Install the Rear Control Arm with the Rear Brake Assembly on 1982 through 1986 Toyota Supra?A:The process describes the operations regarding the displacement and attachment of the rear suspension arm coupled with the rear brake component but with the fixed stub axle assembly. First of all, unscrew the rear stabilizer bar from the suspension arm also, there is the drive axil which has to be unscrewed from the stub axil. Then remove the brake hydraulic line and parking brake cable from the reel of the rear brake assembly. Disengage the shock absorber and the coil spring; make sure that the suspension arm is held up by a jack when removing the pivot bolts nuts. Since toe-in is to be adjusted through the inner pivot bolt's adjusting cam, its position needs to be noted before removal. In the case of suspension arm pivot bushings becoming worn or damaged beyond the recognised limit then they will need to be changed. Thus, for new bushings, it is necessary to cut off the end flange tips while bending the remaining section out as shown in Fig. Rest the inner flange face of the suspension bushing eye on a steel tube, then tap the bushing through with a large socket on a hammer. Finally, the removal of the bushings proceeds in the reversed order, and they are not lubricated. On tightening the suspension arm, ensure that the index and toe-in cam marks are lined, although the pivot bolts should not be over tightened at this point. Lower the vehicle and check the suspension droop after fitting of coil spring and shock absorber, and then bounce the vehicle to settle the suspension before tightening the pivot bolt and the shock absorber lower mounting bolt to the using torque. Last but not the least, release the brake hydraulic system and maybe have the rear wheels alignment done by a professional.


