

My Garage
My Account
Cart
Genuine 1990 Toyota Celica Shock Absorber
Suspension Shock Absorber- Select Vehicle by Model
- Select Vehicle by VIN
Select Vehicle by Model
orMake
Model
Year
Select Vehicle by VIN
For the most accurate results, select vehicle by your VIN (Vehicle Identification Number).
12 Shock Absorbers found
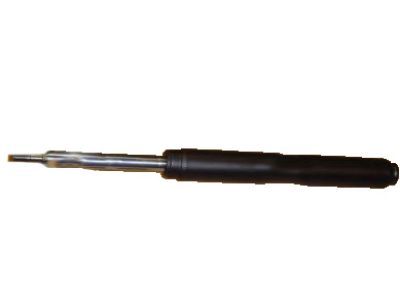
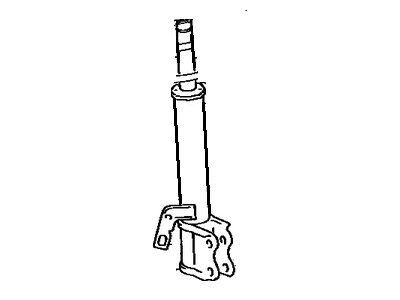
1990 Toyota Celica Shock Absorber Assembly Front Left
Part Number: 48520-20680$125.65 MSRP: $178.63You Save: $52.98 (30%)Ships in 1-3 Business DaysProduct Specifications- Other Name: Absorber Assy, Shock, Front Lh
- Position: Front Driver Side
- Replaced by: 48520-20751
- Part Name Code: 48520
- Item Weight: 9.40 Pounds
- Item Dimensions: 26.9 x 8.5 x 7.7 inches
- Condition: New
- Fitment Type: Direct Replacement
- SKU: 48520-20680
- Warranty: This genuine Toyota part is covered by warranty.
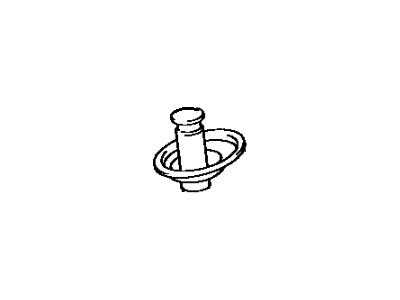
1990 Toyota Celica Shock Absorber Assembly Rear Right
Part Number: 48530-20570$174.53 MSRP: $248.99You Save: $74.46 (30%)Ships in 1-3 Business DaysProduct Specifications- Other Name: ABSORBER Assembly, Shock, Rear RH
- Manufacturer Note: MARK 48530-20570
- Position: Rear Passenger Side
- Part Name Code: 48530
- Item Weight: 7.00 Pounds
- Item Dimensions: 25.8 x 6.7 x 5.9 inches
- Condition: New
- Fitment Type: Direct Replacement
- SKU: 48530-20570
- Warranty: This genuine Toyota part is covered by warranty.


1990 Toyota Celica Shock Absorber Assembly Front Left
Part Number: 48520-20660$125.65 MSRP: $178.63You Save: $52.98 (30%)Product Specifications- Other Name: Absorber Assy, Shock, Front Lh
- Position: Front Driver Side
- Replaced by: 48520-20751
- Part Name Code: 48520
- Item Weight: 9.60 Pounds
- Item Dimensions: 26.4 x 8.2 x 7.5 inches
- Condition: New
- Fitment Type: Direct Replacement
- SKU: 48520-20660
- Warranty: This genuine Toyota part is covered by warranty.


 Product Specifications
- Other Name: Absorber Assy, Shock, Front Rh
- Position: Front Passenger Side
- Replaced by: 48510-20751
- Part Name Code: 48510
- Item Weight: 10.10 Pounds
- Item Dimensions: 27.4 x 8.4 x 7.6 inches
- Condition: New
- Fitment Type: Direct Replacement
- SKU: 48510-20660
- Warranty: This genuine Toyota part is covered by warranty.
 Product Specifications
- Other Name: Absorber Assy, Shock, Front Rh
- Position: Front Passenger Side
- Replaced by: 48510-20751
- Part Name Code: 48510
- Item Weight: 9.30 Pounds
- Item Dimensions: 26.1 x 8.4 x 7.7 inches
- Condition: New
- Fitment Type: Direct Replacement
- SKU: 48510-20680
- Warranty: This genuine Toyota part is covered by warranty.
- Product Specifications
- Other Name: Absorber Assy, Shock, Front Rh
- Position: Front Passenger Side
- Replaced by: 48510-20631
- Part Name Code: 48510
- Item Weight: 9.30 Pounds
- Item Dimensions: 26.6 x 8.4 x 7.6 inches
- Condition: New
- Fitment Type: Direct Replacement
- SKU: 48510-20640
- Warranty: This genuine Toyota part is covered by warranty.
- Product Specifications
- Other Name: Absorber Assy, Shock, Front Lh
- Position: Front Driver Side
- Replaced by: 48520-20631
- Part Name Code: 48520
- Item Weight: 9.70 Pounds
- Item Dimensions: 27.1 x 8.3 x 7.5 inches
- Condition: New
- Fitment Type: Direct Replacement
- SKU: 48520-20640
- Warranty: This genuine Toyota part is covered by warranty.
 Product Specifications
- Other Name: ABSORBER Assembly, Shock, Rear LH; Strut
- Manufacturer Note: MARK 48540-20600
- Position: Rear Driver Side
- Part Name Code: 48540
- Item Weight: 10.20 Pounds
- Item Dimensions: 26.9 x 6.7 x 5.8 inches
- Condition: New
- Fitment Type: Direct Replacement
- SKU: 48540-20600
- Warranty: This genuine Toyota part is covered by warranty.
- Product Specifications
- Other Name: ABSORBER Assembly, Shock, Rear RH; Strut
- Manufacturer Note: MARK 48530-20530
- Position: Rear Passenger Side
- Replaces: 48530-20550, 48530-20510, 48530-20640
- Part Name Code: 48530
- Item Weight: 6.80 Pounds
- Item Dimensions: 25.8 x 6.8 x 5.7 inches
- Condition: New
- Fitment Type: Direct Replacement
- SKU: 48530-20530
- Warranty: This genuine Toyota part is covered by warranty.
- Product Specifications
- Other Name: ABSORBER Assembly, Shock, Rear LH; Strut
- Manufacturer Note: MARK 48540-20530
- Position: Rear Driver Side
- Replaces: 48540-20550, 48540-20510, 48540-20640
- Part Name Code: 48540
- Item Weight: 6.80 Pounds
- Item Dimensions: 25.8 x 6.5 x 5.8 inches
- Condition: New
- Fitment Type: Direct Replacement
- SKU: 48540-20530
- Warranty: This genuine Toyota part is covered by warranty.
- Product Specifications
- Other Name: ABSORBER Assembly, Shock, Rear RH; Strut
- Manufacturer Note: MARK 48530-20600
- Position: Rear Passenger Side
- Part Name Code: 48530
- Item Weight: 9.90 Pounds
- Item Dimensions: 26.4 x 6.8 x 5.9 inches
- Condition: New
- Fitment Type: Direct Replacement
- SKU: 48530-20600
- Warranty: This genuine Toyota part is covered by warranty.
- Product Specifications
- Other Name: ABSORBER Assembly, Shock, Rear LH
- Manufacturer Note: MARK 48540-20570
- Position: Rear Driver Side
- Part Name Code: 48540
- Item Weight: 6.50 Pounds
- Item Dimensions: 26.9 x 6.6 x 5.7 inches
- Condition: New
- Fitment Type: Direct Replacement
- SKU: 48540-20570
- Warranty: This genuine Toyota part is covered by warranty.
1990 Toyota Celica Shock Absorber
With ToyotaPartsDeal.com, you have access to an extensive inventory of genuine 1990 Toyota Celica Shock Absorber, all priced competitively. Feel secure in your purchase, as all our OEM 1990 Toyota Celica Shock Absorber are covered by warranty. Plus, we offer a hassle-free return policy and speedy delivery service.
1990 Toyota Celica Shock Absorber Parts Questions & Experts Answers
- Q:How to Disassemble and Reassemble a Shock Absorber for the 1990 Toyota Celica?Posted by Autar K.A:If the struts or coil springs show signs of wear such as leaking fluid, loss of damping capability, or chipped, sagging, or cracked coil springs, it is important to explore all options before starting any work. The Shock Absorber cannot be serviced and must be replaced if there is a problem. However, there may be strut assemblies complete with springs available on an exchange basis, which can save time and effort. Before disassembling the vehicle, it is recommended to check the cost and availability of parts. When disassembling, remove the coil spring from the strut assembly and store it in a safe area. To disassemble the strut and spring assembly, mount it in a vise lined with wood or rags to prevent damage. Use a spring compressor to relieve pressure from the upper spring seat, following the tool manufacturer's instructions. Loosen the damper shaft nut and remove the nut and suspension support. Inspect the bearing and rubber portion of the suspension support for any issues and replace if necessary. Lift the spring seat and upper insulator from the damper shaft, checking the rubber spring seat for cracking and hardness. Carefully remove the compressed spring from the assembly and set it aside. Slide off the rubber bumper from the damper shaft and check the lower insulator for wear and replace if needed. To reassemble, if replacing the lower insulator, position it with the dropped portion seated in the lowest part of the seat and install the rubber bumper. Place the coil spring onto the lower insulator, ensuring the end fits into the recessed portion of the seat. Install the upper insulator and spring seat, aligning the flats on the damper shaft with the flats in the hole of the seat. Make sure the "OUT" marking on the spring seat faces the lower bracket. Install the dust seal and suspension support onto the damper shaft, tighten the nut, and then install the strut and coil spring assembly following the previous procedure.Answered by Toyota Parts Specialist Jerry / Jun 23, 2025
Related 1990 Toyota Celica Parts
 1990 Toyota Celica Steering Knuckle
 1990 Toyota Celica Coil Springs
 1990 Toyota Celica Tie Rod End
 1990 Toyota Celica Fender
 1990 Toyota Celica Wheelhouse