
My Garage
My Account
Cart
Genuine 1992 Toyota Land Cruiser Cylinder Head
Head- Select Vehicle by Model
- Select Vehicle by VIN
Select Vehicle by Model
orMake
Model
Year
Select Vehicle by VIN
For the most accurate results, select vehicle by your VIN (Vehicle Identification Number).
2 Cylinder Heads found
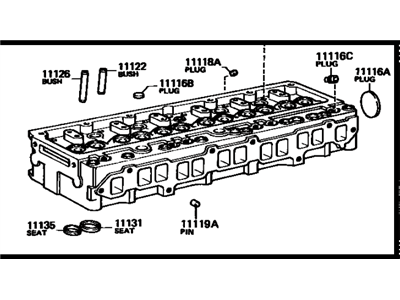
1992 Toyota Land Cruiser Cylinder Head Sub-Assembly
Part Number: 11101-69105$1615.07 MSRP: $2050.87You Save: $435.80 (22%)Ships in 1-3 Business DaysProduct Specifications- Other Name: Head Sub-Assy, Cylinder
- Replaced by: 11101-69107
- Part Name Code: 11101
- Item Weight: 26.80 Pounds
- Item Dimensions: 23.0 x 12.8 x 11.0 inches
- Condition: New
- Fitment Type: Direct Replacement
- SKU: 11101-69105
- Warranty: This genuine part is guaranteed by Toyota's factory warranty.
- Product Specifications
- Other Name: Head Sub-Assy, Cylinder; Cylinder Head
- Part Name Code: 11101
- Item Weight: 26.30 Pounds
- Item Dimensions: 21.9 x 12.2 x 10.7 inches
- Condition: New
- Fitment Type: Direct Replacement
- SKU: 11101-61080
- Warranty: This genuine part is guaranteed by Toyota's factory warranty.
1992 Toyota Land Cruiser Cylinder Head
With ToyotaPartsDeal.com, you have access to an extensive inventory of genuine 1992 Toyota Land Cruiser Cylinder Head, all priced competitively. Feel secure in your purchase, as all our OEM 1992 Toyota Land Cruiser Cylinder Head are covered by the manufacturer's warranty. Plus, we offer a hassle-free return policy and speedy delivery service.
1992 Toyota Land Cruiser Cylinder Head Parts Questions & Experts Answers
- Q: How to remove and install a cylinder head in DOHC engine for the 1992 Toyota Land Cruiser?A: This process should only be undertaken when the engine has not been in use for a while and is therefore, cold. First switch off the car batter and then unfasten the negative terminal of the battery, find the correct code for the turn-on of the stereo if it is of anti theft type. Further to this, the coolant has to be drained from the engine block and the radiator and the engine oil should be drained from the engine accompanied with the removal of the oil filter. Continue by unplugging the throttle body, air intake plenum, fuel injectors, and fuel rail; also, unbolt the intake and exhaust manifolds; both the exhaust manifold and intake manifold may be left attached to the cylinder head for block removal. Subsequently, unbolt the alternator and distributor, then, take off the camshaft sprocket off the intake camshaft and set it on the timing chain guides, then, take out the camshafts accompanied by valve lifters. Remove the nuts of the upper bracket of the power steering pump and take it off but not the hoses. Label and dess any of the remaining items, such as coolant fittings, tubes, cables, and hoses, and then disconnect the wiring harness connectors from a variety of sensors. Pull off both water necks on the opposite ends of the cylinder head, and then unscrew the two cylinder head-to-timing cover bolts. Tighten and loosen the cylinder head bolts by a quarter turn at a time until you can easily remove them, using the cylinder head bolt sequence so as not to warp or crack the cylinder head. After disassembling the engine, lift the cylinder head off the engine block, loosen it gently if it is tightly sitted and pull out all the external parts of the cylinder head for washing and having a look at the condition. When faced with refitting the cylinder head, the block surfaces that make contact with the cylinder head should be free from any dirt, carbon, or traces of gasket materials; use a gasket scraper to thin down the Deposit, then wash off the scrapings with lacquer thinner, or acetone. Ensure that there are no damages on the block and cylinder head mating surfaces; and if there are, you should file or machine the surfaces where there are damages. Run the threads of the cylinder head bolt holes with a tap and blow clean with compressed air make sure nothing is left in the holes. It is recommended to secure each bolt in a vise to run a wire-brush after that down the threads with a file to eliminate the corrosion. Replace the removed components into the cylinder-head, place the new gasket above the dowel pins on the block and then gently place the cylinder head on the block such as not to shift the gasket. Dip the threads and under the heads of the bolts in clean engine oil and then place the bolts in their original positions and tighten them by hand. In turning the bolts, use the following sequence: 1-2-3 to successfully achieve the recommended torque with the shorter bolts-aligned toward the intake and the longer bolts toward the exhaust. After tightening, fasten the two cylinder head-to-timing cover bolts and again produce the torque stated. The rest of the installation procedures are the opposite of the removal process, and check and optimize the valves as required. Add coolants on to the cooling system, fit a new oil filter and add fresh oil on the engine. Ending it, the engine is started, and the vehicle is inspected for leakage, besides fine-tuning the ignition timing and road testing the vehicle if required.


