
My Garage
My Account
Cart
Genuine 1994 Toyota Land Cruiser Cylinder Head
Head- Select Vehicle by Model
- Select Vehicle by VIN
Select Vehicle by Model
orMake
Model
Year
Select Vehicle by VIN
For the most accurate results, select vehicle by your VIN (Vehicle Identification Number).
1 Cylinder Head found
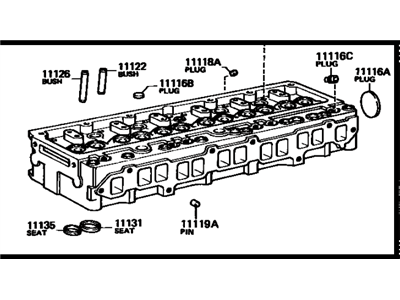
1994 Toyota Land Cruiser Cylinder Head Sub-Assembly
Part Number: 11101-69105$1615.07 MSRP: $2050.87You Save: $435.80 (22%)Ships in 1-3 Business DaysProduct Specifications- Other Name: Head Sub-Assy, Cylinder
- Replaced by: 11101-69107
- Part Name Code: 11101
- Item Weight: 26.80 Pounds
- Item Dimensions: 23.0 x 12.8 x 11.0 inches
- Condition: New
- Fitment Type: Direct Replacement
- SKU: 11101-69105
- Warranty: This genuine part is guaranteed by Toyota's factory warranty.
1994 Toyota Land Cruiser Cylinder Head
With ToyotaPartsDeal.com, you have access to an extensive inventory of genuine 1994 Toyota Land Cruiser Cylinder Head, all priced competitively. Feel secure in your purchase, as all our OEM 1994 Toyota Land Cruiser Cylinder Head are covered by the manufacturer's warranty. Plus, we offer a hassle-free return policy and speedy delivery service.
1994 Toyota Land Cruiser Cylinder Head Parts Questions & Experts Answers
- Q: What steps should be taken for thorough cleaning and inspection of the cylinder head and valve train components during an engine overhaul for the 1994 Toyota Land Cruiser?A: Thorough cleaning of the cylinder head and related valve train components, followed by a detailed inspection, will enable you to decide how much valve service work must be done during the engine overhaul. Begin by scraping all traces of old gasket material and sealing compound off the head gasket, intake manifold, and exhaust manifold sealing surfaces, taking care not to gouge the cylinder head. Remove built-up scale from the coolant passages and use a stiff wire brush to clear deposits from various holes. Run an appropriate size tap into each threaded hole to remove corrosion and thread sealant, using compressed air to clear debris while wearing eye protection. Clean the rocker arm pivot bolt or stud threads with a wire brush, then clean the cylinder head with solvent and dry it thoroughly, using compressed air to speed up the process. Decarbonizing chemicals may be useful but should be handled with caution. Clean the rocker arms, pivot balls or fulcrums, nuts or bolts, and pushrods with solvent, ensuring they are dried thoroughly without mixing them up. Clean all valve springs, spring seats, keepers, and retainers one valve at a time to avoid mixing parts. Scrape off heavy deposits from the valves and use a motorized wire brush for the valve heads and stems, ensuring not to mix them up. Inspect the head for cracks, coolant leakage, and other damage, consulting an automotive machine shop if necessary. Check the head gasket mating surface for warpage using a straightedge and feeler gauge, and if warpage exceeds the specified limit, it can be resurfaced. Examine the valve seats for pitting, cracking, or burning, which may require valve service beyond home mechanic capabilities. Measure the valve stem-to-guide clearance with a dial indicator, and if there are doubts about the valve guides, they should be checked by a machine shop. Inspect each valve for uneven wear, deformation, cracks, pits, and burned areas, checking the valve stem for scuffing and galling. Measure the margin width on each valve, replacing any with a margin narrower than specified. Check each valve spring for wear and pits, measuring the free length and comparing it to specifications; any springs that are shorter than specified should not be reused. Stand each spring on a flat surface to check for squareness, replacing any distorted or sagged springs. Inspect the spring retainers and keepers for wear and cracks, replacing any questionable parts. Check the rocker arm faces for pits, wear, and cracks, as well as the pushrod ends for scuffing and excessive wear, rolling each pushrod on a flat surface to check for bending. Examine the rocker arm bolt holes or studs for damaged threads and secure installation, replacing any damaged or excessively worn parts. If the inspection indicates that the valve components are in generally poor condition and worn beyond specified limits, reassemble the valves in the cylinder head.


