

My Garage
My Account
Cart
Genuine 2008 Toyota Solara Axle Shaft
Car Axle Shaft- Select Vehicle by Model
- Select Vehicle by VIN
Select Vehicle by Model
orMake
Model
Year
Select Vehicle by VIN
For the most accurate results, select vehicle by your VIN (Vehicle Identification Number).
6 Axle Shafts found
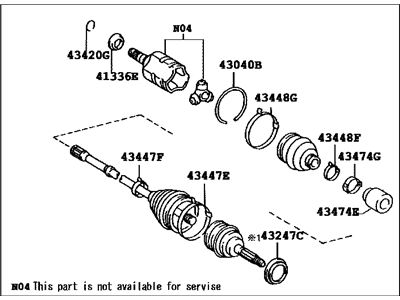
2008 Toyota Solara Axle Assembly
Part Number: 43420-06450$464.94 MSRP: $693.60You Save: $228.66 (33%)Product Specifications- Other Name: Shaft Assembly, Front Drive, Driver Side; Axle Assembly
- Position: Driver Side
- Part Name Code: 43420
- Item Weight: 19.90 Pounds
- Item Dimensions: 29.8 x 5.3 x 5.2 inches
- Condition: New
- Fitment Type: Direct Replacement
- SKU: 43420-06450
- Warranty: This genuine Toyota part is covered by warranty.
2008 Toyota Solara Axle Assembly
Part Number: 43420-06490$456.80 MSRP: $681.46You Save: $224.66 (33%)Ships in 1-3 Business DaysProduct Specifications- Other Name: Shaft Assembly, Front Drive, Driver Side; Axle Assembly
- Manufacturer Note: W(ABS)
- Position: Driver Side
- Replaces: 43420-06221
- Part Name Code: 43420
- Item Weight: 7.30 Pounds
- Item Dimensions: 10.0 x 5.3 x 5.3 inches
- Condition: New
- Fitment Type: Direct Replacement
- SKU: 43420-06490
- Warranty: This genuine Toyota part is covered by warranty.
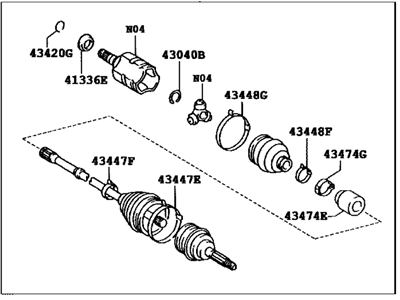
2008 Toyota Solara Axle Assembly
Part Number: 43420-06460$390.00 MSRP: $581.80You Save: $191.80 (33%)Ships in 1-3 Business DaysProduct Specifications- Other Name: Shaft Assembly, Front Drive, Driver Side; Axle Assembly
- Position: Driver Side
- Part Name Code: 43420
- Item Weight: 15.10 Pounds
- Item Dimensions: 28.9 x 7.4 x 6.4 inches
- Condition: New
- Fitment Type: Direct Replacement
- SKU: 43420-06460
- Warranty: This genuine Toyota part is covered by warranty.
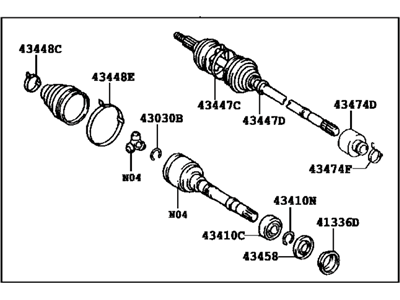
2008 Toyota Solara Axle Assembly
Part Number: 43410-06460$500.94 MSRP: $747.30You Save: $246.36 (33%)Ships in 1-3 Business DaysProduct Specifications- Other Name: Shaft Assembly, Front Drive, Passenger Side; Axle Assembly
- Position: Passenger Side
- Part Name Code: 43410
- Item Weight: 14.60 Pounds
- Item Dimensions: 30.1 x 7.4 x 6.6 inches
- Condition: New
- Fitment Type: Direct Replacement
- SKU: 43410-06460
- Warranty: This genuine Toyota part is covered by warranty.
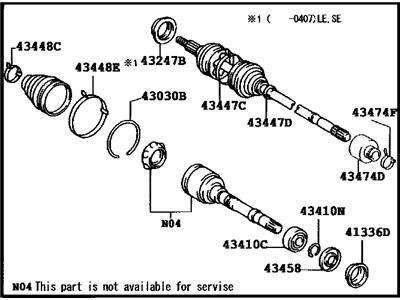
2008 Toyota Solara Axle Assembly
Part Number: 43410-06480$501.40 MSRP: $748.00You Save: $246.60 (33%)Product Specifications- Other Name: Shaft Assembly, Front Drive, Passenger Side; Axle Assembly
- Position: Passenger Side
- Part Name Code: 43410
- Item Weight: 25.20 Pounds
- Item Dimensions: 44.5 x 5.5 x 5.4 inches
- Condition: New
- Fitment Type: Direct Replacement
- SKU: 43410-06480
- Warranty: This genuine Toyota part is covered by warranty.
2008 Toyota Solara Front Drive Shaft Assembly Right Hand
Part Number: 43410-06221$501.40 MSRP: $748.00You Save: $246.60 (33%)Product Specifications- Other Name: Shaft Assy, Front Drive, Rh; Axle Assembly
- Manufacturer Note: W(ABS)
- Position: Passenger Side
- Part Name Code: 43410
- Item Weight: 15.30 Pounds
- Item Dimensions: 29.2 x 7.3 x 6.4 inches
- Condition: New
- Fitment Type: Direct Replacement
- SKU: 43410-06221
- Warranty: This genuine Toyota part is covered by warranty.
2008 Toyota Solara Axle Shaft
With ToyotaPartsDeal.com, you have access to an extensive inventory of genuine 2008 Toyota Solara Axle Shaft, all priced competitively. Feel secure in your purchase, as all our OEM 2008 Toyota Solara Axle Shaft are covered by warranty. Plus, we offer a hassle-free return policy and speedy delivery service.
2008 Toyota Solara Axle Shaft Parts Questions & Experts Answers
- Q:How to Remove the Axle Shaft for the 2008 Toyota Solara?Posted by Tahira A.A:To dismantle the axle shaft, remove the cable from the negative terminal of the battery and engage the parking brake. Depress the hood release handle and open the hood, then unscrew the wheel cover or the hub cap, next is to unscrew the cotter pin and the bearing nut lock of the axle shaft/hub nut. To remove one of the front wheels: turn the axle shaft/hub nut clockwise until it becomes loose, and then turn it counter clockwise to slightly loosen it and then free the front wheel and the lug nuts, lift the car using the jack to a correct height and then place the jack stands in order to support the car before putting off the wheel. There are some engine splash shields that may hinder access; if any, remove them and then the axle shaft/hub nut. However, equipping the right driveshaft half is easier if the entire right axle shaft assembly is withdrawn as a single/whole unit. The ends of the stabilizer link at the suspension strut and the tie-rods should be disconnected from the knuckle, you then remove the nuts and bolt that holds the ball joint to hold the control arm, the control arm should be pulled down to free the two parts from each other. In structures for models having ABS brakes, remove the ABS sensor and shroud clamp part. To release the axle shaft from the hub splines, strike the end of the axle shaft with a light hammer or on a brass punch. If it is still lodged into place, the brake disc may need to be unbolted and a two jaw puller requires to be used. Put a drain pan below the transaxle so that you can capture any dripping lube, and if there is a case shield over the inner CV joint pull it off. Pry up on the slack of the steering knuckle to remove the axle shaft from the hub while being cautious with the ring around the CV joint that is sharp on the hands. In right axle shaft assemblies, you have to unlock the center bearing coming with a lock bolt and snap-ring and then sliding out the splined inner end of the intermediate side shaft from the differential side gear. For the left axle shaft, gently push the inner CV joint away from the transaxle in the mentioned locations. If the axle shaft needs to be removed and the vehicle has to be moved while the part is removed, tighten a large bolt with washers through the hub. For installation, reverse the removal steps, as well as engaging the push on the axle shaft to allow the retaining ring to be wedged in place on the inner CV joint, then torque the center bearing lock bolt and finally install the wheel and tighten the lug nuts then raise the vehicle then again tighten the lug nuts. Last, the axle shaft/hub nut should be tightened and the nut lock accompanied by a new cotter pin should be fitted into place; also, the transaxle or differential lubricant must be checked and the level replenished if necessary. Also, perform a rough check on the intermediate shaft bearing and replace it with a new one if it is not smooth to turn as it requires special tools for replacing it.Answered by Toyota Parts Specialist Phil / Jul 24, 2023
Related 2008 Toyota Solara Parts
 2008 Toyota Solara Wheel Bearing
 2008 Toyota Solara Wheel Seal
 2008 Toyota Solara Torque Converter
 2008 Toyota Solara Transmission Pan
 2008 Toyota Solara Output Shaft Bearing
 2008 Toyota Solara Input Shaft Bearing
 2008 Toyota Solara Pinion Washer