
My Garage
My Account
Cart
Genuine Toyota Matrix Piston
Engine Pistons- Select Vehicle by Model
- Select Vehicle by VIN
Select Vehicle by Model
orMake
Model
Year
Select Vehicle by VIN
For the most accurate results, select vehicle by your VIN (Vehicle Identification Number).
22 Pistons found
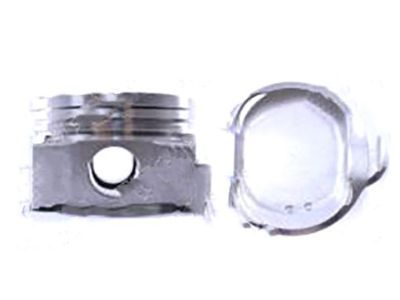
Toyota Matrix Piston
Part Number: 13211-0H040-A0$101.35 MSRP: $142.87You Save: $41.52 (30%)Ships in 1-3 Business DaysToyota Matrix Piston Sub-Assembly with Pin
Part Number: 13101-0T010$81.24 MSRP: $114.53You Save: $33.29 (30%)Ships in 1-3 Business DaysToyota Matrix Piston
Part Number: 13211-28112-B0$101.35 MSRP: $142.87You Save: $41.52 (30%)Ships in 1-3 Business DaysToyota Matrix Piston
Part Number: 13211-28112-A0$99.34 MSRP: $140.04You Save: $40.70 (30%)Ships in 1-3 Business DaysToyota Matrix Piston
Part Number: 13211-28110-A0$99.34 MSRP: $140.04You Save: $40.70 (30%)Ships in 1-3 Business DaysToyota Matrix Piston
Part Number: 13211-0H040-B0$101.35 MSRP: $142.87You Save: $41.52 (30%)Ships in 1-3 Business DaysToyota Matrix Piston Sub-Assembly with Pin
Part Number: 13101-0D091$105.24 MSRP: $148.35You Save: $43.11 (30%)Ships in 1-3 Business DaysToyota Matrix Piston
Part Number: 13211-28110-B0$101.35 MSRP: $142.87You Save: $41.52 (30%)Ships in 1-3 Business DaysToyota Matrix Piston
Part Number: 13211-0H041-C0$101.35 MSRP: $142.87You Save: $41.52 (30%)Ships in 1-3 Business DaysToyota Matrix Piston
Part Number: 13211-0H041-B0$101.35 MSRP: $142.87You Save: $41.52 (30%)Ships in 1-3 Business DaysToyota Matrix Piston
Part Number: 13211-28111-A0$99.34 MSRP: $140.04You Save: $40.70 (30%)Ships in 1-3 Business DaysToyota Matrix Piston
Part Number: 13211-28112-C0$99.34 MSRP: $140.04You Save: $40.70 (30%)Ships in 1-3 Business DaysToyota Matrix Piston
Part Number: 13211-0H040-C0$101.35 MSRP: $142.87You Save: $41.52 (30%)Ships in 1-3 Business DaysToyota Matrix Piston
Part Number: 13211-28110-C0$99.34 MSRP: $140.04You Save: $40.70 (30%)Ships in 1-3 Business DaysToyota Matrix Piston
Part Number: 13211-0H041-A0$101.35 MSRP: $142.87You Save: $41.52 (30%)Ships in 1-3 Business DaysToyota Matrix Piston
Part Number: 13211-28111-B0$101.35 MSRP: $142.87You Save: $41.52 (30%)Ships in 1-3 Business DaysToyota Matrix Piston Sub-Assembly with Pin
Part Number: 13101-22140$103.36 MSRP: $145.70You Save: $42.34 (30%)Ships in 1-3 Business DaysToyota Matrix Piston
Part Number: 13211-28111-C0$99.34 MSRP: $140.04You Save: $40.70 (30%)Ships in 1-3 Business DaysToyota Matrix Piston Sub-Assembly with Pin
Part Number: 13101-0D090$105.24 MSRP: $148.35You Save: $43.11 (30%)Ships in 1-3 Business DaysToyota Matrix Piston Sub-Assembly with Pin
Part Number: 13101-88601$113.50 MSRP: $160.00You Save: $46.50 (30%)
| Page 1 of 2 |Next >
1-20 of 22 Results
Toyota Matrix Piston
The Piston which is present in the Toyota Matrix cars is the critical part of the internal combustion engine, allowing the transformation of the power of combustion into the power needed for movements of the car. It works by imparting force from expanding gases into crankshaft thus ensuring effective engine operation. Usually made up from alloy aluminum designs which are stronger and lighter, the design is improved with the use of gas-tight Piston rings. A variety of Piston types have been employed in addition to the Matrix for many years, such as trunk Pistons, supporting side forces with oil rings to supply lubrication. Also, racing Toyota Pistons are designed for lightweight strength to cope with high RPMs and be performance-oriented. The variations between these Toyota Matrix Piston types are based on their particular use cases and design characteristics including cooling cavities and oil-lubrication, which overall improve the efficiency and lifetime of the engine.
If you are in demand for superior quality and affordable OEM Toyota Matrix Piston, then shop with us! We own a wide range of the reduced-priced genuine Toyota Matrix Piston. You can purchase in confidence as all parts come with a manufacturer's warranty. Any issues with our products? No need to worry as we have a hassle-free return policy to guide you every step of the way.
Toyota Matrix Piston Parts Questions & Experts Answers
- Q: How to remove and install piston/connecting rod assemblies on Toyota Matrix?A:To do so, the cylinder head, upper part of the oil pan, and the oil pan itself have to be removed from the engine before pulling out the piston and connecting rod assemblies. Look for any ridges that are at the extreme end of the ring travel in every cylinder and which must always be trimmed using a specific tool to enhance the lifter of the piston. After that, demarcate the crank shaft, turn the engine to have the crankshaft on the upper most side after removing the ridges. With the connecting rod in place and the piston at TDC, measure the connecting rod endplay with feeler gauges, meaning that if the amount is over the service limit, then the new connecting rods may be required. It is worthy to identify the connecting rods and caps then you can loose and remove the connecting rod cap bolts without dropping the bearing insert. Slide the connecting rod/piston assembly out through the top of the engine you made, be sure to take out all ridges. Stack the caps in order and place the inserts back in position to avoid further harm in case of a review. Before fitting new piston rings the end gaps should be measured and the piston ring side clearance should be checked. Lay down the piston/connecting rod assemblies and new ring sets in order to ensure that corresponding sets are assembled together. Place the first cylinder and the top ring at their proper position and measure the end gap with the help of the feeler gauges and get on with the adjustment if the measurements are not correct. It is to be noted that the correct orientation of the rings must be placed. The first step to fit the rings is to properly place the oil control ring, middle, and the top rings. Scrub the cylinder liners, deburred the corner radii, and make sure the crankshaft is inserted before setting the pistons/connecting rods in. Oil the piston and rings, apply a piston ring compressor and then thread the assembly into the cylinder properly. Inspect the clearance of the connecting rod bearing oil by using Plastigage, comparing the sizes of the bearing as well as its cleanliness. The usage of Plastigage should be skinned, on the bearing faces lubricate using grease or assembly lube, and finally screw the rod cap bolts up to the appropriate torque. Apply the same process for all the assemblies, make sure they are clean and they are installed with right orientation. Last but not the least, perform a crankshaft rocking motion to feel for binding and for the second time, check the connecting rod end play and fix them if there is some problem.


