My Garage
Cart
Make sure this part fits

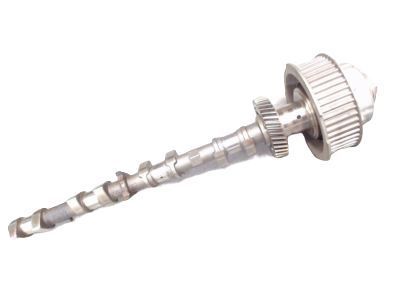
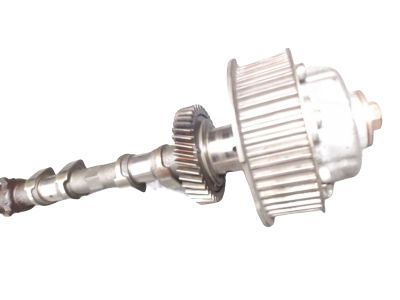
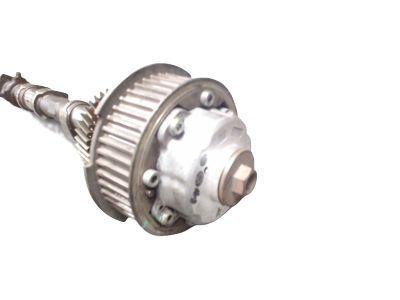
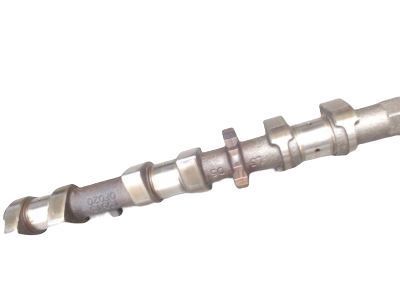
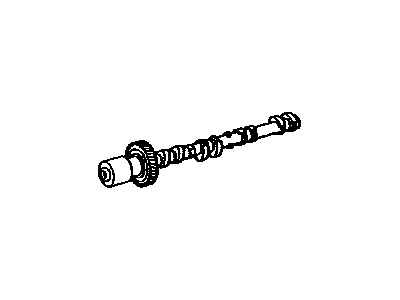
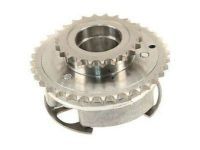
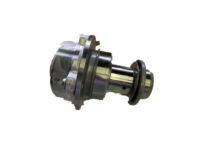
Toyota 13053-0F020 CAMSHAFT Sub-Assembly

2004-2010 Toyota 130530F020

Customer Questions & Expert Answers (3)
Toyota 13053-0F020 CAMSHAFT Sub-Assembly
  • Part Description
    Camshaft Sub-Assy, NO.3
  • Part Name Code
    13053
  • Replaced By
    13053-50060
  • Manufacturer
    Toyota
Make sure this part fits
$405.09 MSRP: $596.29
You Save: $191.20 (33%)
Ships in 1-3 Business Days
1
ADD TO CART
  • Related Parts
  • Product Specifications
  • Vehicle Fitment
  • Customer Questions & Expert Answers
  • Product Specifications

    BrandGenuine Toyota
    Part Name Code13053
    Manufacturer Part Number13053-0F020
    Part DescriptionCamshaft Sub-Assy, NO.3
    Manufacturer Note(L)
    Item Dimensions20.8 x 3.6 x 3.0 inches
    Item Weight10.20 Pounds
    ConditionNew
    Fitment TypeDirect Replacement
    ManufacturerToyota
    SKU13053-0F020
    WarrantyThis genuine Toyota part is guaranteed by Toyota's factory warranty.
    Shipping & ReturnShipping Policy Return Policy
    Warning: California's Proposition 65
  • Vehicle Fitment

    Year Make Model Trim & Engine Important vehicle option details
    2004-2010 Toyota SequoiaLimited, Platinum, SR5|8 Cyl 4.6L, 8 Cyl 4.7L, 8 Cyl 5.7L1URFE, 2UZFE, 3URFBE, 3URFE; UCK35L-GKBLKA, UCK35L-GKBSKA, UCK35L-GKSLKA, UCK35L-GKSSKA, UCK45L-GKBLKA, UCK45L-GKBSKA, UCK45L-GKSLKA, UCK45L-GKSSKA, UCK60L-GKALKA, UCK60L-GKASKA, UCK65L-GKALKA, UCK65L-GKASKA, UPK60L-GKTLKA, UPK60L-GKTSKA, UPK65L-GKTLKA, UPK65L-GKTSKA, USK60L-GKTLKA, USK60L-GKTSKA, USK60L-GKTZKA, USK65L-GKTLGA, USK65L-GKTLKA, USK65L-GKTSGA, USK65L-GKTSKA, USK65L-GKTZGA, USK65L-GKTZKA
    2004-2010 Toyota TundraDLX, Limited, SR5|6 Cyl 3.4L, 6 Cyl 4.0L, 8 Cyl 4.6L, 8 Cyl 4.7L, 8 Cyl 5.7L1GRFE, 1URFE, 2UZFE, 3URFBE, 3URFE, 5VZFE; GSK30L-ARBSKA, GSK30L-ARFSKA, GSK30L-TRBDKA, GSK30L-TRBDKK, GSK30L-TRFDKA, GSK50L-TRADKA, GSK51L-CRASKA, GSK51L-THADKA, UCK30L-ARBLKA, UCK30L-ARBSKA, UCK30L-ARBSKK, UCK30L-ARSLKA, UCK30L-ARSSKA, UCK30L-ARSSKK, UCK30L-ASBLKA, UCK30L-ASBSKA, UCK30L-ASSLKA, UCK30L-ASSSKA, UCK30L-TRBDKA, UCK31L-PRBLKA, UCK31L-PRBSKA, UCK31L-PRBSKK, UCK31L-PRSLKA, UCK31L-PRSSKA, UCK31L-PRSSKK, UCK40L-ARBLKA, UCK40L-ARBLKK, UCK40L-ARBSKA, UCK40L-ARBSKK, UCK40L-ARSLKA, UCK40L-ARSLKK, UCK40L-ARSSKA, UCK40L-ARSSKK, UCK40L-ASBLKA, UCK40L-ASBSKA, UCK40L-ASSLKA, UCK40L-ASSSKA, UCK40L-TRBDKA, UCK40L-TRBDKK, UCK40L-TRSDKK, UCK40L-TRSSKA, UCK41L-PRBLKA, UCK41L-PRBLKK, UCK41L-PRBSKA, UCK41L-PRBSKK, UCK41L-PRSLKA, UCK41L-PRSLKK, UCK41L-PRSSKA, UCK41L-PRSSKK, UCK50L-TRADKA, UCK51L-CRALKA, UCK51L-CRASKA, UCK51L-PSALKA, UCK51L-PSASKA, UCK51L-THADKA, UCK52L-CHASKA, UCK55L-TRADKA, UCK56L-CRALKA, UCK56L-CRASKA, UCK56L-PSALKA, UCK56L-PSASKA, UCK56L-THADKA, UCK57L-CHASKA, UPK50L-TRTDKA, UPK51L-CRTLKA, UPK51L-CRTSKA, UPK51L-PSTLKA, UPK51L-PSTSKA, UPK51L-THTDKA, UPK52L-CHTSKA, UPK55L-TRTDKA, UPK56L-CRTLKA, UPK56L-CRTSKA, UPK56L-PSTLKA, UPK56L-PSTSKA, UPK56L-THTDKA, UPK57L-CHTSKA, USK50L-TRTDKA, USK51L-CRTLKA, USK51L-CRTSKA, USK51L-PSTLKA, USK51L-PSTSKA, USK51L-THTDKA, USK52L-CHTSKA, USK55L-TRTDGA, USK55L-TRTDKA, USK56L-CRTLGA, USK56L-CRTLKA, USK56L-CRTSGA, USK56L-CRTSKA, USK56L-PSTLGA, USK56L-PSTLKA, USK56L-PSTSGA, USK56L-PSTSKA, USK56L-THTDGA, USK56L-THTDKA, USK57L-CHTSGA, USK57L-CHTSKA, VCK30L-ARMSKA, VCK30L-ARSSKA, VCK30L-TRMDKA, VCK30L-TRSDKA, VCK30L-TRSDKK, VCK40L-ARMSKA, VCK40L-ARSSKA
  • Customer Questions & Expert Answers

    Q:
    Does it fit my car? Posted by ToyotaPartsDeal Specialist
    A:
    You can Select Your Vehicle to check if 13053-0F020 fits your vehicle.
    Posted by ToyotaPartsDeal Specialist
    Q:
    How to remove and install Camshaft in V6 engine on Toyota Sequoia? Posted by Customer
    A:
    This removal procedure is not for the rookies; thus, it is advisable to read and follow these instructions carefully before proceeding to the task. First, remove the cable from the negative terminal of the battery next, drain the engine oil and coolant system. Disconnect the timing chain and to to pull the camshafts out of the right cylinder head and rotate the counterclockwise until the intake cam lobe for the No. 1 cylinder is at 7 o'clock and the exhaust cam lobe is at 12 o'clock; for the left cylinder head, the alignment is not required. Tap a little amount of Loctite 243 on all 16 camshaft bearing cap bolts and then, in the reverse of the tightening pattern, remove and ease out all of them In this process, the camshafts and the bearing caps have to be removed and put in and order and labeled. Pick up the lifters using a magnet and arrange them in the same box while writing the name of each lifter on the box. In case camshafts need to be removed from other cylinder head, then the described steps should be repeated, though, the positioning should be rather different for the right cylinder. Once the timing chains and camshafts are off, don't turn the crankshaft while they are off. Looking at each lifter to detect wear while looking at the cam lobes and bearing journals for signs of abnormal wear, measure the height of each of the camshaft lobe and the diameter of each of the journals using micrometer if it does not meet the specifications then get a new one. To ascertain oil clearance, use Plastigage, careful to eliminate grunge from the parts before arranging the camshaft horizontally without lifters or lubricant; include fastening the bearing caps only using the stipulated bolts' torque. Before installation put small amount of clean engine oil on the lifter bores and the lifters before putting the lifters back to their respective bore holes. For the right side, slated the journals of the camshafts, fit the camshafts in their proper positions, apply oil on the upper bearings and finally fit the bearing caps, the amounts tightened in an orderly manner. Performed the same for the left side, making sure the cam lobes are properly aligned. The rest of the components are put back in the reverse order to the removal process, which includes timing chains and cover. Next, after installation, use your hands to turn the crankshaft to and fro just to check if there's any drag or any sign of troubles and on the same note, confirm if the timing marks are in position. Last is refilling the engine with oil and coolant, connecting the battery, and starting the automobile, and then examining for leaks while acknowledging that lifter noise may take some time to diminish.
    Posted by ToyotaPartsDeal Specialist
    Q:
    What are the steps involved in the removal and installation of camshafts in the cylinder heads in 4.7L engine on Toyota Tundra? Posted by Customer
    A:
    Before performing this procedure get two 6 x 1.0 mm bolts 16 to 20 mm long which are commonly referred to as service bolts. It is recommended to begin with the removal of the valve covers and measuring the lift of the valves and clearance before removing the timing belt. If cylinder head work that includes the valves is expected to be carried out, do not measure the clearances at this point. It should be noted that the crankshaft of the specimen must be placed at the angle of 45 degrees TTDC. Next, extract the cam sprockets and the camshaft position sensor out of the engine compartment. For the removal of the camshafts on each cylinder head, firstly locate the right bank cylinder head and make sure that the exhaust camshaft sub-gear is fixed to the driven gear by a service bolt and turn the camshafts in such a manner such that it is in a position that is set approximately 10 degree from the initial position. Position the cam at the top with the two key holes aligned vertically and bring the cam out to contact the drive and driven gears; timing mark on the right side cylinder head should be at an upward 10 degree angle. Turn the camshaft bearing cap bolts by 1/4 turn until they can be undone by hand, in the reverse of the sequence applied. The bearing caps, oil feed pipe and camshafts must be unbolted, lifted using the fingers and placed on a bench with the patented shape end up to reduce the chances of damaging them. The same is done for the left bank cylinder head and the gears are set by camshaft provided that they are not set at a 10 deg angle. Carefully mark each bolt so that you will be able to have them correctly aligned when assembling the bearing caps back again. If necessary, lifters and shims should be removed with a magnetic tool and placed in another place. Screw the hex bolt and remove the timing tube assembly; you also have to release the screw plug, along with its sealing washer while the intake camshaft must be mounted on a vise. To get to the exhaust camshaft, it is possible to eliminate the drive gear from the timing tube assembly which is screwed on four bolts. According to the manual, to disassemble an exhaust camshaft gear, place the cam in a vise and the use the pin spanner to turn the sub-gear clockwise so as to remove the service bolt and the snap ring. The wave washer, sub-gear and camshaft gear spring can then be successfully withdrawn. For installation, use new camshaft plugs in the cylinder head with a little amount of the RTV sealant, new oil seal should be fitted and the drive gear mated to the timing tube. To put the exhaust camshaft gear back in, place all the necessary parts and cover the lifters with grease or engine assembly lube before putting them back in their correct positions. Using a light grade of oil, oil the cam lobes, bearing journals, and tooth faces of the gear, arrange the intake and exhaust camshafts with the timing surfaces set at 10 degrees for the right bank and the same for the left bank. Place RTV sealant on the bearing cap interface componants while the engine is upright, install the bearing caps sequentially, and torque the bolts to 90 degrees in a star pattern. For the service bolt of the exhaust cam gear, remove it and replace the new camshaft oil seal on both the cylinder heads. Replace the timing belt and inspect the valve outcomes; the other parts should also be reinstalled in the reverse manner. Before replacing the valve covers, apply RTV sealant on the surfaces to be connected, and finally replace the cooling system. Then, start the engine and look for evidence of leakage or Signs that the motor is running in the right manner.
    Posted by ToyotaPartsDeal Specialist
    If you have any questions about this product, please don't hesitate to ask us. We will be happy to help you!

Genuine Toyota Part 13053-0F020, the Right Choice

To ensure reliability, purchase Toyota part # 13053-0F020 CAMSHAFT Sub-Assembly. It is sometimes referred to as Toyota Camshaft. For unrivaled quality, OEM parts are the ultimate choice. These parts are manufactured by Toyota's official factory using top-quality materials and undergo strict testing procedures, ensuring outstanding dependability and long-lasting durability. This part fits 2004-2010 Toyota Sequoia, 2004-2010 Toyota Tundra.

ToyotaPartsDeal.com is a leading supplier of genuine Toyota parts and accessories such as Toyota 130530F020 CAMSHAFT Sub-Assembly. In need of OEM Toyota parts? Look no further than our extensive inventory of genuine Toyota parts, competitively priced to be highly exceptional in the market. They are all manufacturer-warrantied. Add to that, our easy return policy and swift delivery service, and your shopping experience promises to be the great pleasant ever. For detailed Toyota parts information, click here.

Why choose Toyota Parts Deal

  • Dedicated Service

    Your complete satisfaction is our #1 goal

  • Lowest Prices

    Best deals on genuine OE parts from dealerships

  • Fast Delivery

    Orders are processed and delivered promptly