My Garage
Cart
Make sure this part fits

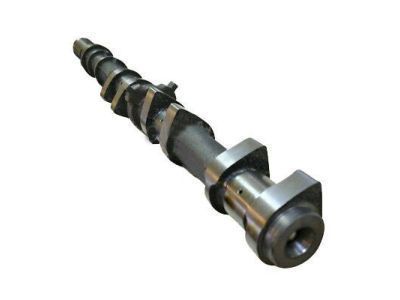
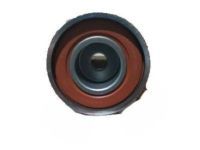
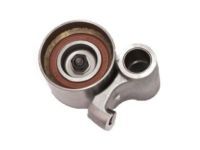
Toyota 13053-50060 CAMSHAFT Sub-Assembly

2004-2010 Toyota 1305350060

Customer Questions & Expert Answers (3)
Toyota 13053-50060 CAMSHAFT Sub-Assembly
  • Part Description
    Camshaft Sub-Assy, NO.3
  • Part Name Code
    13053
  • Replaces
    13053-0F020
  • Manufacturer
    Toyota
Make sure this part fits
$405.09 MSRP: $596.29
You Save: $191.20 (33%)
Ships in 1 Business Day
1
ADD TO CART
  • Related Parts
  • Product Specifications
  • Vehicle Fitment
  • Customer Questions & Expert Answers
  • Product Specifications

    BrandGenuine Toyota
    Part Name Code13053
    Manufacturer Part Number13053-50060
    Part DescriptionCamshaft Sub-Assy, NO.3
    Other NamesCamshaft
    Manufacturer Note(J)
    Item Dimensions21.8 x 3.4 x 3.0 inches
    Item Weight5.50 Pounds
    ConditionNew
    Fitment TypeDirect Replacement
    Replaces13053-0F020
    ManufacturerToyota
    SKU13053-50060
    WarrantyThis genuine Toyota part is guaranteed by Toyota's factory warranty.
    Shipping & ReturnShipping Policy Return Policy
    Warning: California's Proposition 65
  • Vehicle Fitment

    Year Make Model Trim & Engine Important vehicle option details
    2004-2009 Toyota 4RunnerLimited, SR5|6 Cyl 4.0L, 8 Cyl 4.7L1GRFE, 2UZFE; GRN210L-GKAGKA, GRN210L-GKAZKA, GRN210L-GKPGKA, GRN210L-GKPZKA, GRN215L-GKAGKA, GRN215L-GKAZKA, GRN215L-GKPGKA, GRN215L-GKPZKA, UZN210L-GKAGKA, UZN210L-GKAZKA, UZN215L-GKAGKA, UZN215L-GKAZKA
    2005-2007 Toyota Land Cruiser8 Cyl 4.7L2UZFE; UZJ100L-GNAEKA
    2004-2010 Toyota SequoiaLimited, Platinum, SR5|8 Cyl 4.6L, 8 Cyl 4.7L, 8 Cyl 5.7L1URFE, 2UZFE, 2UZFE; UCK35L-GKBLKA, 3URFBE, 3URFE; UCK35L-GKBLKA, UCK35L-GKBSKA, UCK35L-GKSLKA, UCK35L-GKSSKA, UCK45L-GKBLKA, UCK45L-GKBSKA, UCK45L-GKSLKA, UCK45L-GKSSKA, UCK60L-GKALKA, UCK60L-GKASKA, UCK65L-GKALKA, UCK65L-GKASKA, UPK60L-GKTLKA, UPK60L-GKTSKA, UPK65L-GKTLKA, UPK65L-GKTSKA, USK60L-GKTLKA, USK60L-GKTSKA, USK60L-GKTZKA, USK65L-GKTLGA, USK65L-GKTLKA, USK65L-GKTSGA, USK65L-GKTSKA, USK65L-GKTZGA, USK65L-GKTZKA
    2004-2010 Toyota TundraDLX, Limited, SR5|6 Cyl 3.4L, 6 Cyl 4.0L, 8 Cyl 4.6L, 8 Cyl 4.7L, 8 Cyl 5.7L1GRFE, 1URFE, 2UZFE, 3URFBE, 3URFE, 5VZFE; GSK30L-ARBSKA, GSK30L-ARFSKA, GSK30L-TRBDKA, GSK30L-TRBDKK, GSK30L-TRFDKA, GSK50L-TRADKA, GSK51L-CRASKA, GSK51L-THADKA, UCK30L-ARBLKA, UCK30L-ARBSKA, UCK30L-ARBSKK, UCK30L-ARSLKA, UCK30L-ARSSKA, UCK30L-ARSSKK, UCK30L-ASBLKA, UCK30L-ASBSKA, UCK30L-ASSLKA, UCK30L-ASSSKA, UCK30L-TRBDKA, UCK31L-PRBLKA, UCK31L-PRBSKA, UCK31L-PRBSKK, UCK31L-PRSLKA, UCK31L-PRSSKA, UCK31L-PRSSKK, UCK40L-ARBLKA, UCK40L-ARBLKK, UCK40L-ARBSKA, UCK40L-ARBSKK, UCK40L-ARSLKA, UCK40L-ARSLKK, UCK40L-ARSSKA, UCK40L-ARSSKK, UCK40L-ASBLKA, UCK40L-ASBSKA, UCK40L-ASSLKA, UCK40L-ASSSKA, UCK40L-TRBDKA, UCK40L-TRBDKK, UCK40L-TRSDKK, UCK40L-TRSSKA, UCK41L-PRBLKA, UCK41L-PRBLKK, UCK41L-PRBSKA, UCK41L-PRBSKK, UCK41L-PRSLKA, UCK41L-PRSLKK, UCK41L-PRSSKA, UCK41L-PRSSKK, UCK50L-TRADKA, UCK51L-CRALKA, UCK51L-CRASKA, UCK51L-PSALKA, UCK51L-PSASKA, UCK51L-THADKA, UCK52L-CHASKA, UCK55L-TRADKA, UCK56L-CRALKA, UCK56L-CRASKA, UCK56L-PSALKA, UCK56L-PSASKA, UCK56L-THADKA, UCK57L-CHASKA, UPK50L-TRTDKA, UPK51L-CRTLKA, UPK51L-CRTSKA, UPK51L-PSTLKA, UPK51L-PSTSKA, UPK51L-THTDKA, UPK52L-CHTSKA, UPK55L-TRTDKA, UPK56L-CRTLKA, UPK56L-CRTSKA, UPK56L-PSTLKA, UPK56L-PSTSKA, UPK56L-THTDKA, UPK57L-CHTSKA, USK50L-TRTDKA, USK51L-CRTLKA, USK51L-CRTSKA, USK51L-PSTLKA, USK51L-PSTSKA, USK51L-THTDKA, USK52L-CHTSKA, USK55L-TRTDGA, USK55L-TRTDKA, USK56L-CRTLGA, USK56L-CRTLKA, USK56L-CRTSGA, USK56L-CRTSKA, USK56L-PSTLGA, USK56L-PSTLKA, USK56L-PSTSGA, USK56L-PSTSKA, USK56L-THTDGA, USK56L-THTDKA, USK57L-CHTSGA, USK57L-CHTSKA, VCK30L-ARMSKA, VCK30L-ARSSKA, VCK30L-TRMDKA, VCK30L-TRSDKA, VCK30L-TRSDKK, VCK40L-ARMSKA, VCK40L-ARSSKA
  • Customer Questions & Expert Answers

    Q:
    Does it fit my car? Posted by ToyotaPartsDeal Specialist
    A:
    You can Select Your Vehicle to check if 13053-50060 fits your vehicle.
    Posted by ToyotaPartsDeal Specialist
    Q:
    How to remove and install Camshaft in V6 engine on 2003 through 2009 Toyota 4Runner? Posted by Customer
    A:
    The removal procedure is more complex and thus, it will be important that you go through it keenly before attempting it at home. First, start by removing the connection of the cable on the negative terminal of the battery, followed by the removal of engine oil, and coolant. Disconnect the timing chains and to withdraw the camshafts from the right cylinder head and rotate the camshafts anti-clockwise until the intake lobe of No.1 cylinder is at 7 O'clock position and exhaust camshaft lobe is at 12 o' clock position; for left cylinder head this process is not required. Slowly and evenly, undo all the camshaft bearing cap bolts in the manner that is opposite to the lightening sequence, then remove all the bearing caps and camshafts and store them in order and label them. Another magnet is applied in lifting and relocating it to the same box alongside the lifters, then they are also labeled. If in the other cylinder head you will be pulling camshafts out, follow all the steps described above paying attention to the clockwise rotation of the right cylinder. During the inspection look for flattened or scratched places on each lifter and they should visually look at the cam lobes and bearing journals to see if there is any damage done and look at the height of the camshaft lobe with the micrometer and check the diameter of each journal and if all the components are worn out replace them. For oil clearance, first free the bearing caps and journals, place the camshaft on its seat but don't need the lifters or any form of greasing, use Plastigage to determine the amount of clearance and if the amount is greater than the specified measurement, it will require replacement of the camshaft or cylinder head. While assembling, first, the lifter bores and lifters should be lubricated using clean engine oil; then, these parts should be returned to their initial positions while rotating them smoothly. For the right side, apply dry sum lubrication on the camshaft journals, position the camshaft in the correct manner, apply oil to the upper bearings before placing the bearing caps and use the torque wrench to tighten the bolts uniformly. Perform the same for the left side noting the position and the proper sequence of tightening the bonnet. To ensure a successful crankshaft installation, reverse the removal steps by following the applicable automaker's shop manual; while manually rotating the crankshaft to determine resistance or any difficulties at any point, correct the errors before proceeding. Last, add oil or coolant if needed, reconnect battery, start engine and examine it for leaks; however, lifter noise may take few minutes to settle down.
    Posted by ToyotaPartsDeal Specialist
    Q:
    How to remove and install the camshafts in the cylinder heads in V8 engine on 2003 through 2009 Toyota 4Runner? Posted by Customer
    A:
    Before beginning this procedure, obtain two 6 x 1.0 mm bolts 16 to 20 mm long. Start by removing the valve covers and measuring the valve clearances, then remove the timing belt. If cylinder head work involving the valves is to be done, do not measure the valve clearances at this time; otherwise, measure them now to calculate replacement shim thicknesses, minimizing the chances of needing to remove the camshafts later due to incorrect clearances. Ensure the crankshaft is positioned 45 to 50 degrees counterclockwise from the TDC position. Next, remove the cam sprockets and the camshaft position sensor. For the removal of the camshafts on each cylinder head, begin with the right bank cylinder head by securing the exhaust camshaft sub-gear to the driven gear with a service bolt, aligning the marks on the gears and turning the camshafts until the marks are approximately 10 degrees from their original position. Align the cam timing marks on the drive and driven gears at an upward 10-degree angle for the right side cylinder head only. Loosen the camshaft bearing cap bolts in 1/4-turn increments until they can be removed by hand, following the reverse of the recommended lightening sequence. Remove the bearing caps and gently lift out the oil feed pipe and the camshafts, ensuring to keep the oil feed pipe level. Mark each camshaft cap bolt carefully to avoid reassembly problems, and hold the camshafts level during removal to prevent damage to the cylinder head. Repeat the removal process for the left bank cylinder head, ensuring to align the camshaft timing gears without setting them at a 10-degree angle. Store the bearing caps in the correct order and mark each bolt carefully. If necessary, the valve lifters and shims can now be removed with a magnetic tool and stored separately. For 2005 and later models, mount the intake camshaft in a vise, remove the screw plug and sealing washer, then unscrew the hex bolt underneath to remove the timing tube assembly. The drive gear that turns the exhaust camshaft can be removed from the timing tube assembly by holding it with a pin spanner and unscrewing the four bolts. To disassemble an exhaust camshaft gear, mount the cam in a vise and use a pin spanner to rotate the sub-gear clockwise, removing the service bolt and the sub-gear snap-ring. The wave washer, sub-gear, and camshaft gear spring can now be removed from the camshaft. For inspection procedures, use the specifications provided. Insert new camshaft plugs into the cylinder head and apply a small amount of RTV sealant to the grooves. For 2005 and later models, install a new oil seal, mate the drive gear to the timing tube, and install the four bolts, tightening them to the specified torque. Reassemble the exhaust camshaft gear by installing the camshaft gear spring, sub-gear, wave washer, and snap-ring, then mount the camshaft in a padded vise and align the holes of the camshaft driven gear and sub-gear. Apply moly-base grease or engine assembly lube to the lifters and install them in their original locations, ensuring the valve adjustment shims are in place. Apply moly-base grease or engine assembly lube to the camshaft lobes, bearing journals, and gear thrust faces, then set the intake and exhaust camshafts in place with the timing marks at a 10-degree angle for the right bank and aligned for the left bank. Apply a bead of RTV sealant to the edges of the front bearing cap mating surfaces, install the bearing caps in numerical order with arrows pointing toward the front of the engine, and tighten the bearing cap bolts in 1/4-turn increments to the specified torque. Remove the service bolt from the exhaust cam gear and install a new camshaft oil seal for both cylinder heads. Reinstall the timing belt, check the valve clearances, and reinstall the remaining components in reverse order of removal. Before reinstalling the valve covers, use RTV sealant in the indicated areas, then refill the cooling system and run the engine, checking for leaks and proper operation.
    Posted by ToyotaPartsDeal Specialist
    If you have any questions about this product, please don't hesitate to ask us. We will be happy to help you!

Genuine Toyota Part 13053-50060, the Right Choice

To ensure reliability, purchase Toyota part # 13053-50060 CAMSHAFT Sub-Assembly. It is sometimes referred to as Toyota Camshaft. For unrivaled quality, OEM parts are the ultimate choice. These parts are manufactured by Toyota's official factory using top-quality materials and undergo strict testing procedures, ensuring outstanding dependability and long-lasting durability. This part fits 2004-2009 Toyota 4Runner, 2005-2007 Toyota Land Cruiser, 2004-2010 Toyota Sequoia, 2004-2010 Toyota Tundra.

ToyotaPartsDeal.com is a leading supplier of genuine Toyota parts and accessories such as Toyota 1305350060 CAMSHAFT Sub-Assembly. In need of OEM Toyota parts? Look no further than our extensive inventory of genuine Toyota parts, competitively priced to be highly exceptional in the market. They are all manufacturer-warrantied. Add to that, our easy return policy and swift delivery service, and your shopping experience promises to be the great pleasant ever. For detailed Toyota parts information, click here.

Why choose Toyota Parts Deal

  • Dedicated Service

    Your complete satisfaction is our #1 goal

  • Lowest Prices

    Best deals on genuine OE parts from dealerships

  • Fast Delivery

    Orders are processed and delivered promptly