Make sure this part fits your vehicle

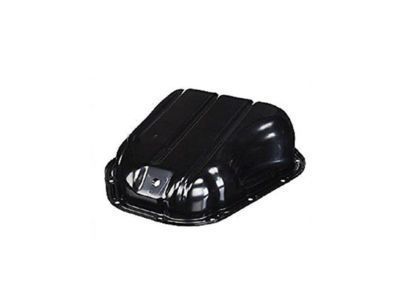
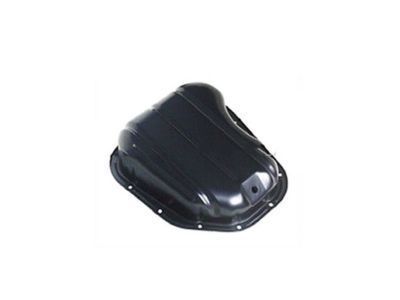
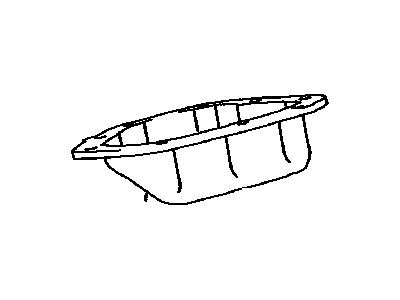
Toyota 12102-0A010 Pan Sub-Assy, Oil

1994-2008 Toyota 121020A010

Toyota 12102-0A010 Pan Sub-Assy, Oil
  • Part Description
    Pan Sub-Assy, Oil, NO.2
  • Part Name Code
    12102A
  • Replaced By
    12102-20010
  • Manufacturer
    Toyota
Customer Questions & Answers
$168.39 MSRP: $239.40
You Save: $71.01 (30%)
1
ADD TO CART
Ships in 1-3 Business Days
  • Product Specifications

    BrandGenuine Toyota
    Part Name Code12102A
    Manufacturer Part Number12102-0A010
    Part DescriptionPan Sub-Assy, Oil, NO.2
    Item Dimensions14.1 x 5.0 x 12.6 inches
    Item Weight2.90 Pounds
    ConditionNew
    Fitment TypeDirect Replacement
    ManufacturerToyota
    SKU12102-0A010
    WarrantyThis genuine Toyota part is guaranteed by Toyota's factory warranty.
    Shipping & ReturnShipping Policy Return Policy
    Warning: California’s Proposition 65
  • Vehicle Fitment

    Year Make Model Trim & Engine Important vehicle option details
    1995-2004 Toyota AvalonXL, XLS|6 Cyl 3.0L1MZFE; 1MZFE; MCX10L-AEPGKA, MCX10L-AEPGKK, MCX10L-AEPNKA, MCX10L-AEPNKK, MCX10L-AESGKA, MCX10L-AESGKK, MCX10L-AESNKA, MCX10L-AESNKK, MCX20L-AEPGKA, MCX20L-AEPGKK, MCX20L-AEPNKA, MCX20L-AEPNKK, MCX20L-AESGKA, MCX20L-AESNKA
    1994-2006 Toyota CamryCE, DX, LE, SE, XLE|6 Cyl 3.0L, 6 Cyl 3.3L1MZFE, 3MZFE; 1MZFE, 3MZFE; MCV10L-CCPNKA, MCV10L-CCPNKK, MCV10L-CCPSKA, MCV10L-CEPDKK, MCV10L-CEPGKA, MCV10L-CEPNKA, MCV10L-CEPNKK, MCV10L-CEPSKA, MCV10L-CWPNKA, MCV10L-CWPNKK, MCV20L-AEPDKK, MCV20L-AEPGKA, MCV20L-AEPGKK, MCV20L-AEPNKA, MCV20L-CEMNKA, MCV20L-CEPDKK, MCV20L-CEPGKA, MCV20L-CEPGKK, MCV20L-CEPNKA, MCV20L-CEPNKK, MCV30L-AEAGKA, MCV30L-AEANKA, MCV30L-AEASKA, MCV30L-AEPGKA, MCV30L-AEPNKA, MCV30L-AEPSKA, MCV30L-CEAGKA, MCV30L-CEANKA, MCV30L-CEASKA, MCV30L-CEPGKA, MCV30L-CEPNKA, MCV30L-CEPSKA, MCV31L-CEASKA
    2002-2004 Toyota Highlander6 Cyl 3.0L1MZFE; 1MZFE; MCU20L-BWPNKA
    1998-2007 Toyota SiennaCE, LE, XLE|6 Cyl 3.0L, 6 Cyl 3.3L1MZFE, 3MZFE; 1MZFE, 3MZFE; MCL10L-GFSDKA, MCL10L-GFSDKK, MCL10L-GFSGKA, MCL10L-GFSGKK, MCL10L-PFSDKA, MCL10L-PFSDKK, MCL10L-PFSGKA, MCL10L-PFSGKK, MCL10L-SESDKA, MCL10L-SESDKK, MCL20L-PFADKK, MCL20L-PFAEKA, MCL20L-PFAEKK, MCL20L-PFAQKA, MCL20L-PFAQKK, MCL20L-PRADKK, MCL20L-PRAEKA, MCL20L-PRAEKK, MCL20L-PRAQKA, MCL20L-PRAQKK, MCL23L-SBADKA, MCL23L-SBADKK, MCL25L-PFADKK, MCL25L-PFAEKA, MCL25L-PFAEKK, MCL25L-PFAQKA, MCL25L-PFAQKK
    1999-2008 Toyota SolaraSE, SLE|6 Cyl 3.0L, 6 Cyl 3.3L1MZFE, 3MZFE; 1MZFE, 3MZFE; MCV20L-GCMNKA, MCV20L-GCMNKK, MCV20L-GCPNKA, MCV20L-GCPNKK, MCV20L-GKPNKA, MCV20L-GKPNKK, MCV31L-GCAGKA, MCV31L-GCANKA, MCV31L-GKAGKA, MCV31L-GKANKA

Customer Questions & Answers

Q:
Does it fit my car? Posted by ToyotaPartsDeal Specialist
A:
You can Select Your Vehicle to check if 12102-0A010 fits your vehicle.
Posted by ToyotaPartsDeal Specialist
Q:
What preparatory steps should be taken before installing the oil pan back onto the engine for the 1999 Toyota Avalon? Posted by Customer
A:
Before installing the oil pan, it's essential to prepare the mating surfaces. Use a scraper to remove all traces of old gasket material and sealant from both the engine block and the oil pan. Clean these surfaces with lacquer thinner or acetone. Additiona
Posted by ToyotaPartsDeal Specialist
See expert answers on similar Oil Pan
Q:
What should be checked and cleaned regarding the oil pump pick-up tube assembly for the 2005 Toyota Solara? Posted by Customer
A:
Inspect the oil pump pick-up tube assembly for cracks and a blocked strainer. If the pick-up was removed, clean it thoroughly and install it now, using a new gasket. Tighten the nuts/bolts.
Posted by ToyotaPartsDeal Specialist
See expert answers on similar Oil Pan
Q:
What initial preparations are necessary before beginning the oil pan removal process for the 2008 Toyota Solara? Posted by Customer
A:
Before starting, you should remove the vehicle's hood, disconnect the negative battery cable, and safely elevate the vehicle on jackstands.
Posted by ToyotaPartsDeal Specialist
See expert answers on similar Oil Pan
Q:
How do you remove the oil pan on V4 engine for 1997 through 2001 Toyota Solara and 1997 through 2001 Toyota Avalon? Posted by Customer
A:
To remove the oil pan, start by disconnecting the negative cable from the battery. Set the parking brake and block the rear wheels. Then, raise the front of the vehicle and support it securely on jack stands. Remove the splash shields under the engine if they are present. Drain the engine oil and remove the oil filter. Disconnect the three nuts holding the front exhaust pipe to the exhaust manifold and remove the two bolts/nuts where the converter attaches to the rest of the exhaust system. Unbolt the two bolts and remove the support bracket, then remove the front exhaust pipe. Remove the brace from the exhaust manifold. Remove the front block-to-transaxle brace. Remove the bolts and detach the oil pan, being careful not to damage the mating surfaces of the pan and block. To install the oil pan, use a scraper to remove all traces of old gasket material and sealant from the block and oil pan. Clean the mating surfaces with lacquer thinner or acetone. Check the oil pan flange for distortion and flatten it if necessary. Inspect the oil pump pick-up tube assembly for cracks and a blocked strainer. Clean it thoroughly and install it with a new O-ring or gasket. Apply a bead of RTV sealant to the oil pan flange. Carefully position the oil pan on the engine block and install the bolts, tightening them from the center out. Complete the installation by adding oil, installing a new oil filter, and using new "doughnut" gaskets on each end of the front exhaust pipe. Finally, run the engine and check for oil pressure and leaks.
Posted by ToyotaPartsDeal Specialist
Q:
What should be done after the oil pan installation for the 2002 Toyota Avalon? Posted by Customer
A:
Be sure to follow the sealant manufacturer's recommendations for assembly and sealant curing times. Run the engine and check for oil pressure and leaks.
Posted by ToyotaPartsDeal Specialist
See expert answers on similar Oil Pan
Q:
How to remove and reinstall an oil pan on V6 engine for 2002 through 2008 Toyota Solara and 2002 through 2006 Toyota Avalon? Posted by Customer
A:
To begin the removal process, start by removing the hood, disconnecting the negative battery cable, and safely elevating the vehicle on jackstands. Proceed to remove the engine splash shields. Drain the engine oil and remove the oil filter, noting that the V6 engine's oil pan consists of two parts: an aluminum casting attached to the block and transaxle and a lower stamped-steel pan section. Disconnect the front exhaust pipe from the catalytic converter, including the two bolts, support bracket, and nuts holding the pipe to the front and rear exhaust manifolds. Remove the flywheel housing cover and the two bolts securing the aluminum oil pan section to the transaxle. Subsequently, remove the ten bolts and two nuts securing the steel oil pan section, carefully detaching it. Take caution not to damage the mating surfaces to prevent oil leaks. Remove the oil pump strainer/pickup and the bolts securing the aluminum oil pan section to the block, ensuring to include those within the area formerly covered by the steel pan. If equipped, remove the oil pan baffle plate. For installation, scrape off any old sealant from the block and oil pan and clean the mating surfaces with lacquer thinner or acetone. Verify that the threaded bolt holes in the block are clean and inspect the flange of the steel pan section for distortion. Flatten and restore the gasket surface if necessary. If the baffle was removed, reinstall it. Clean the mating surfaces of the engine block and aluminum pan section, being careful not to damage the soft metal. Apply a 4 mm wide bead of RTV sealant to the aluminum pan section and install it within five minutes, uniformly tightening the bolts from the center out towards the ends of the pan. Examine the oil pump pick-up/strainer assembly for cracks and blockages, clean if necessary, and install it with a new gasket. Apply a 3 to 4 mm wide bead of RTV sealant to the flange of the steel oil pan section and carefully position the steel pan on the aluminum section, installing and tightening the bolts from the center out. Complete the remaining installation steps in reverse order, allowing the sealant to set for at least two hours before adding new oil and a new oil filter. Finally, run the engine and check for oil pressure and leaks.
Posted by ToyotaPartsDeal Specialist
Q:
How to remove and reinstall an oil pan on V6 engine for 1997 through 2001 Toyota Solara and 1997 through 2001 Toyota Avalon? Posted by Customer
A:
Remove the hood. Disconnect the negative cable from the battery. Raise the vehicle and support it securely on jackstands. Remove the engine splash shields. Drain the engine oil and remove the oil filter. Disconnect the front exhaust pipe from the catalytic converter, the two bolts and the support bracket, and the nuts holding the pipe to the front and rear exhaust manifolds. Remove the flywheel housing cover. Remove the two bolts holding the aluminum oil pan section to the transaxle and air conditioner compressor bracket. Remove the 10 bolts and two nuts securing the steel oil pan section, and detach the steel pan. If it's stuck, pry it loose very carefully with a small screwdriver or putty knife. Remove the oil pump strainer/pickup. Remove the bolts securing the aluminum oil pan section to the block. Remove the oil pan baffle plate if necessary. Use a scraper to remove all traces of old sealant from the block and oil pan. Clean the mating surfaces with lacquer thinner or acetone. Make sure the threaded bolt holes in the block are clean. Check the flange of the steel pan section for distortion, particularly around the bolt holes. If necessary, place the pan on a wood block and use a hammer to flatten and restore the gasket surface. If the baffle had been removed, reinstall it now. Clean the mating surfaces of the engine block and aluminum pan section, being careful not to gouge the soft metal, which could lead to leaks. Apply a 4 mm wide bead of RTV sealant to the aluminum pan section. Install the aluminum pan section within five minutes and uniformly tighten the bolts. Work from the center out towards the ends of the pan. Inspect the oil pump pick-up/strainer assembly for cracks and a blocked strainer. If the pick-up was removed, clean it with solvent or thinner and install it now, using a new gasket. Tighten the fasteners. Apply a 3 to 4 mm wide bead of RTV sealant to the flange of the steel oil pan section. Carefully position the steel pan on the aluminum section and install the bolts. Working from the center out, tighten them. The remainder of the installation is the reverse of removal. Be sure to add oil and install a new oil filter. Run the engine and check for oil pressure and leaks.
Posted by ToyotaPartsDeal Specialist
Q:
What should you do after removing the oil pan components for the 2001 Toyota Solara? Posted by Customer
A:
After removing the oil pan components, you should use a scraper to remove all traces of old sealant from the block and oil pan. Clean the mating surfaces with lacquer thinner or acetone and ensure that the threaded bolt holes in the block are clean.
Posted by ToyotaPartsDeal Specialist
See expert answers on similar Oil Pan
If you have any questions about this product, please don't hesitate to ask us. We will be happy to help you!

Genuine Toyota Part 12102-0A010, the Right Choice

Your vehicle deserves only genuine OEM Toyota parts and accessories. To ensure reliability, purchase Toyota part # 12102-0A010 Pan Sub-Assy, Oil. It is sometimes referred to as Toyota Oil Pan. Our Toyota parts and accessories are expedited directly from authorized Toyota dealers strategically located all across the U.S. and are backed by the manufacturer's 12 month, 12,000 mile warranty. OEM Toyota parts are the best for restoring your vehicle to factory condition performance. This part fits 1995-2004 Toyota Avalon, 1994-2006 Toyota Camry, 2002-2004 Toyota Highlander, 1998-2007 Toyota Sienna.

Affordable, reliable and built to last, Toyota part # 121020A010 Pan Sub-Assy, Oil stands out as the smart option. ToyotaPartsDeal.com is your prime online source with the biggest and best selection of genuine Toyota parts and accessories at giant discounted prices. We have the OEM Toyota parts and accessories you need at the wholesale prices. ToyotaPartsDeal.com has you covered no matter what type of Toyota vehicle you drive. For detailed Toyota parts information, click here.

Why choose Toyota Parts Deal

  • Dedicated Service

    Your complete satisfaction is our #1 goal

  • Lowest Prices

    Best deals on genuine OE parts from dealerships

  • Fast Delivery

    Orders are processed and delivered promptly