Menu


My Garage
My Account
Cart
Genuine Toyota 4Runner Differential Seal
- Select Vehicle by Model
- Select Vehicle by VIN
Select Vehicle by Model
orMake
Model
Year
Select Vehicle by VIN
For the most accurate results, select vehicle by your VIN (Vehicle Identification Number).
13 Differential Seals found
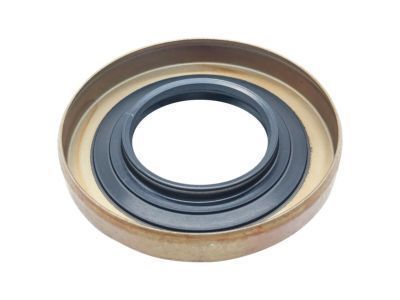
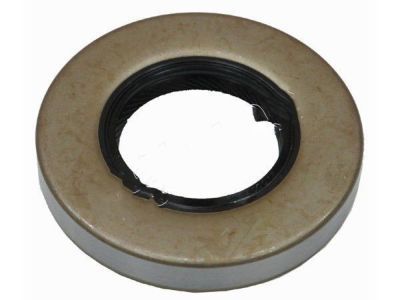
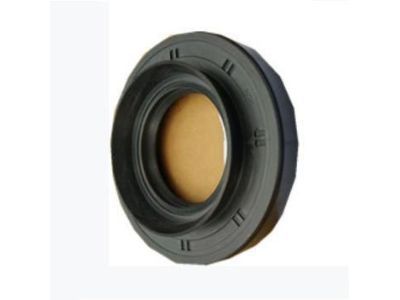
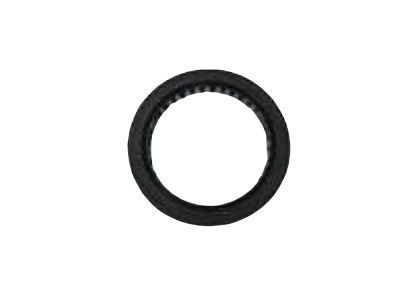
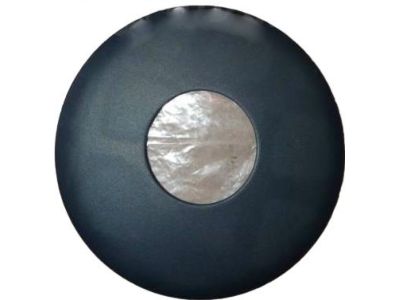
Toyota 4Runner Type T Oil Seal
Part Number: 90311-38047$8.68 MSRP: $12.13You Save: $3.45 (29%)Ships in 1-3 Business DaysADD TO CARTProduct Specifications- Other Name: Seal, Oil (For Rear Differential Carrier); Pinion Seal, Seal
- Comment: (FOR FRONT AXLE DIFFERENTIAL CARRIER)
- Replaces: 90311-38133, 90311-38035, 90311-38134, 90311-38028
- Warranty: This genuine part is guaranteed by Toyota's factory warranty.
Fits the following Vehicles:- 1984-2002 Toyota 4Runner | DLX, LULI, SDT, SR5, SR5 Turbo, SR5B, SR5V, STD | 4 Cyl 2.4L, 4 Cyl 2.7L, 6 Cyl 3.0L, 6 Cyl 3.4L | 22R, 22RE, 22REC, 22RTEC, 2L, 2LT, 3RZFE, 3VZE, 3VZE; LN51L-KRA, 5VZFE; LN56L-MRK, 5VZFE; RZN180L-GKMSKA, LN51L-KRA3, LN56L-MDA3, LN56L-MDCA, LN56L-MDCA3, LN56L-MDCK, LN56L-MDCXA3, LN56L-MDK, LN56L-MDXA3, LN56L-MRK, LN65L-MDA, LN65L-MDA3, LN65L-MDCA3, LN65L-MDCK, LN65L-MDXA, LN65L-MDXA3, LN65L-MDXK, LN66L-MDCXK, RN101L-TRLDEA, RN101L-TRLDEAB, RN101L-TRLDEK, RN101L-TRLSEA, RN101L-TRLSEA3, RN101L-TRMDEA, RN101L-TRMDEA3, RN101L-TRMDEAB, RN101L-TRMDEK, RN101L-TRMSEA, RN101L-TRMSEA3, RN101L-TRPDEA, RN101L-TRPDEAB, RN106L-TRLDEA, RN106L-TRLDEK, RN106L-TRMDEA, RN106L-TRMDEA3, RN106L-TRMDEK, RN106L-TRPDEA, RN106L-TRPDEA3, RN106L-TRPDEK, RN110L-CRLDEA, RN110L-CRLDEK, RN110L-CRLSEA, RN110L-CRLSEA3, RN110L-CRMDEA, RN110L-CRMDEA3, RN110L-CRMDEAB, RN110L-CRMDEK, RN110L-CRMSEA, RN110L-CRMSEA3, RN110L-CRPDEA, RN110L-CRPDEA3, RN110L-CRPSEA, RN110L-CRPSEA3, RN120L-GKPSEA, RN121L-RKMSEK, RN121L-RKPSEK, RN130L-GJLSEA, RN130L-GJMSEA, RN130L-GJPSEA, RN130L-GKLSEA, RN130L-GKMSEA, RN130L-GKPSEA, RN131L-RJLSEK, RN131L-RJMSEK, RN131L-RJPSEK, RN131L-RKLSEK, RN131L-RKMSEK, RN131L-RKPSEK, RN50L-KRA, RN50L-KRK, RN50L-LRA, RN50L-MRA, RN50L-MSEA, RN50L-MSEA3, RN50L-PRA, RN50L-SRA, RN50L-SREA, RN50L-TRA, RN55L-KDA3W, RN55L-KDEA3W, RN55L-KDEK3W, RN55L-KDK3W, RN55L-KRA3W, RN55L-KREA3W, RN55L-KRTEA3W, RN55L-LDA, RN55L-LDA3, RN55L-LRA, RN55L-MDA, RN55L-MDA3, RN55L-MDCA, RN55L-MDCA3, RN55L-MDCK, RN55L-MGCZA, RN55L-MGCZA3, RN55L-MRA, RN55L-MRHA, RN55L-MRHA3, RN55L-MRHEA, RN55L-MRHEK, RN55L-MRHK, RN55L-MRK, RN55L-MSCEA, RN55L-MSCEA3, RN55L-MSCEK, RN55L-MSCZA, RN55L-MSCZA3, RN55L-MSEA, RN55L-MSEA3, RN55L-MSEK, RN55L-PDA, RN55L-PDA3, RN55L-PDCA, RN55L-PDCA3, RN55L-PDCK, RN55L-PDEA3W, RN55L-PDEK3W, RN55L-PDK, RN55L-PGCZA, RN55L-PGCZA3, RN55L-PGCZK, RN55L-PRA, RN55L-PRK, RN55L-PSCEA, RN55L-PSCEA3, RN55L-PSCEK, RN55L-PSEA3, RN55L-SDA, RN55L-SDEA, RN55L-SDEA3, RN55L-SRA, RN55L-SREA, RN55L-SREA3W, RN55L-SREK, RN55L-SRHEA, RN55L-SRHEK, RN55L-SRK, RN55L-SRTEA3W, RN60L-MDK, RN60L-MRA, RN60L-MRA3, RN60L-MSA, RN60L-MSA3, RN60L-MSEA, RN60L-MSEA3, RN60LG-MDA, RN60LG-MDEA, RN60LG-MSA, RN60LG-MSEA, RN60LG-PDEA, RN60LV-MDA, RN60LV-MDEA, RN60LV-MSEK, RN60LV-MSK, RN60LV-PDEA, RN60LV-PSEK, RN61L-MBZA, RN61L-MBZA3, RN61L-MDK, RN61L-MRA, RN61L-MRA3, RN61L-MREA, RN61L-MREA3, RN61L-MREK, RN61L-MSEA, RN61L-MSEA3, RN61LG-MDEA, RN61LG-MSEA, RN61LG-PDEA, RN61LG-PGZA, RN61LG-PSEA, RN61LV-MDEA, RN61LV-MDEK, RN61LV-MSEA, RN61LV-MSEK, RN61LV-PDEA, RN61LV-PDEK, RN61LV-PGZK, RN61LV-PSEA, RN61LV-PSEK, RN65L-MDA, RN65L-MDA3, RN65L-MDCA, RN65L-MDCA3, RN65L-MDK, RN65L-MSA3, RN65L-MSCA, RN65L-MSCA3, RN65L-MSCEA, RN65L-MSCEA3, RN65L-MSCEK, RN65L-MSCK, RN65L-MSEA3, RN65L-MSEK, RN65L-MSK, RN65L-PDCEA, RN65L-PDCEA3, RN65L-PDEA, RN65L-PDEA3, RN65L-PDEK, RN65L-PSCEK, RN66L-MDA, RN66L-MDA3, RN66L-MDCA, RN66L-MDCA3, RN66L-MDCEA, RN66L-MDCEA3, RN66L-MDCEK, RN66L-MDEA, RN66L-MDEA3, RN66L-MDEK, RN66L-MDK, RN66L-MGCZA, RN66L-MGCZA3, RN66L-MGCZK, RN66L-MRA, RN66L-MSCEA, RN66L-MSCEA3, RN66L-MSCEK, RN66L-MSEA3, RN66L-MSEK, RN66L-PDCEA, RN66L-PDCEA3, RN66L-PDEA, RN66L-PDEA3, RN66L-PDEK, RN66L-PGCZA, RN66L-PGCZA3, RN66L-PGCZK, RN66L-PSCEA3, RN66L-PSCEK, RN70L-LDCA3, RN70L-LRCA, RN70L-LRCA3, RN70L-MDCA, RN70L-MDCA3, RN70L-MDCK, RN70L-MRCA, RN70L-MRCA3, RN70L-MRCK, RN70L-SDCA, RN70L-SDCA3, RN70L-SDCEA3, RN70L-SDCK, RN70L-SRCA, RN70L-SRCEA, RN70L-SRCEA3, RN70L-SRCEK, RN70L-SRCK, RN75L-KRTEA3W, RN75L-PDTEA3W, RN75L-SDTEA3W, RN75L-SDTEK3W, RN80L-TRKREA, RN80L-TRKRSA, RN80L-TRKRSA3, RN80L-TRLDSA, RN80L-TRLDSA3, RN80L-TRMDEA, RN80L-TRMDEA3, RN80L-TRMDEAB, RN80L-TRMREA, RN80L-TRMREAB, RN80L-TRMREK, RN80L-TRMRSK, RN80L-TRSDEA, RN80L-TRSDEA3, RN80L-TRSDEAB, RN80L-TRTRSA, RN80L-TRTRSA3, RN85L-TRLDSA, RN85L-TRLDSA3, RN85L-TRMDEA, RN85L-TRMDEA3, RN85L-TRMDEK, RN85L-TRMDSK, RN85L-TRMSEA, RN85L-TRMSEA3, RN85L-TRSDEA, RN85L-TRSDEA3, RN85L-TRSDEK, RN85L-TRSSEA, RN85L-TRSSEA3, RN90L-CRLDSA, RN90L-CRLDSA3, RN90L-CRMDEA, RN90L-CRMDEA3, RN90L-CRMDEAB, RN90L-CRMDEK, RN90L-CRMDSK, RN90L-CRMSEA, RN90L-CRMSEA3, RN90L-CRSDEA, RN90L-CRSDEA3, RN90L-CRSDEK, RN90L-CRSSEA, RN90L-CRSSEA3, RZN180L-GKMSKA, RZN180L-GKPSKA, RZN185L-GKMSKA, RZN185L-GKPSKA, VZN100L-TRMDEA, VZN100L-TRMDEA3, VZN100L-TRMDEAB, VZN100L-TRMDEK, VZN100L-TRMGEA, VZN100L-TRMGEA3, VZN105L-TRMDEA, VZN105L-TRMDEA3, VZN105L-TRMDEK, VZN105L-TRPDEA, VZN105L-TRPDEA3, VZN110L-CRMDEA, VZN110L-CRMDEA3, VZN110L-CRMDEAB, VZN110L-CRMDEK, VZN110L-CRMGEA, VZN110L-CRMGEA3, VZN110L-CRMGEK, VZN110L-CRPDEA, VZN110L-CRPDEA3, VZN110L-CRPDEAB, VZN110L-CRPDEK, VZN110L-CRPGEA, VZN110L-CRPGEA3, VZN120L-GKPGEA, VZN130L-GJMGEA, VZN130L-GJPGEA, VZN130L-GKMGEA, VZN130L-GKPGEA, VZN131L-RJMGEK, VZN131L-RJPGEK, VZN131L-RKMGEK, VZN131L-RKPGEK, VZN180L-GKPGKA, VZN180L-GKPSKA, VZN180L-GKPZKA, VZN185L-GKMGKA, VZN185L-GKPGKA, VZN185L-GKPSKA, VZN185L-GKPZKA, VZN61L-MBEA, VZN61L-MBEA3, VZN61L-MSEA, VZN61L-MSEA3, VZN61LG-MSEA, VZN61LG-PSEA, VZN61LV-MDEA, VZN61LV-MSEA, VZN61LV-MSEK, VZN61LV-PDEA, VZN61LV-PSEA, VZN61LV-PSEK, VZN66L-MDCEA3, VZN66L-MDCEK, VZN66L-MDEA3, VZN66L-MDEK, VZN66L-MSCEA, VZN66L-MSCEA3, VZN66L-MSCEK, VZN66L-PDCEA3, VZN66L-PDEA3, VZN66L-PDEK, VZN66L-PSCEA3, VZN66L-PSCEK, VZN85L-THMDEA, VZN85L-THMDEA3, VZN85L-THSDEA, VZN85L-THSDEA3, VZN85L-TRMDEA, VZN85L-TRMDEA3, VZN85L-TRMDEK, VZN85L-TRMREA6, VZN85L-TRSDEA, VZN85L-TRSDEA3, VZN85L-TRSDEK, VZN85L-TRSREA6, VZN85L-TWMREA6, VZN85L-TWSREA6, VZN90L-CRMDEA, VZN90L-CRMDEA3, VZN90L-CRMDEK, VZN90L-CRMGEA, VZN90L-CRMGEA3, VZN90L-CRMGEK, VZN90L-CRPGEA, VZN90L-CRPGEA3, VZN90L-CRSDEA, VZN90L-CRSDEA3, VZN90L-CRSDEK, VZN95L-TWMREA6, VZN95L-TWSREA6, VZN95L-TWSREK6
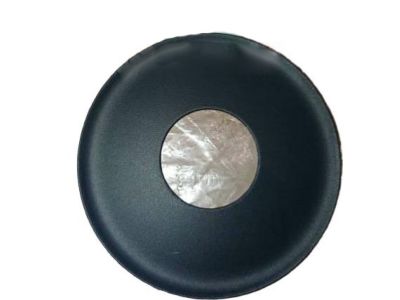
Toyota 4Runner Type T Oil Seal
Part Number: 90311-41009$17.96 MSRP: $25.10You Save: $7.14 (29%)Ships in 1-2 Business DaysADD TO CARTProduct Specifications- Other Name: Seal, Oil (For Rear Differential Carrier); Pinion Seal
- Comment: (FOR FRONT AXLE DIFFERENTIAL CARRIER)
- Warranty: This genuine part is guaranteed by Toyota's factory warranty.
Fits the following Vehicles:- 2002-2016 Toyota 4Runner | Limited, LULI, SR5, SR5B, SR5V | 4 Cyl 2.7L, 6 Cyl 3.4L, 6 Cyl 4.0L, 8 Cyl 4.7L | 1GRFE, 2TRFE, 2UZFE, 5VZFE; GRN210L-GKAGKA, GRN210L-GKAZKA, GRN210L-GKPGKA, GRN210L-GKPZKA, GRN215L-GKAGKA, GRN215L-GKAZKA, GRN215L-GKPGKA, GRN215L-GKPZKA, GRN280L-GKAGKA, GRN285L-GKAGKA, TRN280L-GKPGKA, TRN285L-GKPGKA, UZN210L-GKAGKA, UZN210L-GKAZKA, UZN215L-GKAGKA, UZN215L-GKAZKA, VZN180L-GKPGKA, VZN180L-GKPSKA, VZN180L-GKPZKA, VZN185L-GKPGKA, VZN185L-GKPSKA, VZN185L-GKPZKA
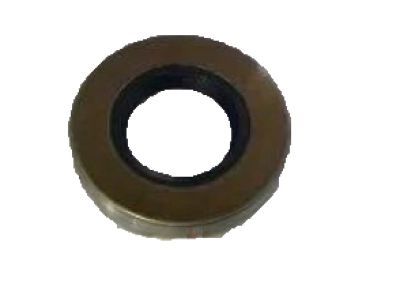
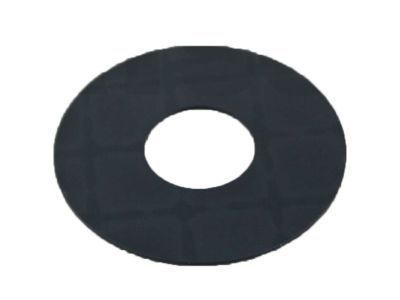
Toyota 4Runner Type T Oil Seal
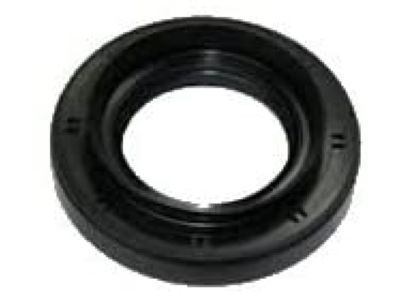
Part Number: 90311-38134$8.68 MSRP: $12.13You Save: $3.45 (29%)Ships in 1-3 Business DaysADD TO CARTProduct Specifications- Other Name: Seal, Type T Oil (For Front Axle Differential Carrier)
- Replaced by: 90311-38047
- Warranty: This genuine part is guaranteed by Toyota's factory warranty.
Fits the following Vehicles:- 1984-1995 Toyota 4Runner | DLX, SDT, SR5, SR5 Turbo, STD | 4 Cyl 2.4L, 6 Cyl 3.0L | 22R, 22RE, 22REC, 22RTEC, 2L, 2LT, 3VZE; LN51L-KRA, LN51L-KRA3, LN56L-MDA3, LN56L-MDCA, LN56L-MDCA3, LN56L-MDCK, LN56L-MDCXA3, LN56L-MDK, LN56L-MDXA3, LN56L-MRK, LN65L-MDA, LN65L-MDA3, LN65L-MDCA3, LN65L-MDCK, LN65L-MDXA, LN65L-MDXA3, LN65L-MDXK, LN66L-MDCXK, RN101L-TRLDEA, RN101L-TRLDEAB, RN101L-TRLDEK, RN101L-TRLSEA, RN101L-TRLSEA3, RN101L-TRMDEA, RN101L-TRMDEA3, RN101L-TRMDEAB, RN101L-TRMDEK, RN101L-TRMSEA, RN101L-TRMSEA3, RN101L-TRPDEA, RN101L-TRPDEAB, RN106L-TRLDEA, RN106L-TRLDEK, RN106L-TRMDEA, RN106L-TRMDEA3, RN106L-TRMDEK, RN106L-TRPDEA, RN106L-TRPDEA3, RN106L-TRPDEK, RN110L-CRLDEA, RN110L-CRLDEK, RN110L-CRLSEA, RN110L-CRLSEA3, RN110L-CRMDEA, RN110L-CRMDEA3, RN110L-CRMDEAB, RN110L-CRMDEK, RN110L-CRMSEA, RN110L-CRMSEA3, RN110L-CRPDEA, RN110L-CRPDEA3, RN110L-CRPSEA, RN110L-CRPSEA3, RN130L-GJLSEA, RN130L-GJMSEA, RN130L-GJPSEA, RN130L-GKLSEA, RN130L-GKMSEA, RN130L-GKPSEA, RN131L-RJLSEK, RN131L-RJMSEK, RN131L-RJPSEK, RN131L-RKLSEK, RN131L-RKMSEK, RN131L-RKPSEK, RN50L-KRA, RN50L-KRK, RN50L-LRA, RN50L-MRA, RN50L-MSEA, RN50L-MSEA3, RN50L-PRA, RN50L-SRA, RN50L-SREA, RN50L-TRA, RN55L-KDA3W, RN55L-KDEA3W, RN55L-KDEK3W, RN55L-KDK3W, RN55L-KRA3W, RN55L-KREA3W, RN55L-KRTEA3W, RN55L-LDA, RN55L-LDA3, RN55L-LRA, RN55L-MDA, RN55L-MDA3, RN55L-MDCA, RN55L-MDCA3, RN55L-MDCK, RN55L-MGCZA, RN55L-MGCZA3, RN55L-MRA, RN55L-MRHA, RN55L-MRHA3, RN55L-MRHEA, RN55L-MRHEK, RN55L-MRHK, RN55L-MRK, RN55L-MSCEA, RN55L-MSCEA3, RN55L-MSCEK, RN55L-MSCZA, RN55L-MSCZA3, RN55L-MSEA, RN55L-MSEA3, RN55L-MSEK, RN55L-PDA, RN55L-PDA3, RN55L-PDCA, RN55L-PDCA3, RN55L-PDCK, RN55L-PDEA3W, RN55L-PDEK3W, RN55L-PDK, RN55L-PGCZA, RN55L-PGCZA3, RN55L-PGCZK, RN55L-PRA, RN55L-PRK, RN55L-PSCEA, RN55L-PSCEA3, RN55L-PSCEK, RN55L-PSEA3, RN55L-SDA, RN55L-SDEA, RN55L-SDEA3, RN55L-SRA, RN55L-SREA, RN55L-SREA3W, RN55L-SREK, RN55L-SRHEA, RN55L-SRHEK, RN55L-SRK, RN55L-SRTEA3W, RN60LG-MDA, RN60LG-MDEA, RN60LG-MSA, RN60LG-MSEA, RN60LG-PDEA, RN60L-MDK, RN60L-MRA, RN60L-MRA3, RN60L-MSA, RN60L-MSA3, RN60L-MSEA, RN60L-MSEA3, RN60LV-MDA, RN60LV-MDEA, RN60LV-MSEK, RN60LV-MSK, RN60LV-PDEA, RN60LV-PSEK, RN61LG-MDEA, RN61LG-MSEA, RN61LG-PDEA, RN61LG-PGZA, RN61LG-PSEA, RN61L-MBZA, RN61L-MBZA3, RN61L-MDK, RN61L-MRA, RN61L-MRA3, RN61L-MREA, RN61L-MREA3, RN61L-MREK, RN61L-MSEA, RN61L-MSEA3, RN61LV-MDEA, RN61LV-MDEK, RN61LV-MSEA, RN61LV-MSEK, RN61LV-PDEA, RN61LV-PDEK, RN61LV-PGZK, RN61LV-PSEA, RN61LV-PSEK, RN65L-MDA, RN65L-MDA3, RN65L-MDCA, RN65L-MDCA3, RN65L-MDK, RN65L-MSA3, RN65L-MSCA, RN65L-MSCA3, RN65L-MSCEA, RN65L-MSCEA3, RN65L-MSCEK, RN65L-MSCK, RN65L-MSEA3, RN65L-MSEK, RN65L-MSK, RN65L-PDCEA, RN65L-PDCEA3, RN65L-PDEA, RN65L-PDEA3, RN65L-PDEK, RN65L-PSCEK, RN66L-MDA, RN66L-MDA3, RN66L-MDCA, RN66L-MDCA3, RN66L-MDCEA, RN66L-MDCEA3, RN66L-MDCEK, RN66L-MDEA, RN66L-MDEA3, RN66L-MDEK, RN66L-MDK, RN66L-MGCZA, RN66L-MGCZA3, RN66L-MGCZK, RN66L-MRA, RN66L-MSCEA, RN66L-MSCEA3, RN66L-MSCEK, RN66L-MSEA3, RN66L-MSEK, RN66L-PDCEA, RN66L-PDCEA3, RN66L-PDEA, RN66L-PDEA3, RN66L-PDEK, RN66L-PGCZA, RN66L-PGCZA3, RN66L-PGCZK, RN66L-PSCEA3, RN66L-PSCEK, RN70L-LDCA3, RN70L-LRCA, RN70L-LRCA3, RN70L-MDCA, RN70L-MDCA3, RN70L-MDCK, RN70L-MRCA, RN70L-MRCA3, RN70L-MRCK, RN70L-SDCA, RN70L-SDCA3, RN70L-SDCEA3, RN70L-SDCK, RN70L-SRCA, RN70L-SRCEA, RN70L-SRCEA3, RN70L-SRCEK, RN70L-SRCK, RN75L-KRTEA3W, RN75L-PDTEA3W, RN75L-SDTEA3W, RN75L-SDTEK3W, VZN100L-TRMDEA, VZN100L-TRMDEA3, VZN100L-TRMDEAB, VZN100L-TRMDEK, VZN100L-TRMGEA, VZN100L-TRMGEA3, VZN105L-TRMDEA, VZN105L-TRMDEA3, VZN105L-TRMDEK, VZN105L-TRPDEA, VZN105L-TRPDEA3, VZN110L-CRMDEA, VZN110L-CRMDEA3, VZN110L-CRMDEAB, VZN110L-CRMDEK, VZN110L-CRMGEA, VZN110L-CRMGEA3, VZN110L-CRMGEK, VZN110L-CRPDEA, VZN110L-CRPDEA3, VZN110L-CRPDEAB, VZN110L-CRPDEK, VZN110L-CRPGEA, VZN110L-CRPGEA3, VZN130L-GJMGEA, VZN130L-GJPGEA, VZN130L-GKMGEA, VZN130L-GKPGEA, VZN131L-RJMGEK, VZN131L-RJPGEK, VZN131L-RKMGEK, VZN131L-RKPGEK, VZN61LG-MSEA, VZN61LG-PSEA, VZN61L-MBEA, VZN61L-MBEA3, VZN61L-MSEA, VZN61L-MSEA3, VZN61LV-MDEA, VZN61LV-MSEA, VZN61LV-MSEK, VZN61LV-PDEA, VZN61LV-PSEA, VZN61LV-PSEK, VZN66L-MDCEA3, VZN66L-MDCEK, VZN66L-MDEA3, VZN66L-MDEK, VZN66L-MSCEA, VZN66L-MSCEA3, VZN66L-MSCEK, VZN66L-PDCEA3, VZN66L-PDEA3, VZN66L-PDEK, VZN66L-PSCEA3, VZN66L-PSCEK
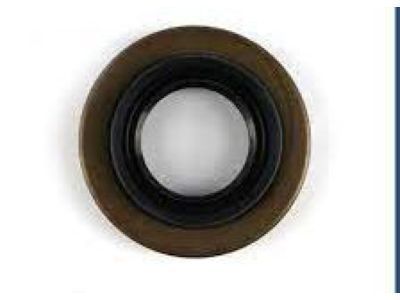
Toyota 4Runner Oil Seal
Part Number: 90311-38133$8.68 MSRP: $12.13You Save: $3.45 (29%)Ships in 1-2 Business DaysADD TO CARTProduct Specifications- Other Name: Seal, Oil (For Rear Differential Carrier)
- Manufacturer Note: HTB2 38 74 11
- Comment: (FOR REAR DIFFERENTIAL CARRIER)
- Replaced by: 90311-38047
- Warranty: This genuine part is guaranteed by Toyota's factory warranty.
Fits the following Vehicles:- 1984-1995 Toyota 4Runner | DLX, SDT, SR5, SR5 Turbo, STD | 4 Cyl 2.4L, 6 Cyl 3.0L | 22R, 22RE, 22REC, 22RTEC, 2L, 2LT, 3VZE; LN51L-KRA, LN51L-KRA3, LN56L-MDA3, LN56L-MDCA, LN56L-MDCA3, LN56L-MDCK, LN56L-MDCXA3, LN56L-MDK, LN56L-MDXA3, LN56L-MRK, LN65L-MDA, LN65L-MDA3, LN65L-MDCA3, LN65L-MDCK, LN65L-MDXA, LN65L-MDXA3, LN65L-MDXK, LN66L-MDCXK, RN101L-TRLDEA, RN101L-TRLDEAB, RN101L-TRLDEK, RN101L-TRLSEA, RN101L-TRLSEA3, RN101L-TRMDEA, RN101L-TRMDEA3, RN101L-TRMDEAB, RN101L-TRMDEK, RN101L-TRMSEA, RN101L-TRMSEA3, RN101L-TRPDEA, RN101L-TRPDEAB, RN106L-TRLDEA, RN106L-TRLDEK, RN106L-TRMDEA, RN106L-TRMDEA3, RN106L-TRMDEK, RN106L-TRPDEA, RN106L-TRPDEA3, RN106L-TRPDEK, RN110L-CRLDEA, RN110L-CRLDEK, RN110L-CRLSEA, RN110L-CRLSEA3, RN110L-CRMDEA, RN110L-CRMDEA3, RN110L-CRMDEAB, RN110L-CRMDEK, RN110L-CRMSEA, RN110L-CRMSEA3, RN110L-CRPDEA, RN110L-CRPDEA3, RN110L-CRPSEA, RN110L-CRPSEA3, RN120L-GKPSEA, RN121L-RKMSEK, RN121L-RKPSEK, RN130L-GJLSEA, RN130L-GJMSEA, RN130L-GJPSEA, RN130L-GKLSEA, RN130L-GKMSEA, RN130L-GKPSEA, RN131L-RJLSEK, RN131L-RJMSEK, RN131L-RJPSEK, RN131L-RKLSEK, RN131L-RKMSEK, RN131L-RKPSEK, RN50L-KRA, RN50L-KRK, RN50L-LRA, RN50L-MRA, RN50L-MSEA, RN50L-MSEA3, RN50L-PRA, RN50L-SRA, RN50L-SREA, RN50L-TRA, RN55L-KDA3W, RN55L-KDEA3W, RN55L-KDEK3W, RN55L-KDK3W, RN55L-KRA3W, RN55L-KREA3W, RN55L-KRTEA3W, RN55L-LDA, RN55L-LDA3, RN55L-LRA, RN55L-MDA, RN55L-MDA3, RN55L-MDCA, RN55L-MDCA3, RN55L-MDCK, RN55L-MGCZA, RN55L-MGCZA3, RN55L-MRA, RN55L-MRHA, RN55L-MRHA3, RN55L-MRHEA, RN55L-MRHEK, RN55L-MRHK, RN55L-MRK, RN55L-MSCEA, RN55L-MSCEA3, RN55L-MSCEK, RN55L-MSCZA, RN55L-MSCZA3, RN55L-MSEA, RN55L-MSEA3, RN55L-MSEK, RN55L-PDA, RN55L-PDA3, RN55L-PDCA, RN55L-PDCA3, RN55L-PDCK, RN55L-PDEA3W, RN55L-PDEK3W, RN55L-PDK, RN55L-PGCZA, RN55L-PGCZA3, RN55L-PGCZK, RN55L-PRA, RN55L-PRK, RN55L-PSCEA, RN55L-PSCEA3, RN55L-PSCEK, RN55L-PSEA3, RN55L-SDA, RN55L-SDEA, RN55L-SDEA3, RN55L-SRA, RN55L-SREA, RN55L-SREA3W, RN55L-SREK, RN55L-SRHEA, RN55L-SRHEK, RN55L-SRK, RN55L-SRTEA3W, RN60LG-MDA, RN60LG-MDEA, RN60LG-MSA, RN60LG-MSEA, RN60LG-PDEA, RN60L-MDK, RN60L-MRA, RN60L-MRA3, RN60L-MSA, RN60L-MSA3, RN60L-MSEA, RN60L-MSEA3, RN60LV-MDA, RN60LV-MDEA, RN60LV-MSEK, RN60LV-MSK, RN60LV-PDEA, RN60LV-PSEK, RN61LG-MDEA, RN61LG-MSEA, RN61LG-PDEA, RN61LG-PGZA, RN61LG-PSEA, RN61L-MBZA, RN61L-MBZA3, RN61L-MDK, RN61L-MRA, RN61L-MRA3, RN61L-MREA, RN61L-MREA3, RN61L-MREK, RN61L-MSEA, RN61L-MSEA3, RN61LV-MDEA, RN61LV-MDEK, RN61LV-MSEA, RN61LV-MSEK, RN61LV-PDEA, RN61LV-PDEK, RN61LV-PGZK, RN61LV-PSEA, RN61LV-PSEK, RN65L-MDA, RN65L-MDA3, RN65L-MDCA, RN65L-MDCA3, RN65L-MDK, RN65L-MSA3, RN65L-MSCA, RN65L-MSCA3, RN65L-MSCEA, RN65L-MSCEA3, RN65L-MSCEK, RN65L-MSCK, RN65L-MSEA3, RN65L-MSEK, RN65L-MSK, RN65L-PDCEA, RN65L-PDCEA3, RN65L-PDEA, RN65L-PDEA3, RN65L-PDEK, RN65L-PSCEK, RN66L-MDA, RN66L-MDA3, RN66L-MDCA, RN66L-MDCA3, RN66L-MDCEA, RN66L-MDCEA3, RN66L-MDCEK, RN66L-MDEA, RN66L-MDEA3, RN66L-MDEK, RN66L-MDK, RN66L-MGCZA, RN66L-MGCZA3, RN66L-MGCZK, RN66L-MRA, RN66L-MSCEA, RN66L-MSCEA3, RN66L-MSCEK, RN66L-MSEA3, RN66L-MSEK, RN66L-PDCEA, RN66L-PDCEA3, RN66L-PDEA, RN66L-PDEA3, RN66L-PDEK, RN66L-PGCZA, RN66L-PGCZA3, RN66L-PGCZK, RN66L-PSCEA3, RN66L-PSCEK, RN70L-LDCA3, RN70L-LRCA, RN70L-LRCA3, RN70L-MDCA, RN70L-MDCA3, RN70L-MDCK, RN70L-MRCA, RN70L-MRCA3, RN70L-MRCK, RN70L-SDCA, RN70L-SDCA3, RN70L-SDCEA3, RN70L-SDCK, RN70L-SRCA, RN70L-SRCEA, RN70L-SRCEA3, RN70L-SRCEK, RN70L-SRCK, RN75L-KRTEA3W, RN75L-PDTEA3W, RN75L-SDTEA3W, RN75L-SDTEK3W, RN80L-TRKREA, RN80L-TRKRSA, RN80L-TRKRSA3, RN80L-TRLDSA, RN80L-TRLDSA3, RN80L-TRMDEA, RN80L-TRMDEA3, RN80L-TRMDEAB, RN80L-TRMREA, RN80L-TRMREAB, RN80L-TRMREK, RN80L-TRMRSK, RN80L-TRSDEA, RN80L-TRSDEA3, RN80L-TRSDEAB, RN80L-TRTRSA, RN80L-TRTRSA3, RN85L-TRLDSA, RN85L-TRLDSA3, RN85L-TRMDEA, RN85L-TRMDEA3, RN85L-TRMDEK, RN85L-TRMDSK, RN85L-TRMSEA, RN85L-TRMSEA3, RN85L-TRSDEA, RN85L-TRSDEA3, RN85L-TRSDEK, RN85L-TRSSEA, RN85L-TRSSEA3, RN90L-CRLDSA, RN90L-CRLDSA3, RN90L-CRMDEA, RN90L-CRMDEA3, RN90L-CRMDEAB, RN90L-CRMDEK, RN90L-CRMDSK, RN90L-CRMSEA, RN90L-CRMSEA3, RN90L-CRSDEA, RN90L-CRSDEA3, RN90L-CRSDEK, RN90L-CRSSEA, RN90L-CRSSEA3, VZN100L-TRMDEA, VZN100L-TRMDEA3, VZN100L-TRMDEAB, VZN100L-TRMDEK, VZN100L-TRMGEA, VZN100L-TRMGEA3, VZN105L-TRMDEA, VZN105L-TRMDEA3, VZN105L-TRMDEK, VZN105L-TRPDEA, VZN105L-TRPDEA3, VZN110L-CRMDEA, VZN110L-CRMDEA3, VZN110L-CRMDEAB, VZN110L-CRMDEK, VZN110L-CRMGEA, VZN110L-CRMGEA3, VZN110L-CRMGEK, VZN110L-CRPDEA, VZN110L-CRPDEA3, VZN110L-CRPDEAB, VZN110L-CRPDEK, VZN110L-CRPGEA, VZN110L-CRPGEA3, VZN120L-GKPGEA, VZN130L-GJMGEA, VZN130L-GJPGEA, VZN130L-GKMGEA, VZN130L-GKPGEA, VZN131L-RJMGEK, VZN131L-RJPGEK, VZN131L-RKMGEK, VZN131L-RKPGEK, VZN61LG-MSEA, VZN61LG-PSEA, VZN61L-MBEA, VZN61L-MBEA3, VZN61L-MSEA, VZN61L-MSEA3, VZN61LV-MDEA, VZN61LV-MSEA, VZN61LV-MSEK, VZN61LV-PDEA, VZN61LV-PSEA, VZN61LV-PSEK, VZN66L-MDCEA3, VZN66L-MDCEK, VZN66L-MDEA3, VZN66L-MDEK, VZN66L-MSCEA, VZN66L-MSCEA3, VZN66L-MSCEK, VZN66L-PDCEA3, VZN66L-PDEA3, VZN66L-PDEK, VZN66L-PSCEA3, VZN66L-PSCEK, VZN85L-THMDEA, VZN85L-THMDEA3, VZN85L-THSDEA, VZN85L-THSDEA3, VZN85L-TRMDEA, VZN85L-TRMDEA3, VZN85L-TRMDEK, VZN85L-TRMREA6, VZN85L-TRSDEA, VZN85L-TRSDEA3, VZN85L-TRSDEK, VZN85L-TRSREA6, VZN85L-TWMREA6, VZN85L-TWSREA6, VZN90L-CRMDEA, VZN90L-CRMDEA3, VZN90L-CRMDEK, VZN90L-CRMGEA, VZN90L-CRMGEA3, VZN90L-CRMGEK, VZN90L-CRPGEA, VZN90L-CRPGEA3, VZN90L-CRSDEA, VZN90L-CRSDEA3, VZN90L-CRSDEK, VZN95L-TWMREA6, VZN95L-TWSREA6, VZN95L-TWSREK6
Toyota 4Runner Oil Seal
Part Number: 90311-38049$12.48 MSRP: $17.45You Save: $4.97 (29%)Ships in 1-3 Business DaysADD TO CARTProduct Specifications- Other Name: Seal, Oil (For Front Differential Carrier)
- Comment: (FOR FRONT DIFFERENTIAL CARRIER)
- Replaced by: 90311-38066
- Warranty: This genuine part is guaranteed by Toyota's factory warranty.
Fits the following Vehicles:- 1996-2002 Toyota 4Runner | LULI, SR5B, SR5V | 4 Cyl 2.7L, 6 Cyl 3.4L | 3RZFE, 5VZFE; RZN180L-GKMSKA, RZN180L-GKPSKA, RZN185L-GKMSKA, RZN185L-GKPSKA, VZN180L-GKPGKA, VZN180L-GKPSKA, VZN180L-GKPZKA, VZN185L-GKMGKA, VZN185L-GKPGKA, VZN185L-GKPSKA, VZN185L-GKPZKA
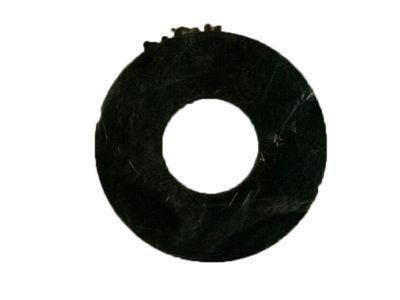
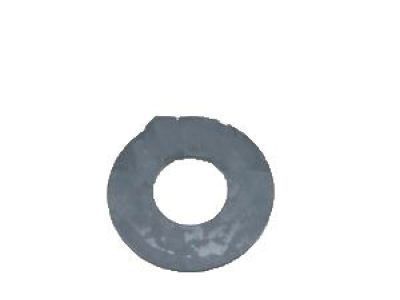
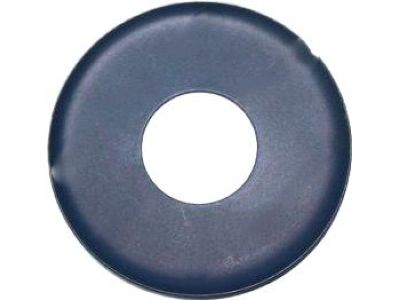
Toyota 4Runner Slinger, Rear Differential Drive Pinion Oil
Part Number: 41214-26010$11.89 MSRP: $16.62You Save: $4.73 (29%)Ships in 1-2 Business DaysADD TO CARTProduct Specifications- Manufacturer Note: *AXC=G392 OR G662
- Replaces: 41214-40010, 90201-28002, 41214-30010
- Warranty: This genuine part is guaranteed by Toyota's factory warranty.
Fits the following Vehicles:- 1984-2002 Toyota 4Runner | DLX, LULI, SDT, SR5, SR5 Turbo, SR5B, SR5V, STD | 4 Cyl 2.4L, 4 Cyl 2.7L, 6 Cyl 3.0L, 6 Cyl 3.4L | 22R, 22RE, 22REC, 22RTEC, 2L, 2LT, 3RZFE, 3VZE, 5VZFE; LN51L-KRA, LN51L-KRA3, LN56L-MDA3, LN56L-MDCA, LN56L-MDCA3, LN56L-MDCK, LN56L-MDCXA3, LN56L-MDK, LN56L-MDXA3, LN56L-MRK, LN65L-MDA, LN65L-MDA3, LN65L-MDCA3, LN65L-MDCK, LN65L-MDXA, LN65L-MDXA3, LN65L-MDXK, LN66L-MDCXK, RN101L-TRLDEA, RN101L-TRLDEAB, RN101L-TRLDEK, RN101L-TRLSEA, RN101L-TRLSEA3, RN101L-TRMDEA, RN101L-TRMDEA3, RN101L-TRMDEAB, RN101L-TRMDEK, RN101L-TRMSEA, RN101L-TRMSEA3, RN101L-TRPDEA, RN101L-TRPDEAB, RN106L-TRLDEA, RN106L-TRLDEK, RN106L-TRMDEA, RN106L-TRMDEA3, RN106L-TRMDEK, RN106L-TRPDEA, RN106L-TRPDEA3, RN106L-TRPDEK, RN110L-CRLDEA, RN110L-CRLDEK, RN110L-CRLSEA, RN110L-CRLSEA3, RN110L-CRMDEA, RN110L-CRMDEA3, RN110L-CRMDEAB, RN110L-CRMDEK, RN110L-CRMSEA, RN110L-CRMSEA3, RN110L-CRPDEA, RN110L-CRPDEA3, RN110L-CRPSEA, RN110L-CRPSEA3, RN120L-GKPSEA, RN121L-RKMSEK, RN121L-RKPSEK, RN130L-GJLSEA, RN130L-GJMSEA, RN130L-GJPSEA, RN130L-GKLSEA, RN130L-GKMSEA, RN130L-GKPSEA, RN131L-RJLSEK, RN131L-RJMSEK, RN131L-RJPSEK, RN131L-RKLSEK, RN131L-RKMSEK, RN131L-RKPSEK, RN50L-KRA, RN50L-KRK, RN50L-LRA, RN50L-MRA, RN50L-MSEA, RN50L-MSEA3, RN50L-PRA, RN50L-SRA, RN50L-SREA, RN50L-TRA, RN55L-KDA3W, RN55L-KDEA3W, RN55L-KDEK3W, RN55L-KDK3W, RN55L-KRA3W, RN55L-KREA3W, RN55L-KRTEA3W, RN55L-LDA, RN55L-LDA3, RN55L-LRA, RN55L-MDA, RN55L-MDA3, RN55L-MDCA, RN55L-MDCA3, RN55L-MDCK, RN55L-MGCZA, RN55L-MGCZA3, RN55L-MRA, RN55L-MRHA, RN55L-MRHA3, RN55L-MRHEA, RN55L-MRHEK, RN55L-MRHK, RN55L-MRK, RN55L-MSCEA, RN55L-MSCEA3, RN55L-MSCEK, RN55L-MSCZA, RN55L-MSCZA3, RN55L-MSEA, RN55L-MSEA3, RN55L-MSEK, RN55L-PDA, RN55L-PDA3, RN55L-PDCA, RN55L-PDCA3, RN55L-PDCK, RN55L-PDEA3W, RN55L-PDEK3W, RN55L-PDK, RN55L-PGCZA, RN55L-PGCZA3, RN55L-PGCZK, RN55L-PRA, RN55L-PRK, RN55L-PSCEA, RN55L-PSCEA3, RN55L-PSCEK, RN55L-PSEA3, RN55L-SDA, RN55L-SDEA, RN55L-SDEA3, RN55L-SRA, RN55L-SREA, RN55L-SREA3W, RN55L-SREK, RN55L-SRHEA, RN55L-SRHEK, RN55L-SRK, RN55L-SRTEA3W, RN60LG-MDA, RN60LG-MDEA, RN60LG-MSA, RN60LG-MSEA, RN60LG-PDEA, RN60L-MDK, RN60L-MRA, RN60L-MRA3, RN60L-MSA, RN60L-MSA3, RN60L-MSEA, RN60L-MSEA3, RN60LV-MDA, RN60LV-MDEA, RN60LV-MSEK, RN60LV-MSK, RN60LV-PDEA, RN60LV-PSEK, RN61LG-MDEA, RN61LG-MSEA, RN61LG-PDEA, RN61LG-PGZA, RN61LG-PSEA, RN61L-MBZA, RN61L-MBZA3, RN61L-MDK, RN61L-MRA, RN61L-MRA3, RN61L-MREA, RN61L-MREA3, RN61L-MREK, RN61L-MSEA, RN61L-MSEA3, RN61LV-MDEA, RN61LV-MDEK, RN61LV-MSEA, RN61LV-MSEK, RN61LV-PDEA, RN61LV-PDEK, RN61LV-PGZK, RN61LV-PSEA, RN61LV-PSEK, RN65L-MDA, RN65L-MDA3, RN65L-MDCA, RN65L-MDCA3, RN65L-MDK, RN65L-MSA3, RN65L-MSCA, RN65L-MSCA3, RN65L-MSCEA, RN65L-MSCEA3, RN65L-MSCEK, RN65L-MSCK, RN65L-MSEA3, RN65L-MSEK, RN65L-MSK, RN65L-PDCEA, RN65L-PDCEA3, RN65L-PDEA, RN65L-PDEA3, RN65L-PDEK, RN65L-PSCEK, RN66L-MDA, RN66L-MDA3, RN66L-MDCA, RN66L-MDCA3, RN66L-MDCEA, RN66L-MDCEA3, RN66L-MDCEK, RN66L-MDEA, RN66L-MDEA3, RN66L-MDEK, RN66L-MDK, RN66L-MGCZA, RN66L-MGCZA3, RN66L-MGCZK, RN66L-MRA, RN66L-MSCEA, RN66L-MSCEA3, RN66L-MSCEK, RN66L-MSEA3, RN66L-MSEK, RN66L-PDCEA, RN66L-PDCEA3, RN66L-PDEA, RN66L-PDEA3, RN66L-PDEK, RN66L-PGCZA, RN66L-PGCZA3, RN66L-PGCZK, RN66L-PSCEA3, RN66L-PSCEK, RN70L-LDCA3, RN70L-LRCA, RN70L-LRCA3, RN70L-MDCA, RN70L-MDCA3, RN70L-MDCK, RN70L-MRCA, RN70L-MRCA3, RN70L-MRCK, RN70L-SDCA, RN70L-SDCA3, RN70L-SDCEA3, RN70L-SDCK, RN70L-SRCA, RN70L-SRCEA, RN70L-SRCEA3, RN70L-SRCEK, RN70L-SRCK, RN75L-KRTEA3W, RN75L-PDTEA3W, RN75L-SDTEA3W, RN75L-SDTEK3W, RN80L-TRKREA, RN80L-TRKRSA, RN80L-TRKRSA3, RN80L-TRLDSA, RN80L-TRLDSA3, RN80L-TRMDEA, RN80L-TRMDEA3, RN80L-TRMREA, RN80L-TRMREK, RN80L-TRMRSK, RN80L-TRSDEA, RN80L-TRSDEA3, RN80L-TRTRSA, RN80L-TRTRSA3, RN85L-TRLDSA, RN85L-TRLDSA3, RN85L-TRMDEA, RN85L-TRMDEA3, RN85L-TRMDEK, RN85L-TRMDSK, RN85L-TRMSEA, RN85L-TRMSEA3, RN85L-TRSDEA, RN85L-TRSDEA3, RN85L-TRSDEK, RN85L-TRSSEA, RN85L-TRSSEA3, RN90L-CRLDSA, RN90L-CRLDSA3, RN90L-CRMDEA, RN90L-CRMDEA3, RN90L-CRMDEK, RN90L-CRMDSK, RN90L-CRMSEA, RN90L-CRMSEA3, RN90L-CRSDEA, RN90L-CRSDEA3, RN90L-CRSDEK, RN90L-CRSSEA, RN90L-CRSSEA3, RZN180L-GKMSKA, RZN180L-GKPSKA, RZN185L-GKMSKA, RZN185L-GKPSKA, VZN100L-TRMDEA, VZN100L-TRMDEA3, VZN100L-TRMDEAB, VZN100L-TRMDEK, VZN100L-TRMGEA, VZN100L-TRMGEA3, VZN105L-TRMDEA, VZN105L-TRMDEA3, VZN105L-TRMDEK, VZN105L-TRPDEA, VZN105L-TRPDEA3, VZN110L-CRMDEA, VZN110L-CRMDEA3, VZN110L-CRMDEAB, VZN110L-CRMDEK, VZN110L-CRMGEA, VZN110L-CRMGEA3, VZN110L-CRMGEK, VZN110L-CRPDEA, VZN110L-CRPDEA3, VZN110L-CRPDEAB, VZN110L-CRPDEK, VZN110L-CRPGEA, VZN110L-CRPGEA3, VZN120L-GKPGEA, VZN130L-GJMGEA, VZN130L-GJPGEA, VZN130L-GKMGEA, VZN130L-GKPGEA, VZN131L-RJMGEK, VZN131L-RJPGEK, VZN131L-RKMGEK, VZN131L-RKPGEK, VZN180L-GKPGKA, VZN180L-GKPSKA, VZN180L-GKPZKA, VZN185L-GKMGKA, VZN185L-GKPGKA, VZN185L-GKPSKA, VZN185L-GKPZKA, VZN61LG-MSEA, VZN61LG-PSEA, VZN61L-MBEA, VZN61L-MBEA3, VZN61L-MSEA, VZN61L-MSEA3, VZN61LV-MDEA, VZN61LV-MSEA, VZN61LV-MSEK, VZN61LV-PDEA, VZN61LV-PSEA, VZN61LV-PSEK, VZN66L-MDCEA3, VZN66L-MDCEK, VZN66L-MDEA3, VZN66L-MDEK, VZN66L-MSCEA, VZN66L-MSCEA3, VZN66L-MSCEK, VZN66L-PDCEA3, VZN66L-PDEA3, VZN66L-PDEK, VZN66L-PSCEA3, VZN66L-PSCEK, VZN85L-THMDEA, VZN85L-THMDEA3, VZN85L-THSDEA, VZN85L-THSDEA3, VZN85L-TRMDEA, VZN85L-TRMDEA3, VZN85L-TRMDEK, VZN85L-TRMREA6, VZN85L-TRSDEA, VZN85L-TRSDEA3, VZN85L-TRSDEK, VZN85L-TRSREA6, VZN85L-TWMREA6, VZN85L-TWSREA6, VZN90L-CRMDEA, VZN90L-CRMDEA3, VZN90L-CRMDEK, VZN90L-CRMGEA, VZN90L-CRMGEA3, VZN90L-CRMGEK, VZN90L-CRPGEA, VZN90L-CRPGEA3, VZN90L-CRSDEA, VZN90L-CRSDEA3, VZN90L-CRSDEK, VZN95L-TWMREA6, VZN95L-TWSREA6, VZN95L-TWSREK6
Toyota 4Runner Slinger, Front Differential Drive Pinion Oil
Part Number: 41214-26011$7.13 MSRP: $9.96You Save: $2.83 (29%)Ships in 1-3 Business DaysADD TO CARTProduct Specifications- Warranty: This genuine part is guaranteed by Toyota's factory warranty.
Fits the following Vehicles:- 2002-2024 Toyota 4Runner | Limited, LULI, SR5, SR5B, SR5V | 4 Cyl 2.7L, 6 Cyl 3.4L, 6 Cyl 4.0L, 8 Cyl 4.7L | 1GRFE, 2TRFE, 2UZFE, 5VZFE; GRN210L-GKAGKA, GRN210L-GKAZKA, GRN210L-GKPGKA, GRN210L-GKPZKA, GRN215L-GKAGKA, GRN215L-GKAZKA, GRN215L-GKPGKA, GRN215L-GKPZKA, GRN280L-GKAGKA, GRN285L-GKAGKA, TRN280L-GKPGKA, TRN285L-GKPGKA, UZN210L-GKAGKA, UZN210L-GKAZKA, UZN215L-GKAGKA, UZN215L-GKAZKA, VZN180L-GKPGKA, VZN180L-GKPSKA, VZN180L-GKPZKA, VZN185L-GKPGKA, VZN185L-GKPSKA, VZN185L-GKPZKA
Toyota 4Runner Type T Oil Seal
Part Number: 90311-41015$17.84 MSRP: $24.93You Save: $7.09 (29%)Ships in 1-3 Business DaysADD TO CARTProduct Specifications- Other Name: Seal, Oil (For Front Differential Carrier); Pinion Seal
- Manufacturer Note: LIMITED PACKAGE
- Warranty: This genuine part is guaranteed by Toyota's factory warranty.
Fits the following Vehicles:- 2015-2024 Toyota 4Runner | 6 Cyl 4.0L | 1GRFE; GRN280L-GKAGKA, GRN285L-GKAGKA
Toyota 4Runner Type T Oil Seal
Part Number: 90311-44008$19.86 MSRP: $27.76You Save: $7.90 (29%)Ships in 1-3 Business DaysADD TO CARTProduct Specifications- Other Name: Seal, Oil (For Rear Differential Carrier); Pinion Seal
- Comment: (FOR REAR DIFFERENTIAL CARRIER)
- Warranty: This genuine part is guaranteed by Toyota's factory warranty.
Fits the following Vehicles:- 2010-2024 Toyota 4Runner | 4 Cyl 2.7L, 6 Cyl 4.0L | 1GRFE, 2TRFE; GRN280L-GKAGKA, GRN285L-GKAGKA, TRN280L-GKPGKA, TRN285L-GKPGKA
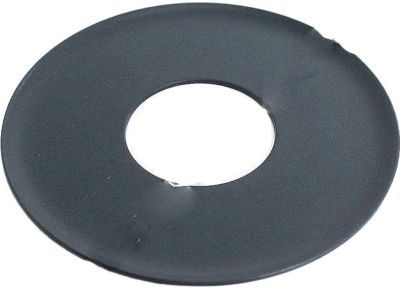
Toyota 4Runner Drive Pinion Oil Slinger
Part Number: 41214-30021$17.12 MSRP: $23.93You Save: $6.81 (29%)Ships in 1-2 Business DaysADD TO CARTProduct Specifications- Other Name: Slinger, Rear Differential Drive Pinion Oil; Oil Slinger
- Replaces: 41214-30020
- Warranty: This genuine part is guaranteed by Toyota's factory warranty.
Fits the following Vehicles:- 1984-1995 Toyota 4Runner | DLX, SDT, SR5, SR5 Turbo, STD | 4 Cyl 2.4L, 6 Cyl 3.0L | 22R, 22RE, 22REC, 22RTEC, 2L, 2LT, 3VZE; LN51L-KRA, LN51L-KRA3, LN56L-MDA3, LN56L-MDCA, LN56L-MDCA3, LN56L-MDCK, LN56L-MDCXA3, LN56L-MDK, LN56L-MDXA3, LN56L-MRK, LN65L-MDA, LN65L-MDA3, LN65L-MDCA3, LN65L-MDCK, LN65L-MDXA, LN65L-MDXA3, LN65L-MDXK, LN66L-MDCXK, RN120L-GKPSEA, RN121L-RKMSEK, RN121L-RKPSEK, RN50L-KRA, RN50L-KRK, RN50L-LRA, RN50L-MRA, RN50L-MSEA, RN50L-MSEA3, RN50L-PRA, RN50L-SRA, RN50L-SREA, RN50L-TRA, RN55L-KDA3W, RN55L-KDEA3W, RN55L-KDEK3W, RN55L-KDK3W, RN55L-KRA3W, RN55L-KREA3W, RN55L-KRTEA3W, RN55L-LDA, RN55L-LDA3, RN55L-LRA, RN55L-MDA, RN55L-MDA3, RN55L-MDCA, RN55L-MDCA3, RN55L-MDCK, RN55L-MGCZA, RN55L-MGCZA3, RN55L-MRA, RN55L-MRHA, RN55L-MRHA3, RN55L-MRHEA, RN55L-MRHEK, RN55L-MRHK, RN55L-MRK, RN55L-MSCEA, RN55L-MSCEA3, RN55L-MSCEK, RN55L-MSCZA, RN55L-MSCZA3, RN55L-MSEA, RN55L-MSEA3, RN55L-MSEK, RN55L-PDA, RN55L-PDA3, RN55L-PDCA, RN55L-PDCA3, RN55L-PDCK, RN55L-PDEA3W, RN55L-PDEK3W, RN55L-PDK, RN55L-PGCZA, RN55L-PGCZA3, RN55L-PGCZK, RN55L-PRA, RN55L-PRK, RN55L-PSCEA, RN55L-PSCEA3, RN55L-PSCEK, RN55L-PSEA3, RN55L-SDA, RN55L-SDEA, RN55L-SDEA3, RN55L-SRA, RN55L-SREA, RN55L-SREA3W, RN55L-SREK, RN55L-SRHEA, RN55L-SRHEK, RN55L-SRK, RN55L-SRTEA3W, RN60LG-MDA, RN60LG-MDEA, RN60LG-MSA, RN60LG-MSEA, RN60LG-PDEA, RN60L-MDK, RN60L-MRA, RN60L-MRA3, RN60L-MSA, RN60L-MSA3, RN60L-MSEA, RN60L-MSEA3, RN60LV-MDA, RN60LV-MDEA, RN60LV-MSEK, RN60LV-MSK, RN60LV-PDEA, RN60LV-PSEK, RN61LG-MDEA, RN61LG-MSEA, RN61LG-PDEA, RN61LG-PGZA, RN61LG-PSEA, RN61L-MBZA, RN61L-MBZA3, RN61L-MDK, RN61L-MRA, RN61L-MRA3, RN61L-MREA, RN61L-MREA3, RN61L-MREK, RN61L-MSEA, RN61L-MSEA3, RN61LV-MDEA, RN61LV-MDEK, RN61LV-MSEA, RN61LV-MSEK, RN61LV-PDEA, RN61LV-PDEK, RN61LV-PGZK, RN61LV-PSEA, RN61LV-PSEK, RN65L-MDA, RN65L-MDA3, RN65L-MDCA, RN65L-MDCA3, RN65L-MDK, RN65L-MSA3, RN65L-MSCA, RN65L-MSCA3, RN65L-MSCEA, RN65L-MSCEA3, RN65L-MSCEK, RN65L-MSCK, RN65L-MSEA3, RN65L-MSEK, RN65L-MSK, RN65L-PDCEA, RN65L-PDCEA3, RN65L-PDEA, RN65L-PDEA3, RN65L-PDEK, RN65L-PSCEK, RN66L-MDA, RN66L-MDA3, RN66L-MDCA, RN66L-MDCA3, RN66L-MDCEA, RN66L-MDCEA3, RN66L-MDCEK, RN66L-MDEA, RN66L-MDEA3, RN66L-MDEK, RN66L-MDK, RN66L-MGCZA, RN66L-MGCZA3, RN66L-MGCZK, RN66L-MRA, RN66L-MSCEA, RN66L-MSCEA3, RN66L-MSCEK, RN66L-MSEA3, RN66L-MSEK, RN66L-PDCEA, RN66L-PDCEA3, RN66L-PDEA, RN66L-PDEA3, RN66L-PDEK, RN66L-PGCZA, RN66L-PGCZA3, RN66L-PGCZK, RN66L-PSCEA3, RN66L-PSCEK, RN70L-LDCA3, RN70L-LRCA, RN70L-LRCA3, RN70L-MDCA, RN70L-MDCA3, RN70L-MDCK, RN70L-MRCA, RN70L-MRCA3, RN70L-MRCK, RN70L-SDCA, RN70L-SDCA3, RN70L-SDCEA3, RN70L-SDCK, RN70L-SRCA, RN70L-SRCEA, RN70L-SRCEA3, RN70L-SRCEK, RN70L-SRCK, RN75L-KRTEA3W, RN75L-PDTEA3W, RN75L-SDTEA3W, RN75L-SDTEK3W, RN80L-TRKREA, RN80L-TRKRSA, RN80L-TRKRSA3, RN80L-TRLDSA, RN80L-TRLDSA3, RN80L-TRMDEA, RN80L-TRMDEA3, RN80L-TRMDEAB, RN80L-TRMREA, RN80L-TRMREAB, RN80L-TRMREK, RN80L-TRMRSK, RN80L-TRSDEA, RN80L-TRSDEA3, RN80L-TRSDEAB, RN80L-TRTRSA, RN80L-TRTRSA3, RN85L-TRLDSA, RN85L-TRLDSA3, RN85L-TRMDEA, RN85L-TRMDEA3, RN85L-TRMDEK, RN85L-TRMDSK, RN85L-TRMSEA, RN85L-TRMSEA3, RN85L-TRSDEA, RN85L-TRSDEA3, RN85L-TRSDEK, RN85L-TRSSEA, RN85L-TRSSEA3, RN90L-CRLDSA, RN90L-CRLDSA3, RN90L-CRMDEA, RN90L-CRMDEA3, RN90L-CRMDEAB, RN90L-CRMDEK, RN90L-CRMDSK, RN90L-CRMSEA, RN90L-CRMSEA3, RN90L-CRSDEA, RN90L-CRSDEA3, RN90L-CRSDEK, RN90L-CRSSEA, RN90L-CRSSEA3, VZN120L-GKPGEA, VZN61LG-MSEA, VZN61LG-PSEA, VZN61L-MBEA, VZN61L-MBEA3, VZN61L-MSEA, VZN61L-MSEA3, VZN61LV-MDEA, VZN61LV-MSEA, VZN61LV-MSEK, VZN61LV-PDEA, VZN61LV-PSEA, VZN61LV-PSEK, VZN66L-MDCEA3, VZN66L-MDCEK, VZN66L-MDEA3, VZN66L-MDEK, VZN66L-MSCEA, VZN66L-MSCEA3, VZN66L-MSCEK, VZN66L-PDCEA3, VZN66L-PDEA3, VZN66L-PDEK, VZN66L-PSCEA3, VZN66L-PSCEK, VZN85L-THMDEA, VZN85L-THMDEA3, VZN85L-THSDEA, VZN85L-THSDEA3, VZN85L-TRMDEA, VZN85L-TRMDEA3, VZN85L-TRMDEK, VZN85L-TRMREA6, VZN85L-TRSDEA, VZN85L-TRSDEA3, VZN85L-TRSDEK, VZN85L-TRSREA6, VZN85L-TWMREA6, VZN85L-TWSREA6, VZN90L-CRMDEA, VZN90L-CRMDEA3, VZN90L-CRMDEK, VZN90L-CRMGEA, VZN90L-CRMGEA3, VZN90L-CRMGEK, VZN90L-CRPGEA, VZN90L-CRPGEA3, VZN90L-CRSDEA, VZN90L-CRSDEA3, VZN90L-CRSDEK, VZN95L-TWMREA6, VZN95L-TWSREA6, VZN95L-TWSREK6
Toyota 4Runner Slinger, Rear Differential Drive Pinion Oil
Part Number: 41214-35020$7.49 MSRP: $10.46You Save: $2.97 (29%)Ships in 1-3 Business DaysADD TO CARTProduct Specifications- Other Name: Slinger, Front Differential Drive Pinion Oil
- Warranty: This genuine part is guaranteed by Toyota's factory warranty.
Fits the following Vehicles:- 1985-2002 Toyota 4Runner | DLX, LULI, SDT, SR5, SR5 Turbo, SR5B, SR5V, STD | 4 Cyl 2.4L, 4 Cyl 2.7L, 6 Cyl 3.0L, 6 Cyl 3.4L | 22R, 22RE, 22REC, 22RTEC, 2L, 2LT, 3RZFE, 3VZE, 5VZFE; LN51L-KRA, LN51L-KRA3, LN56L-MDA3, LN56L-MDCA, LN56L-MDCA3, LN56L-MDCK, LN56L-MDCXA3, LN56L-MDK, LN56L-MDXA3, LN56L-MRK, LN65L-MDA, LN65L-MDA3, LN65L-MDCA3, LN65L-MDCK, LN65L-MDXA, LN65L-MDXA3, LN65L-MDXK, LN66L-MDCXK, RN101L-TRLDEA, RN101L-TRLDEAB, RN101L-TRLDEK, RN101L-TRLSEA, RN101L-TRLSEA3, RN101L-TRMDEA, RN101L-TRMDEA3, RN101L-TRMDEAB, RN101L-TRMDEK, RN101L-TRMSEA, RN101L-TRMSEA3, RN101L-TRPDEA, RN101L-TRPDEAB, RN106L-TRLDEA, RN106L-TRLDEK, RN106L-TRMDEA, RN106L-TRMDEA3, RN106L-TRMDEK, RN106L-TRPDEA, RN106L-TRPDEA3, RN106L-TRPDEK, RN110L-CRLDEA, RN110L-CRLDEK, RN110L-CRLSEA, RN110L-CRLSEA3, RN110L-CRMDEA, RN110L-CRMDEA3, RN110L-CRMDEAB, RN110L-CRMDEK, RN110L-CRMSEA, RN110L-CRMSEA3, RN110L-CRPDEA, RN110L-CRPDEA3, RN110L-CRPSEA, RN110L-CRPSEA3, RN130L-GJLSEA, RN130L-GJMSEA, RN130L-GJPSEA, RN130L-GKLSEA, RN130L-GKMSEA, RN130L-GKPSEA, RN131L-RJLSEK, RN131L-RJMSEK, RN131L-RJPSEK, RN131L-RKLSEK, RN131L-RKMSEK, RN131L-RKPSEK, RN50L-KRA, RN50L-KRK, RN50L-LRA, RN50L-MRA, RN50L-MSEA, RN50L-MSEA3, RN50L-PRA, RN50L-SRA, RN50L-SREA, RN50L-TRA, RN55L-KDA3W, RN55L-KDEA3W, RN55L-KDEK3W, RN55L-KDK3W, RN55L-KRA3W, RN55L-KREA3W, RN55L-KRTEA3W, RN55L-LDA, RN55L-LDA3, RN55L-LRA, RN55L-MDA, RN55L-MDA3, RN55L-MDCA, RN55L-MDCA3, RN55L-MDCK, RN55L-MGCZA, RN55L-MGCZA3, RN55L-MRA, RN55L-MRHA, RN55L-MRHA3, RN55L-MRHEA, RN55L-MRHEK, RN55L-MRHK, RN55L-MRK, RN55L-MSCEA, RN55L-MSCEA3, RN55L-MSCEK, RN55L-MSCZA, RN55L-MSCZA3, RN55L-MSEA, RN55L-MSEA3, RN55L-MSEK, RN55L-PDA, RN55L-PDA3, RN55L-PDCA, RN55L-PDCA3, RN55L-PDCK, RN55L-PDEA3W, RN55L-PDEK3W, RN55L-PDK, RN55L-PGCZA, RN55L-PGCZA3, RN55L-PGCZK, RN55L-PRA, RN55L-PRK, RN55L-PSCEA, RN55L-PSCEA3, RN55L-PSCEK, RN55L-PSEA3, RN55L-SDA, RN55L-SDEA, RN55L-SDEA3, RN55L-SRA, RN55L-SREA, RN55L-SREA3W, RN55L-SREK, RN55L-SRHEA, RN55L-SRHEK, RN55L-SRK, RN55L-SRTEA3W, RN60LG-MDA, RN60LG-MDEA, RN60LG-MSA, RN60LG-MSEA, RN60LG-PDEA, RN60L-MDK, RN60L-MRA, RN60L-MRA3, RN60L-MSA, RN60L-MSA3, RN60L-MSEA, RN60L-MSEA3, RN60LV-MDA, RN60LV-MDEA, RN60LV-MSEK, RN60LV-MSK, RN60LV-PDEA, RN60LV-PSEK, RN61LG-MDEA, RN61LG-MSEA, RN61LG-PDEA, RN61LG-PGZA, RN61LG-PSEA, RN61L-MBZA, RN61L-MBZA3, RN61L-MDK, RN61L-MRA, RN61L-MRA3, RN61L-MREA, RN61L-MREA3, RN61L-MREK, RN61L-MSEA, RN61L-MSEA3, RN61LV-MDEA, RN61LV-MDEK, RN61LV-MSEA, RN61LV-MSEK, RN61LV-PDEA, RN61LV-PDEK, RN61LV-PGZK, RN61LV-PSEA, RN61LV-PSEK, RN65L-MDA, RN65L-MDA3, RN65L-MDCA, RN65L-MDCA3, RN65L-MDK, RN65L-MSA3, RN65L-MSCA, RN65L-MSCA3, RN65L-MSCEA, RN65L-MSCEA3, RN65L-MSCEK, RN65L-MSCK, RN65L-MSEA3, RN65L-MSEK, RN65L-MSK, RN65L-PDCEA, RN65L-PDCEA3, RN65L-PDEA, RN65L-PDEA3, RN65L-PDEK, RN65L-PSCEK, RN66L-MDA, RN66L-MDA3, RN66L-MDCA, RN66L-MDCA3, RN66L-MDCEA, RN66L-MDCEA3, RN66L-MDCEK, RN66L-MDEA, RN66L-MDEA3, RN66L-MDEK, RN66L-MDK, RN66L-MGCZA, RN66L-MGCZA3, RN66L-MGCZK, RN66L-MRA, RN66L-MSCEA, RN66L-MSCEA3, RN66L-MSCEK, RN66L-MSEA3, RN66L-MSEK, RN66L-PDCEA, RN66L-PDCEA3, RN66L-PDEA, RN66L-PDEA3, RN66L-PDEK, RN66L-PGCZA, RN66L-PGCZA3, RN66L-PGCZK, RN66L-PSCEA3, RN66L-PSCEK, RN70L-LDCA3, RN70L-LRCA, RN70L-LRCA3, RN70L-MDCA, RN70L-MDCA3, RN70L-MDCK, RN70L-MRCA, RN70L-MRCA3, RN70L-MRCK, RN70L-SDCA, RN70L-SDCA3, RN70L-SDCEA3, RN70L-SDCK, RN70L-SRCA, RN70L-SRCEA, RN70L-SRCEA3, RN70L-SRCEK, RN70L-SRCK, RN75L-KRTEA3W, RN75L-PDTEA3W, RN75L-SDTEA3W, RN75L-SDTEK3W, RZN180L-GKMSKA, RZN180L-GKPSKA, RZN185L-GKMSKA, RZN185L-GKPSKA, VZN100L-TRMDEA, VZN100L-TRMDEA3, VZN100L-TRMDEAB, VZN100L-TRMDEK, VZN100L-TRMGEA, VZN100L-TRMGEA3, VZN105L-TRMDEA, VZN105L-TRMDEA3, VZN105L-TRMDEK, VZN105L-TRPDEA, VZN105L-TRPDEA3, VZN110L-CRMDEA, VZN110L-CRMDEA3, VZN110L-CRMDEAB, VZN110L-CRMDEK, VZN110L-CRMGEA, VZN110L-CRMGEA3, VZN110L-CRMGEK, VZN110L-CRPDEA, VZN110L-CRPDEA3, VZN110L-CRPDEAB, VZN110L-CRPDEK, VZN110L-CRPGEA, VZN110L-CRPGEA3, VZN130L-GJMGEA, VZN130L-GJPGEA, VZN130L-GKMGEA, VZN130L-GKPGEA, VZN131L-RJMGEK, VZN131L-RJPGEK, VZN131L-RKMGEK, VZN131L-RKPGEK, VZN180L-GKPGKA, VZN180L-GKPSKA, VZN180L-GKPZKA, VZN185L-GKMGKA, VZN185L-GKPGKA, VZN185L-GKPSKA, VZN185L-GKPZKA, VZN61LG-MSEA, VZN61LG-PSEA, VZN61L-MBEA, VZN61L-MBEA3, VZN61L-MSEA, VZN61L-MSEA3, VZN61LV-MDEA, VZN61LV-MSEA, VZN61LV-MSEK, VZN61LV-PDEA, VZN61LV-PSEA, VZN61LV-PSEK, VZN66L-MDCEA3, VZN66L-MDCEK, VZN66L-MDEA3, VZN66L-MDEK, VZN66L-MSCEA, VZN66L-MSCEA3, VZN66L-MSCEK, VZN66L-PDCEA3, VZN66L-PDEA3, VZN66L-PDEK, VZN66L-PSCEA3, VZN66L-PSCEK
Toyota 4Runner Oil Seal
Part Number: 90311-38035$8.68 MSRP: $12.13You Save: $3.45 (29%)Ships in 1-3 Business DaysADD TO CARTProduct Specifications- Other Name: Seal, Oil (For Rear Differential Carrier)
- Manufacturer Note: W(REAR DIFFERENTIAL LOCK)
- Replaced by: 90311-38047
- Warranty: This genuine part is guaranteed by Toyota's factory warranty.
Fits the following Vehicles:- 1988-1996 Toyota 4Runner | DLX, LULI, SDT, SR5, SR5 Turbo, SR5B, SR5V, STD | 4 Cyl 2.4L, 4 Cyl 2.7L, 6 Cyl 3.0L, 6 Cyl 3.4L | 22R, 22RE, 22REC, 22RTEC, 2L, 2LT, 3RZFE, 3VZE, 5VZFE; LN56L-MRK, LN66L-MDCXK, RN101L-TRLDEA, RN101L-TRLDEAB, RN101L-TRLDEK, RN101L-TRLSEA, RN101L-TRLSEA3, RN101L-TRMDEA, RN101L-TRMDEA3, RN101L-TRMDEAB, RN101L-TRMDEK, RN101L-TRMSEA, RN101L-TRMSEA3, RN101L-TRPDEA, RN101L-TRPDEAB, RN106L-TRLDEA, RN106L-TRLDEK, RN106L-TRMDEA, RN106L-TRMDEA3, RN106L-TRMDEK, RN106L-TRPDEA, RN106L-TRPDEA3, RN106L-TRPDEK, RN110L-CRLDEA, RN110L-CRLDEK, RN110L-CRLSEA, RN110L-CRLSEA3, RN110L-CRMDEA, RN110L-CRMDEA3, RN110L-CRMDEAB, RN110L-CRMDEK, RN110L-CRMSEA, RN110L-CRMSEA3, RN110L-CRPDEA, RN110L-CRPDEA3, RN110L-CRPSEA, RN110L-CRPSEA3, RN120L-GKPSEA, RN121L-RKMSEK, RN121L-RKPSEK, RN130L-GJLSEA, RN130L-GJMSEA, RN130L-GJPSEA, RN130L-GKLSEA, RN130L-GKMSEA, RN130L-GKPSEA, RN131L-RJLSEK, RN131L-RJMSEK, RN131L-RJPSEK, RN131L-RKLSEK, RN131L-RKMSEK, RN131L-RKPSEK, RN50L-KRA, RN50L-KRK, RN50L-LRA, RN50L-MRA, RN50L-SRA, RN50L-SREA, RN50L-TRA, RN55L-KREA3W, RN55L-KRTEA3W, RN55L-LDA, RN55L-LDA3, RN55L-LRA, RN55L-MDA, RN55L-MDA3, RN55L-MGCZA, RN55L-MGCZA3, RN55L-MRA, RN55L-MRHEA, RN55L-MRHEK, RN55L-MRK, RN55L-MSCEA, RN55L-MSCEA3, RN55L-MSCEK, RN55L-MSCZA, RN55L-MSCZA3, RN55L-PSCEA, RN55L-PSCEA3, RN55L-PSCEK, RN55L-SDA, RN55L-SDEA, RN55L-SDEA3, RN55L-SRA, RN55L-SREA, RN55L-SREA3W, RN55L-SREK, RN55L-SRHEA, RN55L-SRHEK, RN55L-SRK, RN55L-SRTEA3W, RN61LG-MDEA, RN61LG-MSEA, RN61LG-PDEA, RN61LG-PGZA, RN61LG-PSEA, RN61L-MBZA, RN61L-MBZA3, RN61L-MDK, RN61L-MRA, RN61L-MRA3, RN61L-MREA, RN61L-MREA3, RN61L-MREK, RN61L-MSEA, RN61L-MSEA3, RN61LV-MDEA, RN61LV-MDEK, RN61LV-MSEA, RN61LV-MSEK, RN61LV-PDEA, RN61LV-PDEK, RN61LV-PSEA, RN61LV-PSEK, RN66L-MDA3, RN66L-MDCA, RN66L-MDCA3, RN66L-MDCEA, RN66L-MDCEA3, RN66L-MDCEK, RN66L-MDEA, RN66L-MDEA3, RN66L-MDEK, RN66L-MDK, RN66L-MGCZA, RN66L-MGCZA3, RN66L-MGCZK, RN66L-MRA, RN66L-MSCEA, RN66L-MSCEA3, RN66L-MSCEK, RN66L-PDCEA, RN66L-PDCEA3, RN66L-PDEA, RN66L-PDEA3, RN66L-PDEK, RN66L-PSCEA3, RN66L-PSCEK, RN70L-LDCA3, RN70L-LRCA, RN70L-LRCA3, RN70L-MDCA, RN70L-MDCA3, RN70L-MRCA, RN70L-MRCA3, RN70L-MRCK, RN70L-SDCA3, RN70L-SDCEA3, RN70L-SRCA, RN70L-SRCEA, RN70L-SRCEA3, RN70L-SRCEK, RN70L-SRCK, RN75L-KRTEA3W, RN75L-PDTEA3W, RN75L-SDTEA3W, RN75L-SDTEK3W, RN80L-TRKREA, RN80L-TRKRSA, RN80L-TRKRSA3, RN80L-TRLDSA, RN80L-TRLDSA3, RN80L-TRMDEA, RN80L-TRMDEA3, RN80L-TRMREA, RN80L-TRMREK, RN80L-TRMRSK, RN80L-TRSDEA, RN80L-TRSDEA3, RN80L-TRTRSA, RN80L-TRTRSA3, RN85L-TRLDSA, RN85L-TRLDSA3, RN85L-TRMDEA, RN85L-TRMDEA3, RN85L-TRMDEK, RN85L-TRMDSK, RN85L-TRMSEA, RN85L-TRMSEA3, RN85L-TRSDEA, RN85L-TRSDEA3, RN85L-TRSDEK, RN85L-TRSSEA, RN85L-TRSSEA3, RN90L-CRLDSA, RN90L-CRLDSA3, RN90L-CRMDEA, RN90L-CRMDEA3, RN90L-CRMDEK, RN90L-CRMDSK, RN90L-CRMSEA, RN90L-CRMSEA3, RN90L-CRSDEA, RN90L-CRSDEA3, RN90L-CRSDEK, RN90L-CRSSEA, RN90L-CRSSEA3, RZN180L-GKMSKA, RZN180L-GKPSKA, RZN185L-GKMSKA, RZN185L-GKPSKA, VZN100L-TRMDEA, VZN100L-TRMDEA3, VZN100L-TRMDEAB, VZN100L-TRMDEK, VZN100L-TRMGEA, VZN100L-TRMGEA3, VZN105L-TRMDEA, VZN105L-TRMDEA3, VZN105L-TRMDEK, VZN105L-TRPDEA, VZN105L-TRPDEA3, VZN110L-CRMDEA, VZN110L-CRMDEA3, VZN110L-CRMDEAB, VZN110L-CRMDEK, VZN110L-CRMGEA, VZN110L-CRMGEA3, VZN110L-CRMGEK, VZN110L-CRPDEA, VZN110L-CRPDEA3, VZN110L-CRPDEAB, VZN110L-CRPDEK, VZN110L-CRPGEA, VZN110L-CRPGEA3, VZN120L-GKPGEA, VZN130L-GJMGEA, VZN130L-GJPGEA, VZN130L-GKMGEA, VZN130L-GKPGEA, VZN131L-RJMGEK, VZN131L-RJPGEK, VZN131L-RKMGEK, VZN131L-RKPGEK, VZN180L-GKPGKA, VZN180L-GKPZKA, VZN185L-GKMGKA, VZN185L-GKPGKA, VZN185L-GKPZKA, VZN61LG-MSEA, VZN61LG-PSEA, VZN61L-MBEA, VZN61L-MBEA3, VZN61L-MSEA, VZN61L-MSEA3, VZN61LV-MDEA, VZN61LV-MSEA, VZN61LV-MSEK, VZN61LV-PDEA, VZN61LV-PSEA, VZN61LV-PSEK, VZN66L-MDCEA3, VZN66L-MDCEK, VZN66L-MDEA3, VZN66L-MDEK, VZN66L-MSCEA, VZN66L-MSCEA3, VZN66L-MSCEK, VZN66L-PDCEA3, VZN66L-PDEA3, VZN66L-PDEK, VZN66L-PSCEA3, VZN66L-PSCEK, VZN85L-THMDEA, VZN85L-THMDEA3, VZN85L-THSDEA, VZN85L-THSDEA3, VZN85L-TRMDEA, VZN85L-TRMDEA3, VZN85L-TRMDEK, VZN85L-TRMREA6, VZN85L-TRSDEA, VZN85L-TRSDEA3, VZN85L-TRSDEK, VZN85L-TRSREA6, VZN85L-TWMREA6, VZN85L-TWSREA6, VZN90L-CRMDEA, VZN90L-CRMDEA3, VZN90L-CRMDEK, VZN90L-CRMGEA, VZN90L-CRMGEA3, VZN90L-CRMGEK, VZN90L-CRPGEA, VZN90L-CRPGEA3, VZN90L-CRSDEA, VZN90L-CRSDEA3, VZN90L-CRSDEK, VZN95L-TWMREA6, VZN95L-TWSREA6, VZN95L-TWSREK6
Toyota 4Runner Slinger, Rear Differential Drive Pinion Oil
Part Number: 41214-35030$7.49 MSRP: $10.46You Save: $2.97 (29%)Ships in 1-3 Business DaysADD TO CARTProduct Specifications- Warranty: This genuine part is guaranteed by Toyota's factory warranty.
Fits the following Vehicles:- 2010-2024 Toyota 4Runner | 4 Cyl 2.7L, 6 Cyl 4.0L | 1GRFE, 2TRFE; GRN280L-GKAGKA, GRN285L-GKAGKA, TRN280L-GKPGKA, TRN285L-GKPGKA
Toyota 4Runner Differential Seal
If you are in demand for superior quality and affordable OEM Toyota 4Runner Differential Seal, then shop with us! We own a wide range of the reduced-priced genuine Toyota 4Runner Differential Seal. You can purchase in confidence as all parts come with a manufacturer's warranty. Any issues with our products? No need to worry as we have a hassle-free return policy to guide you every step of the way.
Toyota 4Runner Differential Seal Parts Questions & Experts Answers
- Q: How to remove and install a Differential Seal on a 2003 through 2009 Toyota 4Runner?A:To remove and install a Differential Seal on a vehicle, first, loosen the rear wheel lug nuts, raise the rear of the vehicle, and support it securely on jack stands. Disconnect the Drive Shaft from the differential and use an inch-pound torque wrench to check the torque required to rotate the pinion. Scribe or punch alignment marks on the pinion shaft, nut, and flange, and count the number of threads visible between the end of the nut and the end of the pinion shaft. Use a special flange-holding tool or immobilize the flange to remove the pinion nut and withdraw the companion flange. Pry out the old seal and discard it. To install the new seal, lubricate the lips with high-temperature grease and tap it evenly into position. Align the mating marks and install the companion flange, applying non-hardening sealant to the ends of the splines visible in the center of the flange. Install the washer and pinion nut, tightening it carefully until the original number of threads is exposed. Measure the torque required to rotate the pinion and tighten the nut in small increments until it matches the figure recorded, staking the nut to the groove in the pinion shaft using a hammer and punch. Finally, connect the driveshaft, install the wheels, and lower the vehicle, tightening the lug nuts to the torque specifications.
Related Toyota 4Runner Parts
 Toyota 4Runner Drain Plug Washer
 Toyota 4Runner Drain Plug
 Toyota 4Runner PCV Hose
 Toyota 4Runner Oil Pump Gasket
 Toyota 4Runner Dipstick
 Toyota 4Runner Drive Shaft
 Toyota 4Runner Differential
 Toyota 4Runner Output Shaft Bearing
 Toyota 4Runner Differential Bearing
 Toyota 4Runner Differential Mount
 Toyota 4Runner Engine Mount
 Toyota 4Runner Fuel Line Clamps
Browse by Year
+2024 Differential Seal 2023 Differential Seal 2022 Differential Seal 2021 Differential Seal 2020 Differential Seal 2019 Differential Seal 2018 Differential Seal 2017 Differential Seal 2016 Differential Seal 2015 Differential Seal 2014 Differential Seal 2013 Differential Seal 2012 Differential Seal 2011 Differential Seal 2010 Differential Seal 2009 Differential Seal 2008 Differential Seal 2007 Differential Seal 2006 Differential Seal 2005 Differential Seal 2004 Differential Seal 2003 Differential Seal 2002 Differential Seal 2001 Differential Seal 2000 Differential Seal 1999 Differential Seal 1998 Differential Seal 1997 Differential Seal 1996 Differential Seal 1995 Differential Seal 1994 Differential Seal 1993 Differential Seal 1992 Differential Seal 1991 Differential Seal 1990 Differential Seal 1989 Differential Seal 1988 Differential Seal 1987 Differential Seal 1986 Differential Seal 1985 Differential Seal 1984 Differential Seal
