
Why choose ToyotaPartsDeal
- High-Grade Parts
The best site to buy Toyota 4Runner genuine parts for years has been ToyotaPartsDeal.com. We're the best online store for genuine parts. Toyota 4Runner parts you could ever need are available here at the finest quality and best value on the web that will have your vehicle performing past its limits.
- Value For Money
What makes us the best choice for OEM Toyota 4Runner parts? You get tremendous savings because our goal is to offer unbeatable prices. At ToyotaPartsDeal.com, Our products offer the same performance and reliability as their OEM counterparts without having to break your wallet.
- Quick Delivery
Everything you need for routine maintenance and repair can be found in our complete Toyota 4Runner parts catalog. Having the best OEM parts inventory available, the parts for your vehicle will arrive fast no matter your location in the nation. You'll be back on the open road before you know it.
Popular Genuine Toyota 4Runner Parts
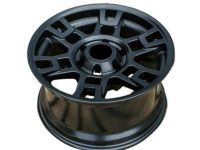
- Power Train/Chassis Parts View More >
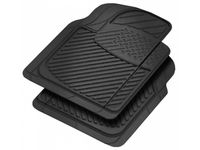
- Body Parts View More >
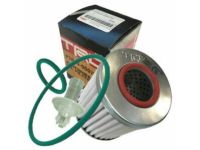
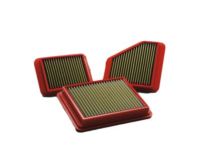
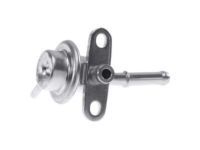
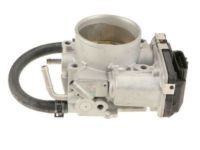
- Engine/Fuel/Tool Parts View More >
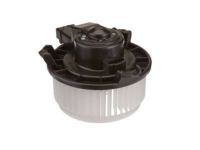
- Electrical Parts View More >
Shop Genuine Toyota 4Runner Parts with ToyotaPartsDeal.com
Toyota 4Runner is a mid-size sport utility vehicle (SUV) manufactured by Toyota since 1984. The first Toyota 4Runner was introduced in 1984 and designed based on Toyota Hilux. It has been produced through five generations. The Toyota 4Runner ranked third in the top 10 longest-lasting vehicles in the US list issued by iSeeCars.com. The fourth generation Toyota 4Runner (N210; 2002-2009) was introduced in October 2002 for the 2003 model year. It was available in several trims including SR5, Sport Edition, and Limited. As a 5-door wagon, it got power from 4.0 L 1GR-FE V6, 2.7 L 2UZ-FE V8, 4.7 L 2UZ-FE with VVT-I, 3.0 L 1KZ-TE inline 4-cylinder turbo diesel and 3.0 L 1KD-FTV inline 4-cylinder engines. All engines were equipped with a 5-speed automatic Aisin A7xx Series. On September 24, 2009, the fifth-generation 4Runner was unveiled at the Texas State Fair. It offered SR5, Limited, Trail Edition (Trail and Trail Premium were renamed to TRD Off-Road and TRD Off-Road Premium), and TRD Pro. Available engines include 2.7 L 157 hp 2TR-FE inline 4-cylinder and 4.0 L 1GR-FE V6 engines. They are equipped with a 4-speed automatic and 5-speed automatic transmission.
Addressing common problems with your Toyota 4Runner can help extend its lifespan. Engine issues, such as misfiring, slow acceleration, poor fuel economy, metallic sounds, overheating, and dirty exhaust smoke, may be indicated by the Check Engine Light. Inspect the spark plug and oil filter to diagnose these problems. Suspension, steering, and transmission issues may manifest as audible clunking noises, excessive front-end vibration, uneven rear tire wear, and shaky or loose steering wheels. Inspect the ball joint, wheel bearing, and tie rod end for suspension and steering problems, while a bad bell housing can lead to transmission failure. Additionally, regularly maintain and replace daily-use parts prone to wear, such as seat belts after accidents, speedometer cables, and brake system components like brake discs, brake proportioning valves, and brake pad sets, to ensure optimal vehicle performance.
Original equipment manufacturer parts excel in quality. Made from the finest materials to guarantee their durability, they are the top choice for maintaining your vehicle's peak performance. Furthermore, they are designed to adhere to official Toyota factory specifications, ensuring effortless installation and a perfect fit. You can find any Toyota 4Runner parts in our extensive inventory of genuine Toyota 4Runner parts, covering everything from alternators to emblems. Furthermore, we provide all these parts at the market's most competitive prices, coupled with a straightforward return policy. Shop with assurance knowing all our OEM parts come with a manufacturer's warranty and are delivered swiftly.
Toyota 4Runner Parts Questions & Answers
- Q: How to replace the fuel pressure regulator on 2003 through 2009 Toyota 4Runner?A: To start, relieve fuel system pressure and disconnect the negative battery cable. For V6 models, remove the engine cover and Air Filter Box. Then, remove the fuel rail and Fuel Injector, followed by fuel pressure regulator mounting bolts to remove the regulator. Replace the old O-ring with a new one. Reverse removal steps for installation, ensuring proper torque for mounting bolts. For V8 models, disconnect the vacuum hose from the regulator and loosen the fuel return hose clamp. Remove bolts securing regulator to fuel rail and replace old O-ring with new one coated in clean engine oil. Follow the reverse order of removal for installation, tightening regulator bolts to the specified torque. Proper torque and careful handling of O-rings are crucial for a successful installation.
- Q: How to remove and install a Blower Motor and Blower Motor Resistor on 2003 through 2009 Toyota 4Runner?A: The blower unit is under the dash, below the glovebox. Remove the trim panel and blower motor connector. Take out the three screws and lower the blower assembly. Remove the clamp and separate the fan from the motor. To install, reverse these steps. The Blower Motor Resistor is on the blower duct under the dash. Remove the trim panel, disconnect the controller connector, and remove screws. Take out the Blower Motor Resistor. To install, reverse the process.
- Q: How to remove a throttle body on 2003 through 2009 Toyota 4Runner?A: To remove the throttle body, first, remove the engine cover on the V6 models or the throttle body cover on the V8 models. Disconnect the negative battery cable and remove the Air Filter Box on the V6 models or the air intake duct on the V8 models. Disconnect the electrical connector from the throttle body and clamp off the coolant hoses. Loosen the hose clamps and disconnect both coolant hoses from the throttle body. Remove the throttle body mounting fasteners and the old throttle body O-ring type gasket. Inspect the gasket and replace it if necessary. To install, reverse the removal steps and tighten the mounting fasteners to the torque specifications. Check the coolant level and add as necessary.
- Q: How to Disassemble a CV Boot on a 2003-2009 Toyota 4Runner?A: To disassemble a CV boot, first, remove it and mount it in a vise with wood-lined jaws. Check the CV joint for excessive play and smooth operation. If the boot is torn, disassemble the joint, clean the components, and inspect for damage. Pry up the retaining tabs of the clamps and slide them off, then pry up on the edge of the outer boot and push it away from the CV joint. Remove both boots if necessary and mark the tripod and axle shaft for reassembly. Thoroughly clean all components and inspect for wear. To reassemble, slide the clamps and CV boot(s) onto the axle shaft, place the tripod on the shaft, apply grease, and insert the tripod into the housing. Slide the boot into place, equalize the pressure, and tighten and secure the boot clamps. Finally, install the CV boot assembly.


