
Why choose ToyotaPartsDeal
- High-Grade Parts
The best site to buy Toyota Prius genuine parts for years has been ToyotaPartsDeal.com. We're the best online store for genuine parts. Toyota Prius parts you could ever need are available here at the finest quality and best value on the web that will have your vehicle performing past its limits.
- Value For Money
What makes us the best choice for OEM Toyota Prius parts? You get tremendous savings because our goal is to offer unbeatable prices. At ToyotaPartsDeal.com, Our products offer the same performance and reliability as their OEM counterparts without having to break your wallet.
- Quick Delivery
Everything you need for routine maintenance and repair can be found in our complete Toyota Prius parts catalog. Having the best OEM parts inventory available, the parts for your vehicle will arrive fast no matter your location in the nation. You'll be back on the open road before you know it.
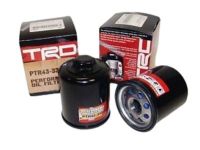
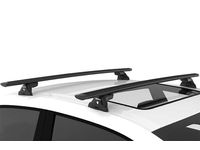
Popular Genuine Toyota Prius Parts
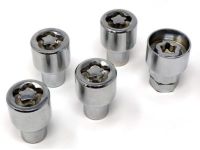
- Power Train/Chassis Parts View More >
- Body Parts View More >
- Engine/Fuel/Tool Parts View More >
- Electrical Parts View More >


Shop Genuine Toyota Prius Parts with ToyotaPartsDeal.com
Toyota Prius was launched in Japan in 1997 and is available at all Toyota dealerships in the country, making it the first mass-produced hybrid vehicle. The second generation of the plug-in variant was released in the U.S. in November 2016. The first Prius, model NHW10, went on sale on December 10, 1997. The first-generation Toyota Prius was available only in Japan, though it has been imported privately to at least the United States. Production of the NHW11 began in May 2000 at the Motomachi plant and continued until the termination of XW10 production in June 2003, when 33,411 NHW11s were produced. The Prius is the second hybrid vehicle in the U.S. market after the two-seater Honda Insight. There are three versions of the Prius: Standard, Base, and Touring. The second-generation Prius is more environmentally friendly than the previous model. Kammback's more aerodynamic design strikes a balance between length and wind resistance. Toyota introduced the new Prius at the North American International Auto Show in January 2009, and sales in Japan began on May 18, 2009. The new Prius comes standard with three user-selectable driving modes. E.V. mode is for low-speed electric driving. Eco mode offers the best fuel economy, and Power mode offers the best performance. Options include solar panels on the roof to cool the cabin in the summer heat, Intelligent Parking Assist, Lane Departure Warning System, and Dynamic Radar Pilot. The fourth-generation Prius was first revealed in Las Vegas in September 2015 and went on sale in Japan on December 9, 2015. It will debut in North America in January 2016 and in Europe in February. The next-generation plug-in hybrid model will be developed alongside the standard Prius.
Even though Toyota Prius belongs to the strong Prius family, it still does not withstand the wearing process. Problems come for it after it has reached a certain mileage: First, excessive oil consumption that is closely related to the engine. Specific symptoms include poor gas mileage, decreased power, acceleration, rough idle, and a no-start condition. If the Check Engine Light on your Prius comes on, thoroughly inspect the oil filter, air filter, spark plug, and EGR valve gasket. Second, premature braking and suspension system failure. Normally, the brake pad set in the braking system of Toyota Prius is vulnerable. Signs include noisy brakes, vibrating brake pedals as well as poorly responded brakes. As for the suspension system, if you hear excessive grinding noises or find your Prius bottoms out, you can try checking the strut housing and coil spring insulator. A seat belt is both important and fragile in a vehicle, you should remember to replace it every time after an accident. Headlights, fog light bulbs, and headlight bulbs are responsible for lighting the road ahead and warning other drivers and pedestrians, especially at night and in adverse weather conditions. The cabin air filter plays an important part in venting fresh air into the compartment.
When it comes to quality, there's no better choice than OEM parts. Manufactured by Toyota, they undergo the strict testing procedures and are made from top-quality materials to guarantee excellent dependability and long-lasting durability. If you're on the hunt for OEM Toyota Prius parts, we strongly encourage you to explore our wide selection of Toyota Prius parts, all available at the most competitive prices. We guarantee that all our genuine Prius parts are accompanied by a manufacturer's warranty and an effortless return policy. We surpass numerous competitors when it comes to price, quality, and reliability.
Toyota Prius Parts Questions & Answers
- Q: How to remove and install the water pump on a Toyota Prius?A:The removal of the water pump involves several steps. For 2009 and earlier models, start by disconnecting the cable from the negative terminal of the auxiliary battery and draining the cooling system. Next, remove the engine drive belt and support the engine with a Jack stand. After that, remove the right-side engine mount and bracket, then use a screwdriver while removing the pulley bolts. Remove the fasteners and carefully take out the water pump, remembering its original bolt position. Installation begins with cleaning the sealing surfaces and the replacement of the gasket with a new one. Install the fasteners in their original positions, ensuring proper torque specifications. Reassemble the remaining parts in the reverse order of removal, refill the cooling system, run the engine, and check for any leaks or issues. For 2010 and later models, detach the coolant hose from the inlet air filter and disconnect the wiring harness. Remove the bolts and the inlet air filter assembly, then drain the engine coolant. Disconnect the wiring from the water pump and remove the mounting bolts. Pull out the water pump from the timing chain cover, discarding the gasket O-ring. During installation, follow the reverse order of removal. Replace the gasket O-ring with a new one and tighten the bolts.
- Q: How to remove the Blower Motor on a Toyota Prius?A:To remove the blower unit from 2001 through 2003 models, start by checking the fuse and connections for looseness and corrosion. Then, remove the glove compartment door and cut out the reinforcement bar. Slide out the PCM and remove the blower assembly, cabin air filter, and blower motor controller. Disconnect the wiring from the motor and remove the motor mounting screws to lift off the motor. For 2004 through 2009 models, remove the lower instrument panel and interfering computers, disconnect and label the 10 connectors, and remove the blower unit and air inlet servo. Detach the wiring harness from the blower motor and remove the motor with the fan attached. For 2010 and later models, release the claws and detach the lower cover, disconnect the wiring from the blower, and remove the blower unit with the mounting screws. Installation is the reverse of removal, but be sure to recheck all connections before reinstalling the instrument panel.
- Q: How to replace the A/C Accumulator in a Toyota Prius air conditioning system?A:To replace the A/C accumulator and condenser in an air conditioning system, follow these steps. Firstly, have the refrigerant discharged and recovered by an air conditioning technician. The A/C Condenser, located adjacent to the radiator, needs to be removed from the vehicle. Use an Allen wrench to remove the large plug from the A/C accumulator and then use needle-nose pliers to extract the filter-drier element inside the A/C accumulator. When reinstalling, ensure the new filter-drier element is properly in place and lubricate the plug's O-ring with refrigerant oil. Once the replacement is complete, have the system evacuated, charged, and leak tested by the same shop that discharged the refrigerant. If the A/C accumulator or condenser was replaced, make sure to add new refrigeration oil to the system. It is essential to use refrigerant oil that is compatible with the refrigerant being used.


