
Why choose ToyotaPartsDeal
- Optimal Shopping Experience
Want to buy parts for your Toyota Tundra? Look no further than ToyotaPartsDeal.com, the best place for Toyota Tundra genuine parts. For years, all of our Toyota Tundra auto parts and accessories have been expedited directly from dedicated dealers and backed by the manufacturer's warranty, so buying from ToyotaPartsDeal.com is always risk-free.
- Dedicated Customer Service
Our first-class customer service team is committed to providing you with the best assistance possible. Dedicated representatives are standing by to assist you by email, live chat, or phone. Every effort is made to ensure your order for OEM Toyota Tundra parts arrives fast no matter your location in the nation, so your vehicle is up and running and back on the road.
- Unbeatable Prices
What makes us the best online source for Toyota Tundra parts and Toyota Tundra truck parts? Our goal is to offer the lowest prices. You get giant savings shopping with ToyotaPartsDeal.com. With a complete Toyota Tundra parts catalog, we cover a full selection of affordable OEM Toyota Tundra parts and pickup parts with a huge inventory.
Popular Genuine Toyota Tundra Parts
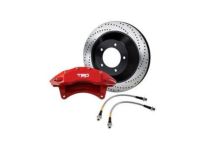
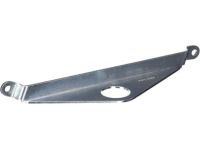
- Power Train/Chassis Parts View More >
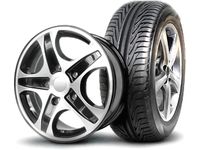
- Body Parts View More >
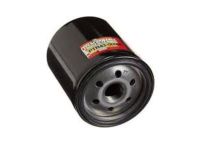
- Engine/Fuel/Tool Parts View More >
- Electrical Parts View More >


Shop Genuine Toyota Tundra Parts with ToyotaPartsDeal.com
Toyota Tundra is a pickup truck manufactured by Toyota since May 1999. The first Toyota Tundra was introduced in 1999 as a 2000 model to replace Toyota T100. As the first North American full-size pickup, it inherits Japanese characteristics and receives popularity in the world. It was nominated for the North American Truck of the Year award and was Motor Trend magazine's Truck of the Year for 2000 and 2008 and other awards. The Tundra has been through two generations. The first generation Toyota Tundra (2000-2006) was unveiled in May 1999 as a 2000 model. As a 2-door Regular cab, 4-door Access cab, and 4-door Double cab pickup, Toyota Tundra had engine options including 3.4 L 190 hp, 4.0 L 236 hp V6, 4.7 L 245 hp, 282 hp, and 271 hp V8 engines. Available transmissions were 5-speed and 6-speed manual transmissions as well as 4-speed and 5-speed automatic transmissions. At the February 2006 Chicago Auto Show, the second generation Toyota Tundra (2007-present) was introduced. It is now available in SR, SR5, Limited, Platinum, and Tundra TRD powered by 4.0 L 4.7 l V6 VVT-I engines and 4.7 L, 4.6 L VVT-I engines and 5.7 L V8 Dual VVT-I engine. Transmissions were all 5-speed and 6-speed automatic.
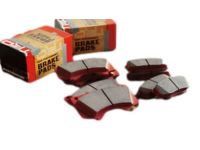
As a pickup truck designed for heavy loads and long distances, the Toyota Tundra is prone to certain common issues. One such problem is poor braking system performance, with drivers reporting noisy sounds, brake pedal vibrations, slow brake response, and visible score marks on brake rotors. To address this, it's advisable to inspect the brake pad set and brake disc. Another issue is reduced engine performance after reaching a specific mileage, characterized by slow acceleration, poor fuel economy, difficulty starting, metallic sounds, dropping oil pressure, dirty exhaust, overheating, and an illuminated Check Engine Light. Inspecting the spark plug and oil filter can help resolve these problems. Additionally, it's important to maintain other auto parts like seat belts, wheel seals, wiper blades, and cabin air filters, which play crucial roles in safety, smooth wheel operation, clear driver visibility, and providing fresh air while driving, respectively.
You have nothing to worry about if you choose OEM parts as they are the best you can get in terms of quality and longevity. This is because they are precisely-engineered with the meticulous specifications of the official factory. They have passed strict quality control tests during manufacturing, so you know they're durable and sure to fit. We are your prime source for the lowest-priced and high-quality OEM Toyota Tundra parts. We provide you with parts that will allow you to save a lot of money without sacrificing quality. All our OEM parts are backed by the manufacturer's warranty and shipped out at a swift rate.
Toyota Tundra Parts Questions & Answers
- Q: How to replace the water pump in a Toyota Tundra?A:To replace the water pump in a vehicle, disconnect the battery cable, drain the cooling system, remove the engine cover, and splash shield, and take off the drive belt. Next, you can disconnect the upper and lower radiator hoses, and remove the fan shroud and Cooling Fan Assembly. Next, remove the idler pulleys, alternator, and drive belt tensioner. Remove the water pump mounting bolts and clean the gasket surfaces. Install a new gasket, water pump, and O-ring. For certain models, remove the timing belt and idler pulley. Disconnect the bypass hose and remove the water inlet assembly. Replace the O-ring and clean the gasket surface. For specific models, disconnect the harness, and remove the A/C Compressor, oil cooler hoses, and cooler tubes. Remove the water pump pulley bolts and replace the O-ring. Install a new gasket, water pump, and water inlet O-ring. Reverse the removal steps, refill the cooling system, run the engine, and check for leaks.
- Q: How to remove and replace a A/C Accumulator in an air conditioning system for Toyota Tundra?A:Firstly, ensure the refrigerant is discharged by an air conditioning technician. Then, disconnect the cable from the negative battery terminal. Proceed to remove the condenser and using an Allen wrench, detach the end plug and remove the A/C Accumulator from the A/C Condenser. To secure the end plug, ensure it's tightened properly. Finally, have the system evacuated, charged, and leak tested by the same shop that discharged it. If the receiver was replaced, request them to add the proper amount of refrigeration oil to the compressor. Only use A/C Compressor oil that is compatible with R-134a refrigerant.
- Q: How to relieve fuel system pressure and replace the fuel pressure regulator on Toyota Tundra?A:To relieve fuel system pressure, disconnect the negative battery cable. For 2UZ-FE engines, disconnect the vacuum hose and loosen the fuel return hose clamp. Remove the bolts securing the fuel pressure regulator and replace the O-ring before reinstalling. For other engines, remove the engine cover and Air Filter Box. Disconnect the fuel return hose and vacuum hose from the regulator. Remove the mounting bolts and discard the old O-ring. Installation is the reverse of removal.
- Q: How to remove and install front mounted blower motors on Toyota Tundra?A:The rear AIC unit, which houses the heater core and evaporator, is mounted behind the rear quarter trim panel. The blower motor and fan cannot be separated and must be replaced as a unit if either is faulty. The blower unit is in the cooling assembly under the dash. Remove the front-mounted blower motor by unplugging the connector and removing the screws and pulling it out. Installation is the reverse of removal.
- Q: How to replace a thermostat in a Toyota Tundra?A:Before any repairs, it is important to check the coolant level and drive belt tension, and make sure the temperature gauge or warning light circuit is functioning correctly. If the engine has overheated, there may be issues with cylinder head gaskets, pistons, or cylinder heads. To replace the thermostat, disconnect the negative battery cable, remove the engine splash shield, and drain the cooling system. Remove the engine cover and, if applicable, the throttle body cover and air cleaner housing. Disconnect and remove air pump hoses if necessary. Remove the radiator hose, housing mounting nuts, and the housing and thermostat assembly. Clean the sealing surfaces, install a new gasket, and reassemble the components in reverse order. Refill the cooling system, check for leaks, and ensure proper operation.


