
Why choose ToyotaPartsDeal
- High-Grade Parts
The best site to buy Toyota MR2 genuine parts for years has been ToyotaPartsDeal.com. We're the best online store for genuine parts. Toyota MR2 parts you could ever need are available here at the finest quality and best value on the web that will have your vehicle performing past its limits.
- Value For Money
What makes us the best choice for OEM Toyota MR2 parts? You get tremendous savings because our goal is to offer unbeatable prices. At ToyotaPartsDeal.com, Our products offer the same performance and reliability as their OEM counterparts without having to break your wallet.
- Quick Delivery
Everything you need for routine maintenance and repair can be found in our complete Toyota MR2 parts catalog. Having the best OEM parts inventory available, the parts for your vehicle will arrive fast no matter your location in the nation. You'll be back on the open road before you know it.
Popular Genuine Toyota MR2 Parts
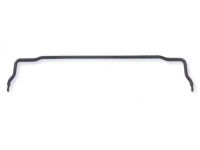
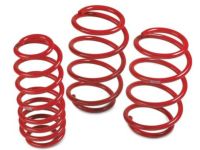
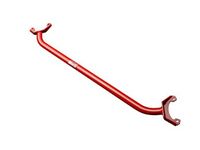
- Power Train/Chassis Parts View More >
- Body Parts View More >
- Engine/Fuel/Tool Parts View More >
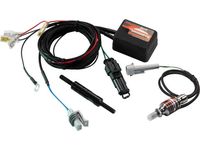
- Electrical Parts View More >


Shop Genuine Toyota MR2 Parts with ToyotaPartsDeal.com
Toyota MR2 is a two-seat, mid-engine, rear-wheel drive sports car manufactured by Toyota from 1984 to 2007. The first Toyota MR2 was introduced under the model code "W10". It has been a very popular and successful car globally. It had been on Road & Track and Car and Driver magazines' Top 10 Best Cars, Car and Driver magazine's Ten Best lists for 1986 and 1987, on Sports Car International's list of Top Sports Cars of the 1980s, earned Wheels magazine's favorite sports car and Motor Trend's Import Car of the Year for 1985. It had been produced through three generations. The second generation Toyota MR2 (W20; 1989-1999) was a redesigned version and it did not go on sale until late 1990 as 1991 models for the North American market. There were only two trim levels available in the US: MR2 powered by a 2.2 L 130 hp 5S-FE inline 4-cylinder engine equipped with a 4-speed automatic transmission and a 5-speed manual transmission as well as MR2 Turbo powered by 2.0 L 3S-GTE turbo inline 4-cylinder engine equipped with only a 5-speed manual transmission. The third generation Toyota MR2 (W30; 1999-2007) was called as Toyota MR2 Spyder in the US.
The Toyota MR2, a sports car known for its high performance and quality, may still experience common issues due to natural wear and tear. Problems include engine rattling and excessive oil consumption, which may be attributed to a broken camshaft seal, bad oil filter, or worn spark plug. Transmission, suspension, and braking issues also occur. Transmission failure can lead to gear engagement issues or wrong gear selection, often caused by a damaged synchronizer ring, shift cable, or transfer case output shaft snap ring. Suspension failure symptoms include bottoming out, excessive road noise, or grinding noises while turning, possibly due to failing shock and strut mounts or coil spring insulators. Braking failure is often linked to a bad parking brake cable. To fully enjoy the modern Toyota MR2, maintain all auto parts in good condition. The antenna provides real-time information, while a functioning water pump and gasket prevent overheating. Additionally, a well-maintained headlight ensures optimal driving vision.
Original equipment manufacturer parts provide exceptional performance and boast first-rate durability. This is attributed to their adherence to Toyota's official manufacturing methods, utilization of high-quality materials, and compliance with stringent quality standards. Are you in search of superior quality and reasonably priced OEM Toyota MR2 parts? You've landed at the perfect online store. We provide all parts at the most competitive prices in the market, even outdoing inexpensive aftermarket auto parts. Furthermore, we guarantee that you'll receive genuine Toyota MR2 parts covered by the manufacturer's warranty, delivered at the fastest possible speed. Our professional customer service team is always on hand to assist with any issues during your shopping experience. Enjoy your shopping journey with us!
Toyota MR2 Parts Questions & Answers
- Q: How to replace the Wheel Seal in a Toyota MR2?A:To replace the Wheel Seal in a vehicle, remove the Axle Shaft. Use a hammer and drift to knock the side gear shaft loose from the differential. Pry out the old seal from the shaft bore with a screwdriver, being careful not to damage the bore. Drive the new seal into place with a hammer and socket. Coat the seal lip with grease. Tap the shaft into the transaxle with a brass hammer, aligning the splines. Reinstall the drive axle.
- Q: How to remove and install the rear bumper and bumper cover on Toyota MR2?A:Start by using two of the four bolts on the lower area of the support. After that, remove two upper support nuts which are installed in the rear luggage compartment, and then remove the bumper. To remove this plastic bumper, unscrew the upper row of nuts and the lower row of bolts. To install, it is done in the sequence that is the opposite of the removal process, or step by step starting with the last step.
- Q: How to replace a water pump in a Toyota MR2?A:Drain coolant.Remove A/C compressor drivebelt if applicable.Loosen water pump pulley bolts.Loosen alternator bolt and nut, remove drivebelt.Remove water pump pulley.Detach water inlet pipe flange from water pump.Pull inlet pipe away from pump.Remove dipstick tube, plug hole.Remove timing belt covers.Remove water pump bolts and pump. 1Discard old O-ring.Install new O-ring on block.Reverse steps for installation.
- Q: How important is it to aim headlights correctly on Toyota MR2?A:The aim of headlights is very vital so that drivers travelling in the opposite direction do not cause an accident because of the light shining on their eyes, as well as to enable that enough light is emitted on the road for ease of friving. The checks for proper aim should be carried out every one year or at any time the sealed beam headlight is replaced or at any time front-end body work is being done. The adjustment process involves two spring-loaded screws: , he will have one wheel on top of the object for the up and down movement and another one at the side for the sideways movement. In order to level the headlights, one requires a wall of the same colour as the car preferably white and an absolute flat surface about 25 feet away from the car. For successful manufacturing of a car, vertical masking tape should be put on the wall then the vehicle's centerline and the centerlines of the two headlights then a horizontal masking tape line should also be applied. It is recommended the vehicle is on flat ground with middle gas indicator and no heavy logistic load inside the car. For low beam adjustment the high-intensity zone should be two inches below the horizontal line and two inches to the right of the head light vertical line.One should use one of the nuts on top of the lens to raise or lower the beam while the other nut on the side of the lens should be used to move the beam right or left. When the high beams are on, the high-intensity portion of the beam should be aimed slightly below the horizontal line; nevertheless, low beams are used more often and are more important to safety. Any driver is advised to take their vehicle to a dealer service department to have the headlights adjusted as soon as possible.


