
Why choose ToyotaPartsDeal
- High-Grade Parts
The best site to buy Toyota Corolla genuine parts for years has been ToyotaPartsDeal.com. We're the best online store for genuine parts. Toyota Corolla parts you could ever need are available here at the finest quality and best value on the web that will have your vehicle performing past its limits.
- Value For Money
What makes us the best choice for OEM Toyota Corolla parts? You get tremendous savings because our goal is to offer unbeatable prices. At ToyotaPartsDeal.com, Our products offer the same performance and reliability as their OEM counterparts without having to break your wallet.
- Quick Delivery
Everything you need for routine maintenance and repair can be found in our complete Toyota Corolla parts catalog. Having the best OEM parts inventory available, the parts for your vehicle will arrive fast no matter your location in the nation. You'll be back on the open road before you know it.
Popular Genuine Toyota Corolla Parts
- Power Train/Chassis Parts View More >
- Body Parts View More >
- Engine/Fuel/Tool Parts View More >
- Electrical Parts View More >


Shop Genuine Toyota Corolla Parts with ToyotaPartsDeal.com
The Corolla was the world's best-selling car until 1974 and has remained one of the best-selling cars ever since. Early models tended to be rear-wheel drive, while later models were front-wheel drive. There were also AWD versions. The Toyota Corolla and Sprinter designations are now used to distinguish slightly different bodywork and trim styles. The Corolla's air intake grille, headlights, and taillights were simplified. Changes included the addition of new A-series engines to the model range. The last model used the K-series "Hickam" and T-series engines. Fuel injection was introduced as an option for vehicles sold in the Japanese market. In June 1991, the Toyota Corolla was redesigned to be larger and heavier while retaining the fully rounded aerodynamic shape of the 1990s. In the United States, the slightly larger Corolla now belongs in the compact category rather than the small car category. A coupe version, known as the AE101 Levin, was still available. Carburetors were discontinued mainly in this generation. The 1ZZ-FE engine has an aluminum block and aluminum cylinder heads. Models with this engine were lighter than models with the A engine. It had an iron block and aluminum heads. The model range began to change because Toyota believed that design differences would improve sales in different markets.
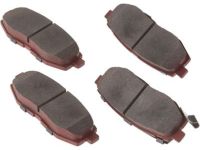
To prolong the life expectancy of your Toyota Corolla, it's crucial to keep all auto parts in prime condition and address issues promptly. Common problems include reduced engine performance, characterized by poor fuel economy, difficulty starting the vehicle, slow acceleration, and Check Engine Light activation. Inspect the spark plug, oil filter, and air filter to address these issues. Another concern is a brake system failure and poor suspension operation. Noisy brakes, pulsating and vibrating brake pedals, and poor brake response may result from a worn brake pad set and brake disc. Additionally, if you notice the vehicle bottoming out, grinding noises while turning, and excessive wear on front tires and brakes, check the coil spring insulator and the strut housing. Regular maintenance of often neglected parts like seat belts, door handles, headlights, and fog light bulbs is essential for optimal vehicle performance.
Every OEM part is meticulously built to precisely match the original part's specs. They also adhere to strict official quality control standards during manufacture to guarantee exceptional quality. If you need any OEM Toyota Corolla parts, feel free to choose them out of our huge selection of genuine Corolla parts. All our parts are offered at the lowest prices and are supported by the manufacturer's warranty. In addition, we offer quick shipping to have your parts delivered to your door step in a matter of days.
Toyota Corolla Parts Questions & Answers
- Q: How should headlights be aimed correctly to ensure safety on Toyota Corolla?A:Headlamps must be set to the correct position to cause inconvenience to other people on the road or to ensure that good light is thrown on the road ahead. One should make sure of this aim yearly or when a new headlight is fitted or when the front end body work is attended to. The adjusting screws are of the vertical type only and are hidden beneath each light housing; there are no horizontal adjusting screws. A basic form of adjustment requires a wall which is painted white and preferably is blank, a piece of masking tape, and a level floor. To begin with, put a vertical masking tape on the wall along with the vehicle centerline and the centerline of both headlights; novice it with a horizontal tape line with reference to the centerline of all headlights, preferably with the vehicle at a few inches. The position and state in which the vehicle has to be parked are 25 ft away from the wall, on level ground, 1/2 tank of gas and no heavy load in the car. To control the low beam adjustment a there should be a high intensity zone should be set two inches below the horizontal line the screw should be turned clockwise to raise the beam while turning it anticlockwise to lower it. The HIT area should be just below the guidelines of high beam illumination with indicating a low beam is five times more common and vital in night driving. Ideally, adjustments of the headlights should be done by a dealer service department or a service station as soon as possible.
- Q: Should Coil Springs/Shock Absorber Assemblies Only Be Replaced in Pairs on Toyota Corolla?A:Shock absorber and coil spring assemblies should only be replaced in pairs. To remove the assembly, start by opening the trunk and taking out the spare tire. Next, take off the left and right inner trim panels along with the floor trim panel in front of the spare tire well. Raise the rear of the vehicle and securely support it on jackstands, using a floor jack to support the axle beam near the shock absorber being removed. Inside the trunk, remove the two nuts at the upper mount, noting that the shock absorber is still secured by one bolt accessible from below. From underneath, take out the bolt that secures the upper part of the shock absorber to the body, then remove the lower mounting nut and washer to detach the rear shock absorber from the axle beam. Finally, take out the shock absorber assembly, which may require lowering the floor jack to disengage the upper mount. For installation, maneuver the assembly into the fenderwell, install the lower mount onto the stud, and guide the upper mounting studs into the body holes. Install the bolt from below and tighten it to the specified torque, then place the lower washer and nut, raising the axle beam to simulate normal ride height before tightening the nut. Finish by installing the two upper mounting nuts and tightening them to the specified torque, followed by reinstalling the spare tire and trim panels in the trunk.
- Q: How should the starter motor and solenoid assembly be handled in the event of failure on Toyota Corolla?A:The starter motor and solenoid assembly cannot be repaired using separate components; if failure occurs, exchange the entire starter/solenoid assembly for a new or rebuilt unit. Begin by detaching the cable from the negative terminal of the battery. Next, raise the vehicle and support it securely on jackstands. Remove the splash shield from under the engine, then disconnect the electrical connector from the starter solenoid and remove the nut to disconnect the battery cable from the solenoid. After that, remove the starter motor mounting bolts and take the starter out of the vehicle. Installation is the reverse of removal.
- Q: How to adjust and replace the shift cable on Toyota Corolla?A:When the shift lever inside the vehicle is changed from the Neutral position to another position, it changes to a new position seamlessly, and exactly to the required position, with the shift indicating the correct position. If the alignment of the indicator is off, the position of the shift cable can be adjusted by first loosening the swivel nut located on the manual shift lever at the transaxle before moving the manual lever down to the Park position and back up two notches to the Neutral position, this action should be accompanied by making sure that the shift lever found inside the vehicle is also in the Neutrual position before completing the process of fastening the After such correction, it is necessary to ensure that the functioning of the transaxle is checked in each position of the shift lever, to work in the Park and Neutral only the starter. For replacement, the negative battery cable should be disconnected, then the cable which is coming out of the tie bar shield, the large C-clip cable retainer on the bracket which is above the manual lever. Subsequently, and to gain access to the Boarding Data Sheet, it was necessary to remove the floor console, together, with portions of carpeting ahead of the floor tunnel as well. The nut screws fastening the airbag ECU to the floor should be loosened and aside because shift cable is below the ECU. The bolts which are attached on the cable housing retainer on the floor inside the vehicle need to be unfixed, likewise, the cable should be detached by prying the ends off from the shift housing and eye must be unbolted from the shifter. The cable and grommet has then to be pulled through the floor pan again and while installing it again should be noted that the same should be done in the reverse order followed during removal of the floor pan while after adjustment of the cable should also be made.


